Bulk Upload(Export) SharePoint Site wizard is designed to help a user to export a single SharePoint site (entire site or some of its elements) to many sites on a specified target PWA.
Please note: SharePoint Sites with the site items you would like to populate to multiple sites on your PWA should already be present in FluentBooks Workspace.
To download SharePoint Sites to the workspace, please refer to the article Download SharePoint Sites and follow the steps there.
Also, please refer to How to perform a bulk update of SharePoint Sites article to find the step-by-step instructions on how to perform the bulk update of SharePoint Sites using FluentBooks.
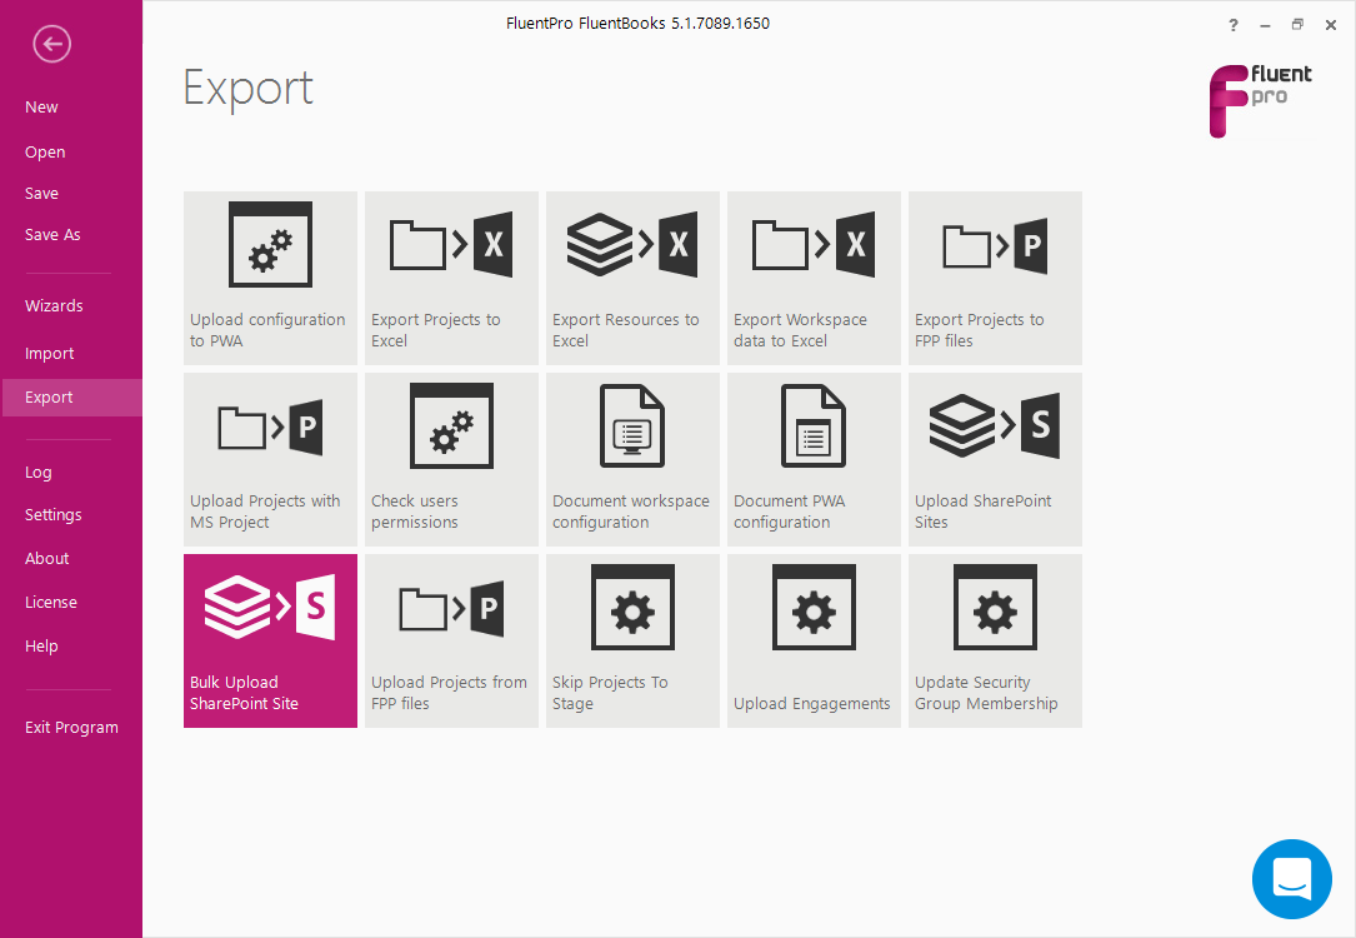
To start the wizard click File → Export → Bulk Upload SharePoint Site.
Step 1
Specify the Root Site URL of the PWA where you would like to upload the selected site items. Provide login credentials and click Next to load the sites list.
User account that is used by FluentBooks when migrating SharePoint content should have Site Collection Administrator rights.
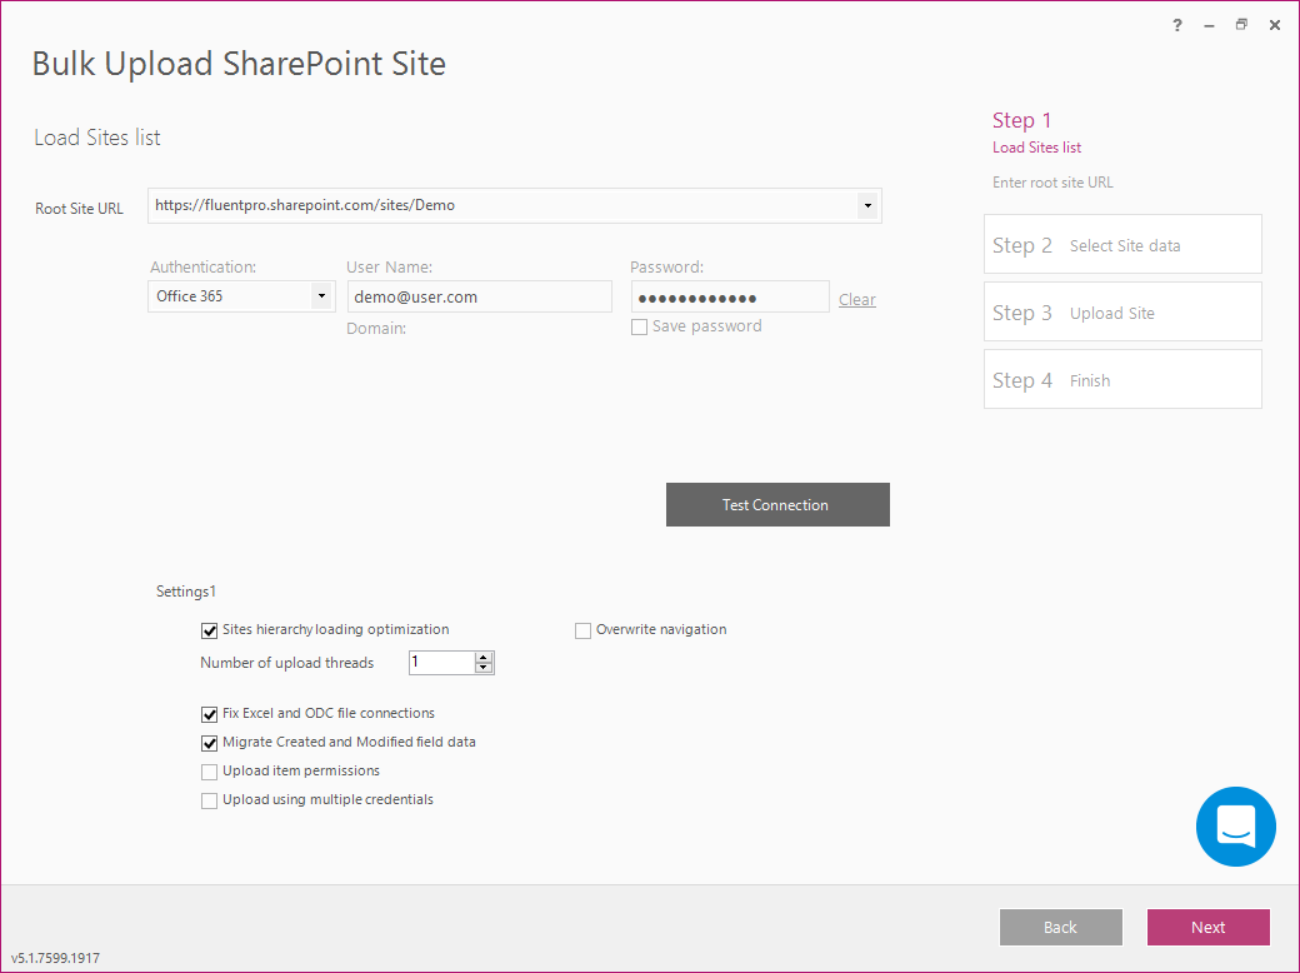
Site hierarchy loading optimization - check this checkbox to optimize the loading of site hierarchy, this setting allows you to create multiple download threads to speed up the process;
Fix Excel and ODC file connections - check this checkbox to process Excel Reports and ODC files during import and to update Data Source URLs from the source PWA URL to the target PWA URL;
Migrate created and Modified field data - check this checkbox to migrate the values of the “Created” and “Modified” fields.
Upload item permissions - check this checkbox to upload the permission of the selected items.
Overwrite navigation - if the checkbox is checked then the SharePoint site navigation will be deleted from the target before upload and the navigation from the source (workspace) will be uploaded to the target site. If the checkbox is not checked, FluentBooks will be updating the existing navigation on the target according to the source site (workspace), if the same links/files/names are found on the target site. We recommend checking this checkbox for the navigation to be uploaded correctly.
Step 2
Select site items that need to be populated to multiple sites on the provided PWA.
If some of the selected elements exist on the target sites already, FluentBooks will export only the missing elements and will update the existing ones with the new information. Nothing will be deleted.
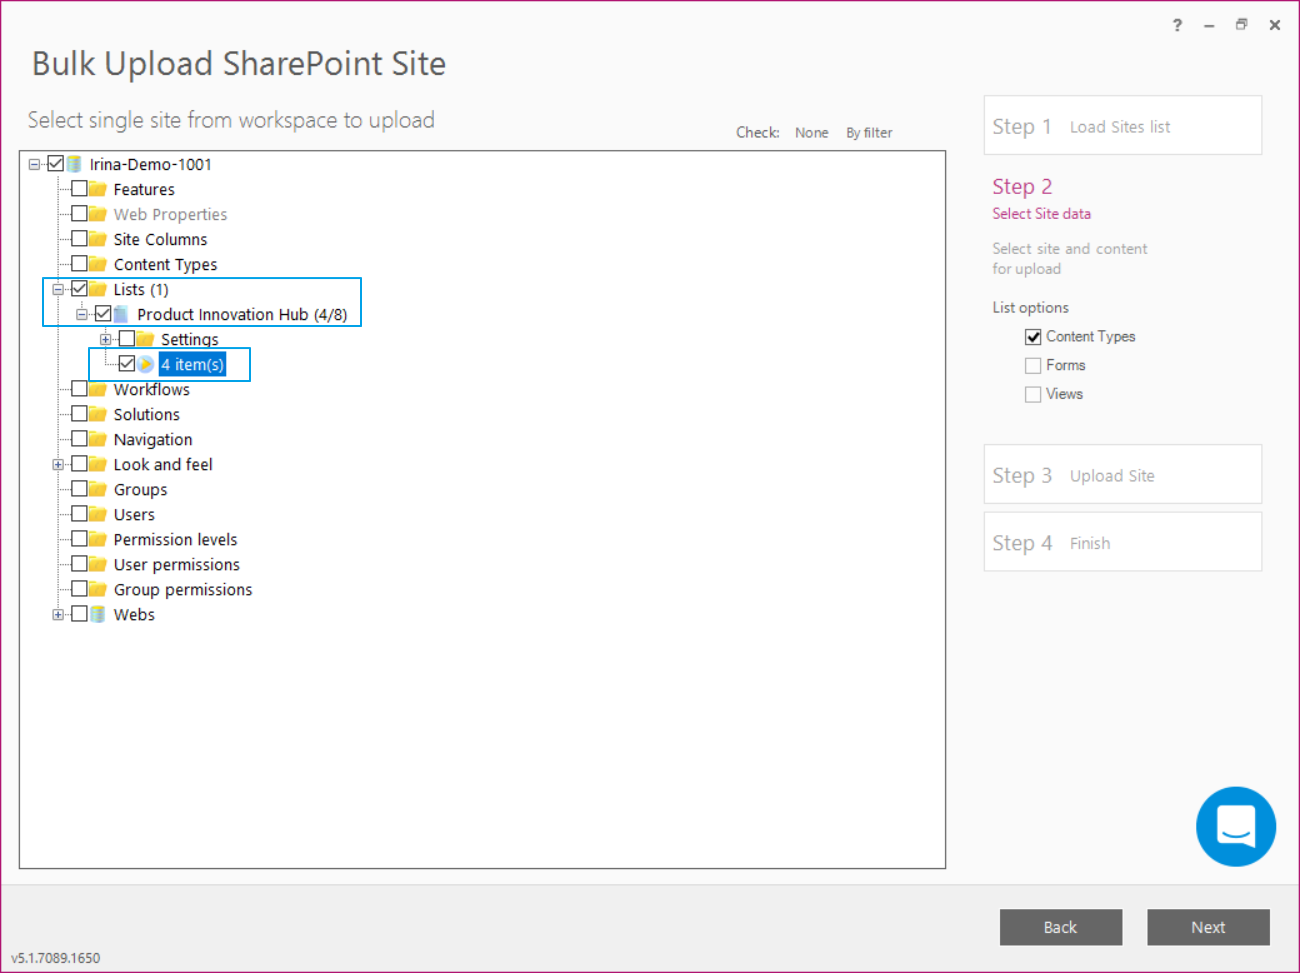
Select only the items you need to populate to other sites.
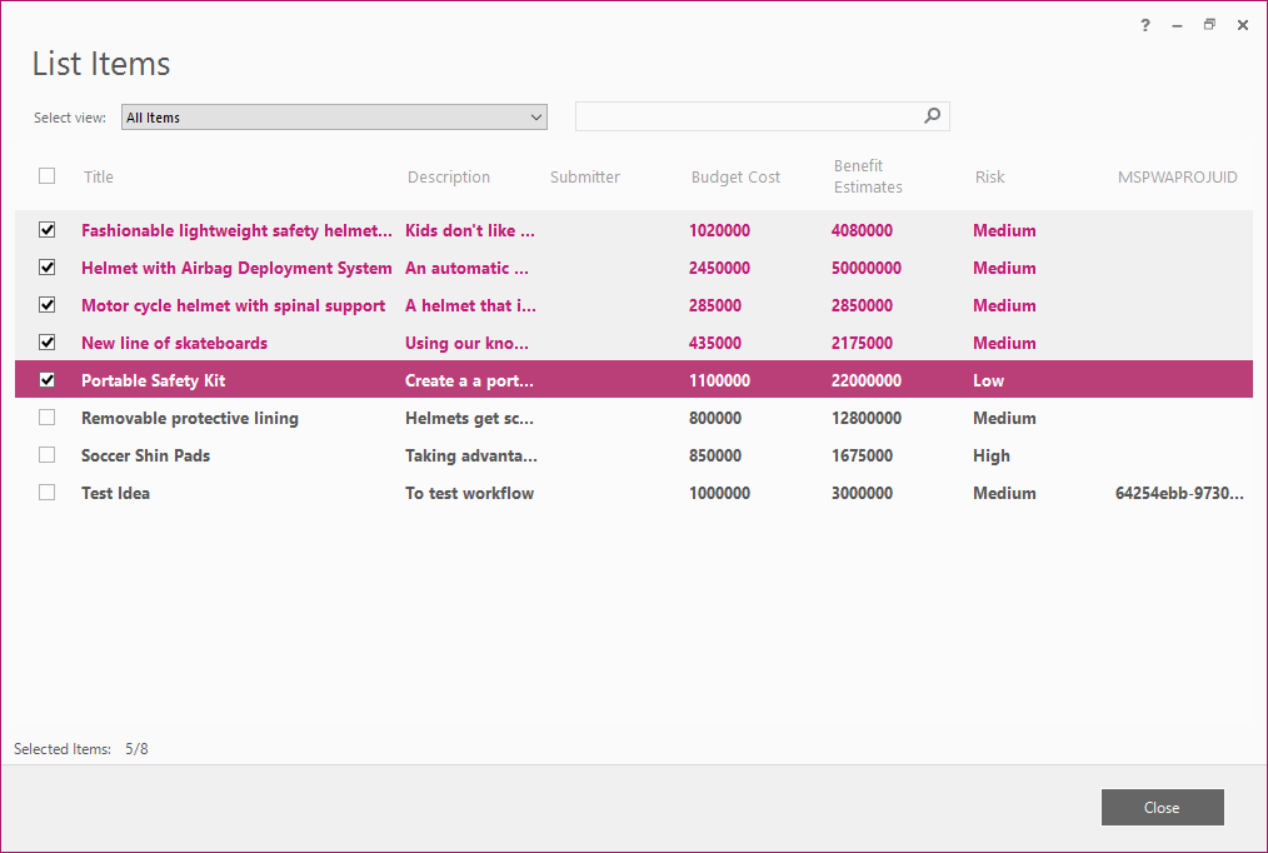
Please note: List items can be selected on this step if they were not selected in the workspace. Just double-click on the items, List items window will be opened for selection.
As you are ready with the selection, click Next to proceed.
Step 3
Select the site URLs where you would like to populate the selected site list items.
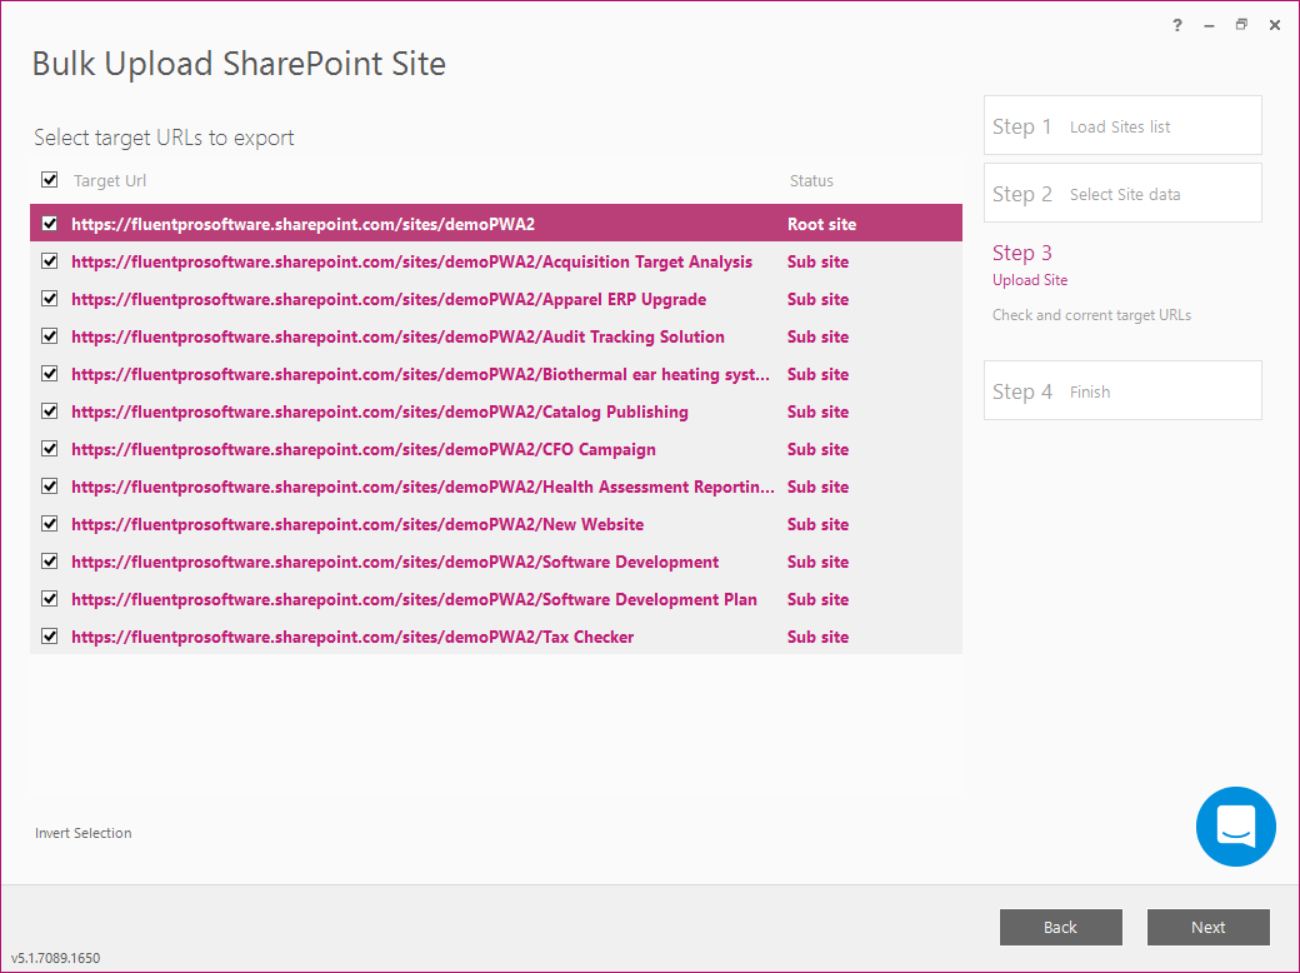
Click Next to start the upload process.
Allow FluentBooks some time to complete this operation.
Step 4
On the summary screen, check if the upload process was successful.
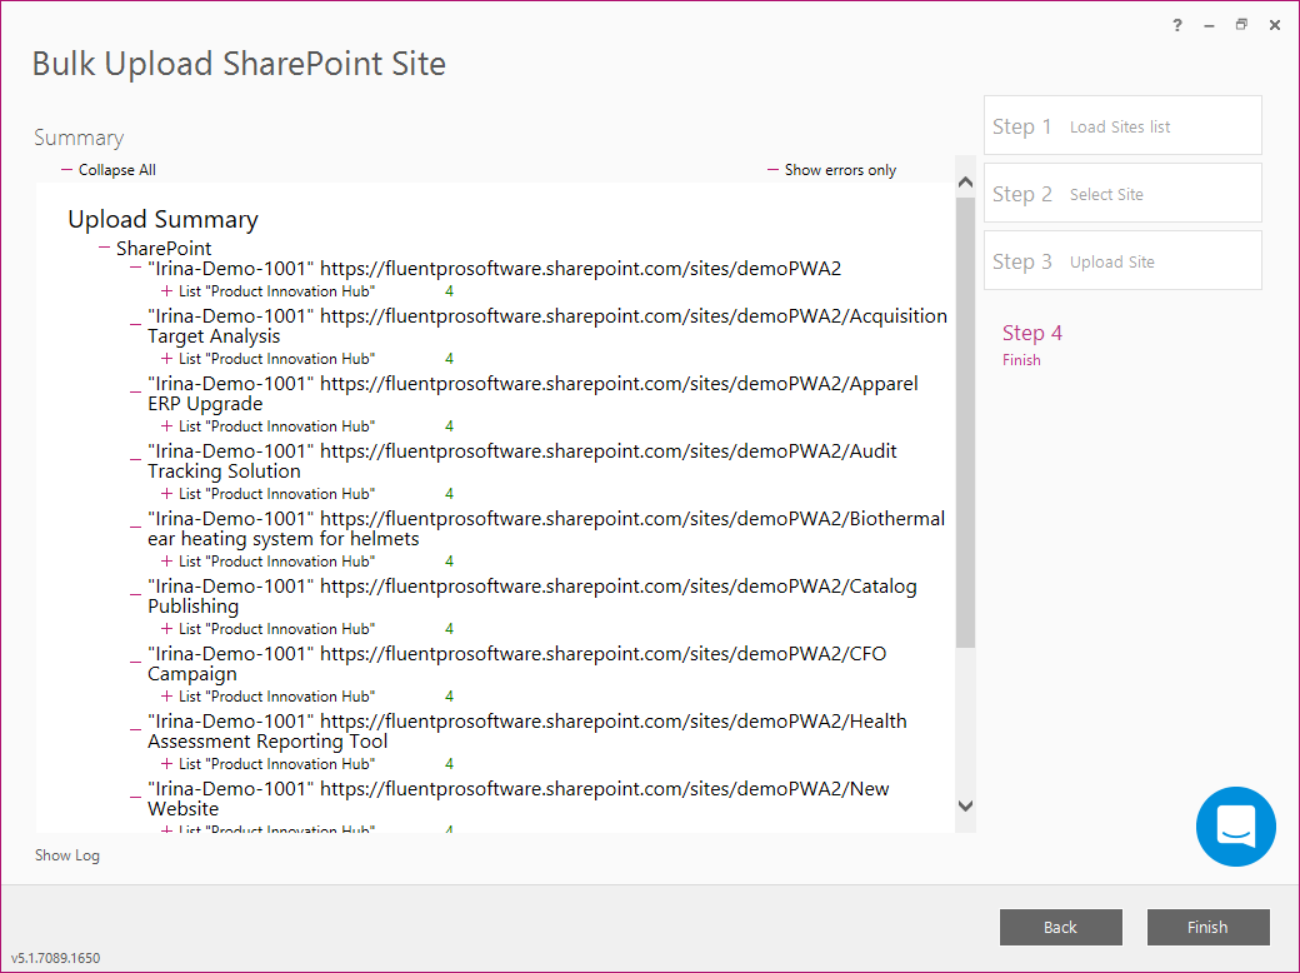
Show Log option can be used to review the log file for errors after the Sites data upload is completed.
Click Finish to complete the process.
Open the PWA and check if the information is now present there.
