
There are cases when it is necessary to create a significant number of resources in Project Online. This can be done manually, but another way is to use FluentBooks, which can help to significantly speed-up the process and automate it.
Before starting creating resources with FluentBooks, please make sure that at least one resource exists in the PWA, this resources will be used as a template for bulk creation.
1. Download template Resource from Project Online
The first step is to import a template resource from Project Online into FluentBooks Workspace. This can be done using the ‘Import Extra Resources’ option in the FluentBooks workspace.
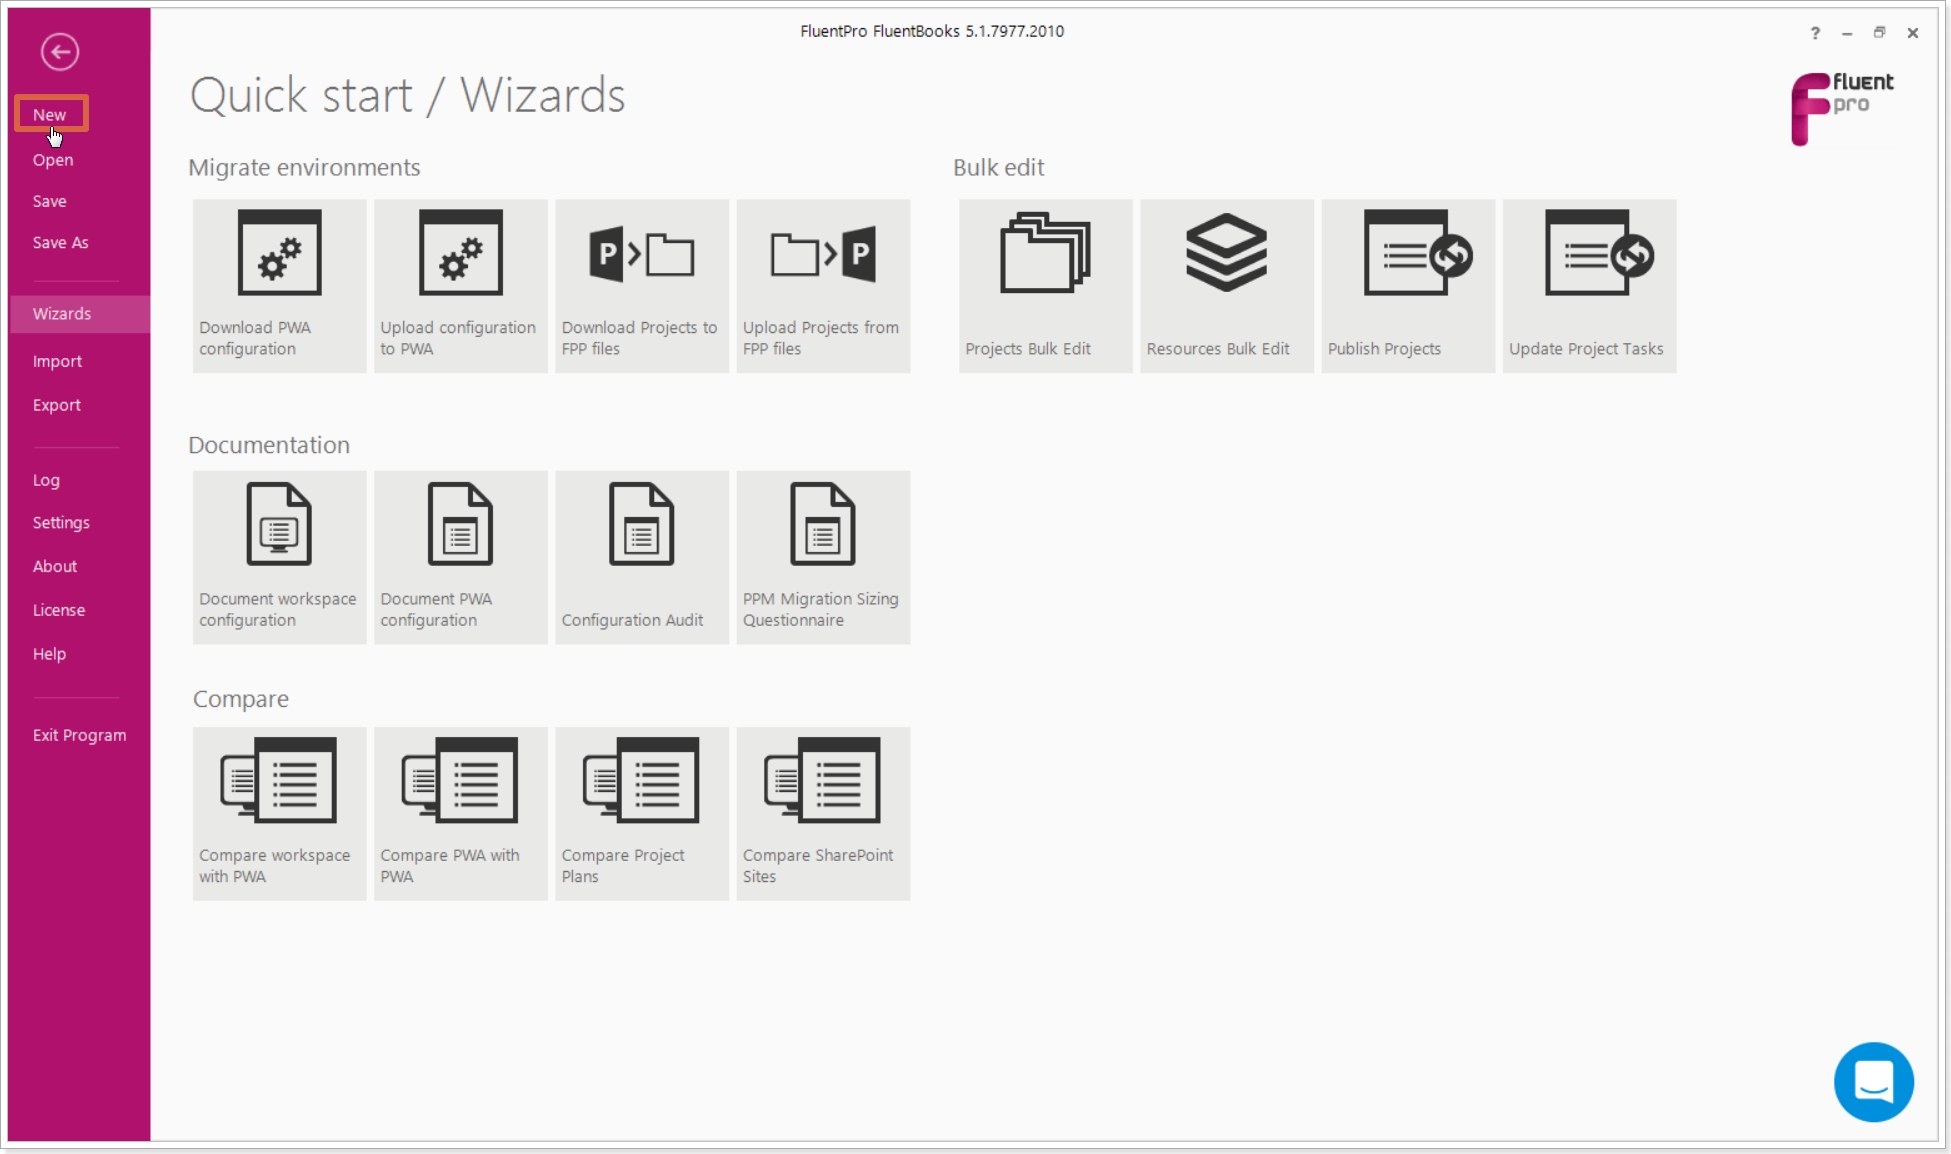
1. Run FluentBooks, and click 'File' > 'New' in the top left corner.
2. Switch to the 'Resources' page and click 'Import Extra Resources' in the bottom left area of the page.

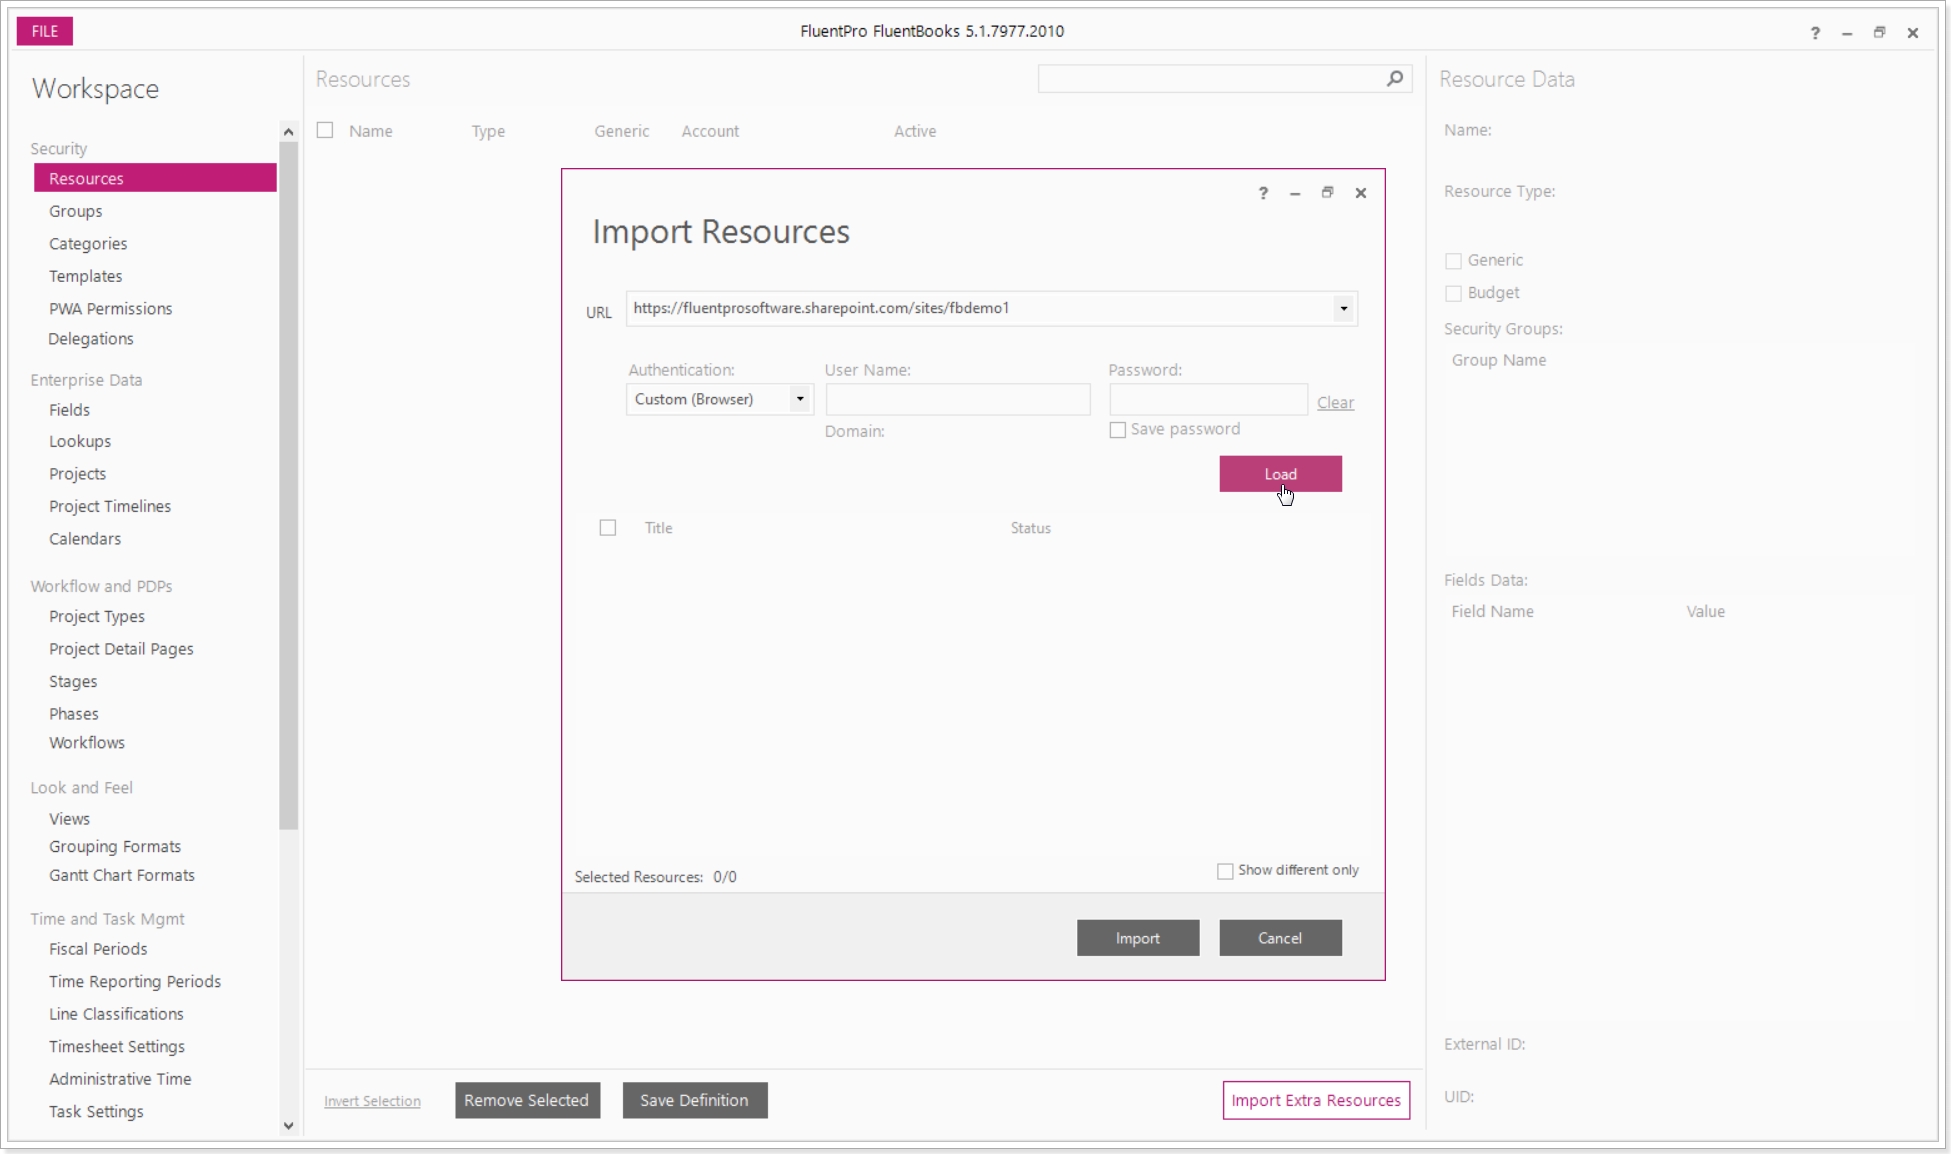
3. In the opened window provide the URL of the Project Online instance where you will be downloading a template resource from, then provide the credentials for for FluentBooks to connect to the Project Online instance and download the data.
Click 'Load'.
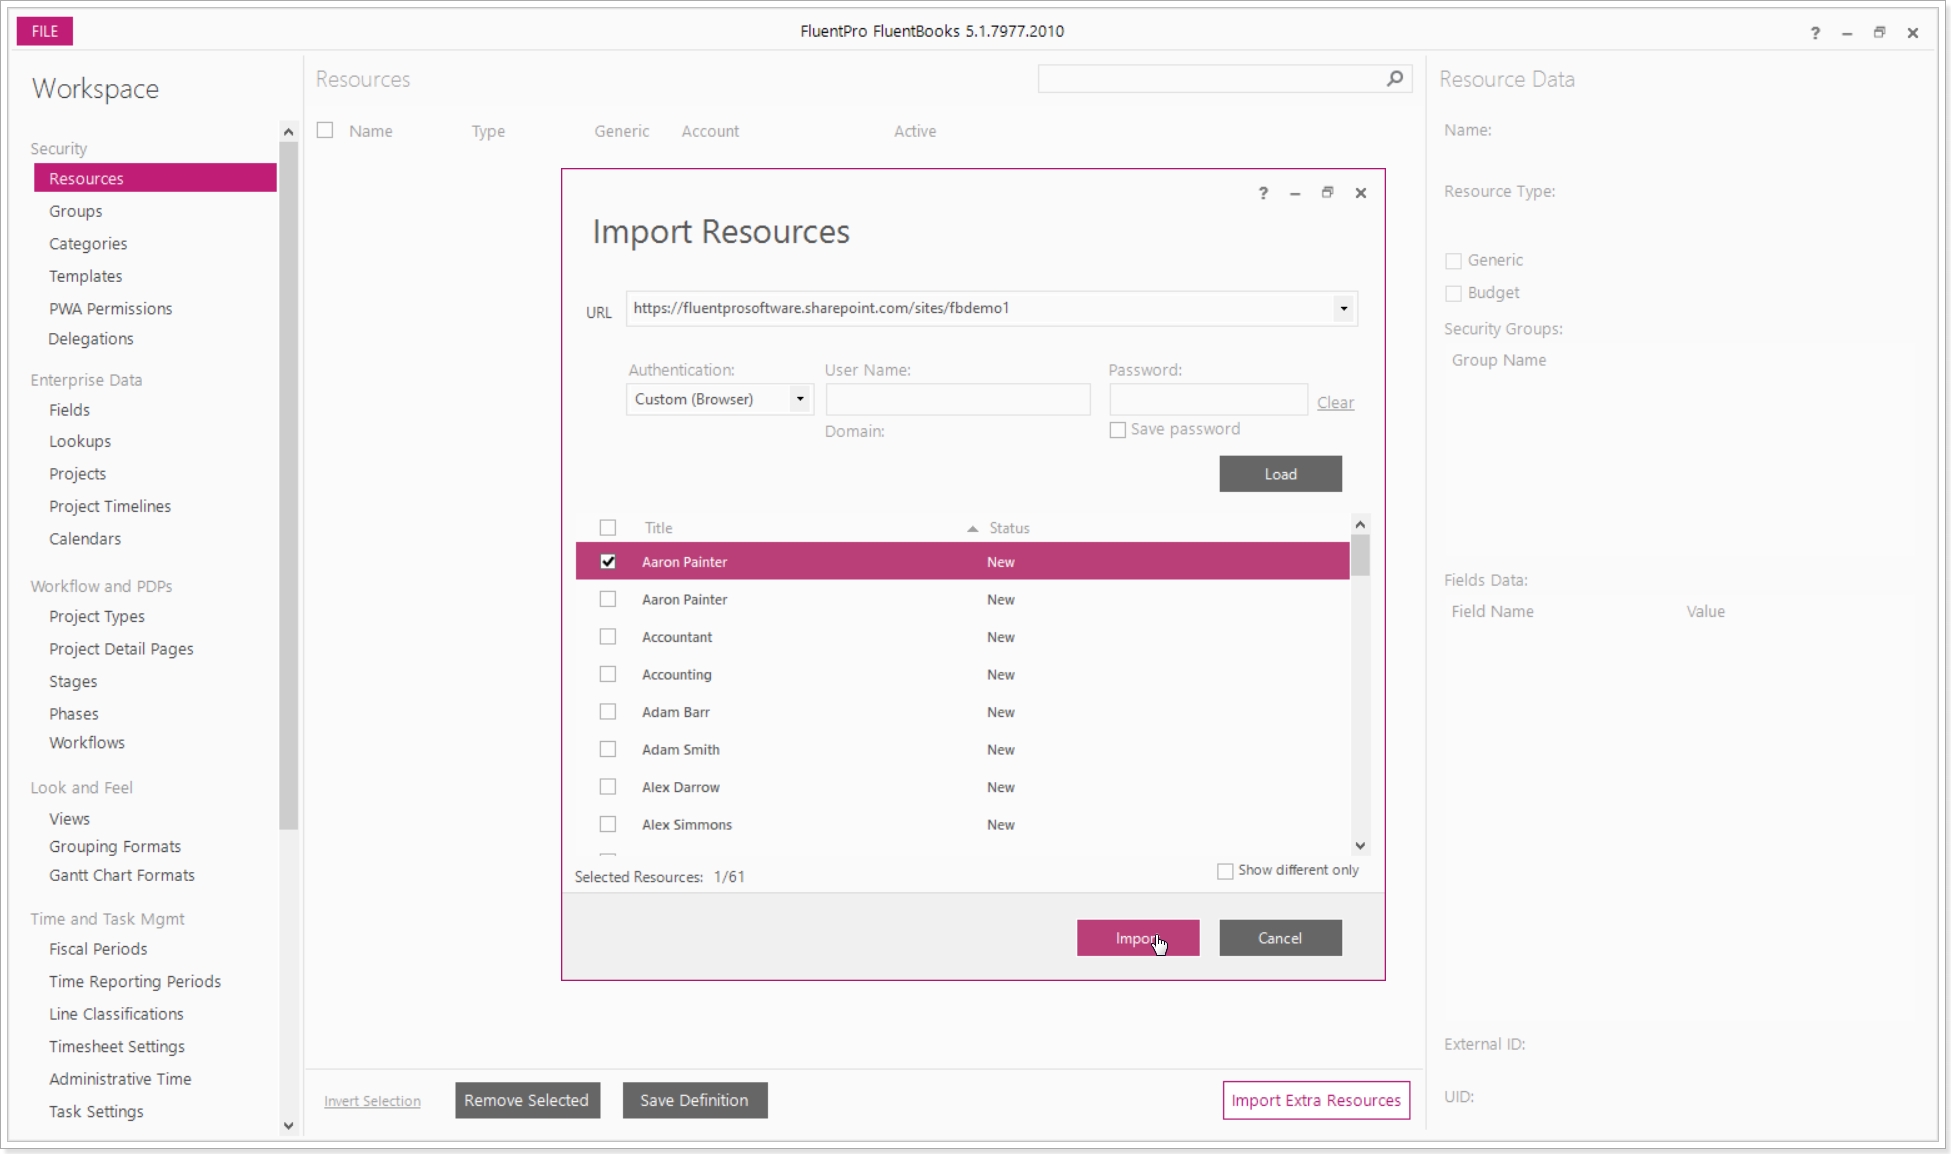
4. FluentBooks will load the resources that are currently present in the Project Online instance. Pick one Resource that will be used as a template for bulk creation.
Click 'Import' and allow the tool some time to load it.
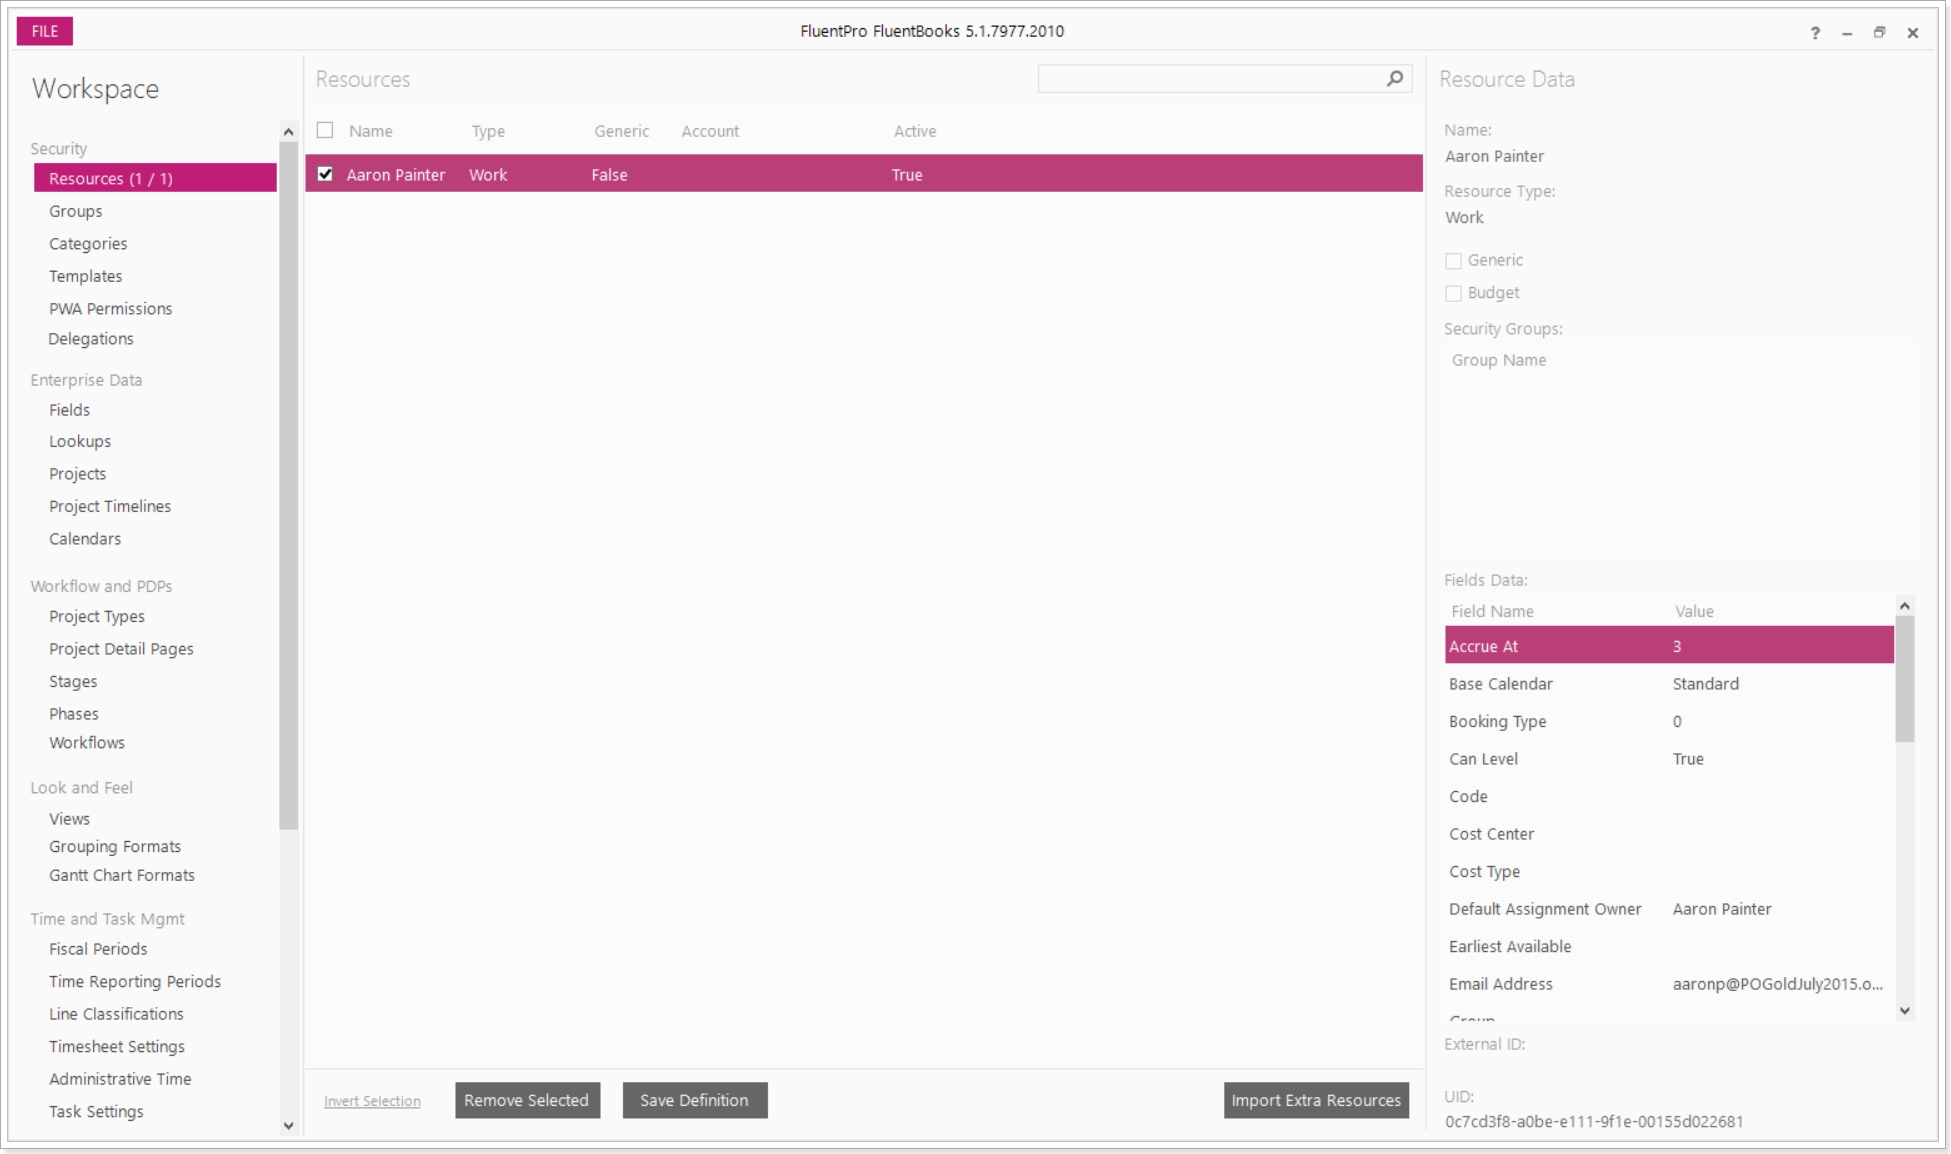
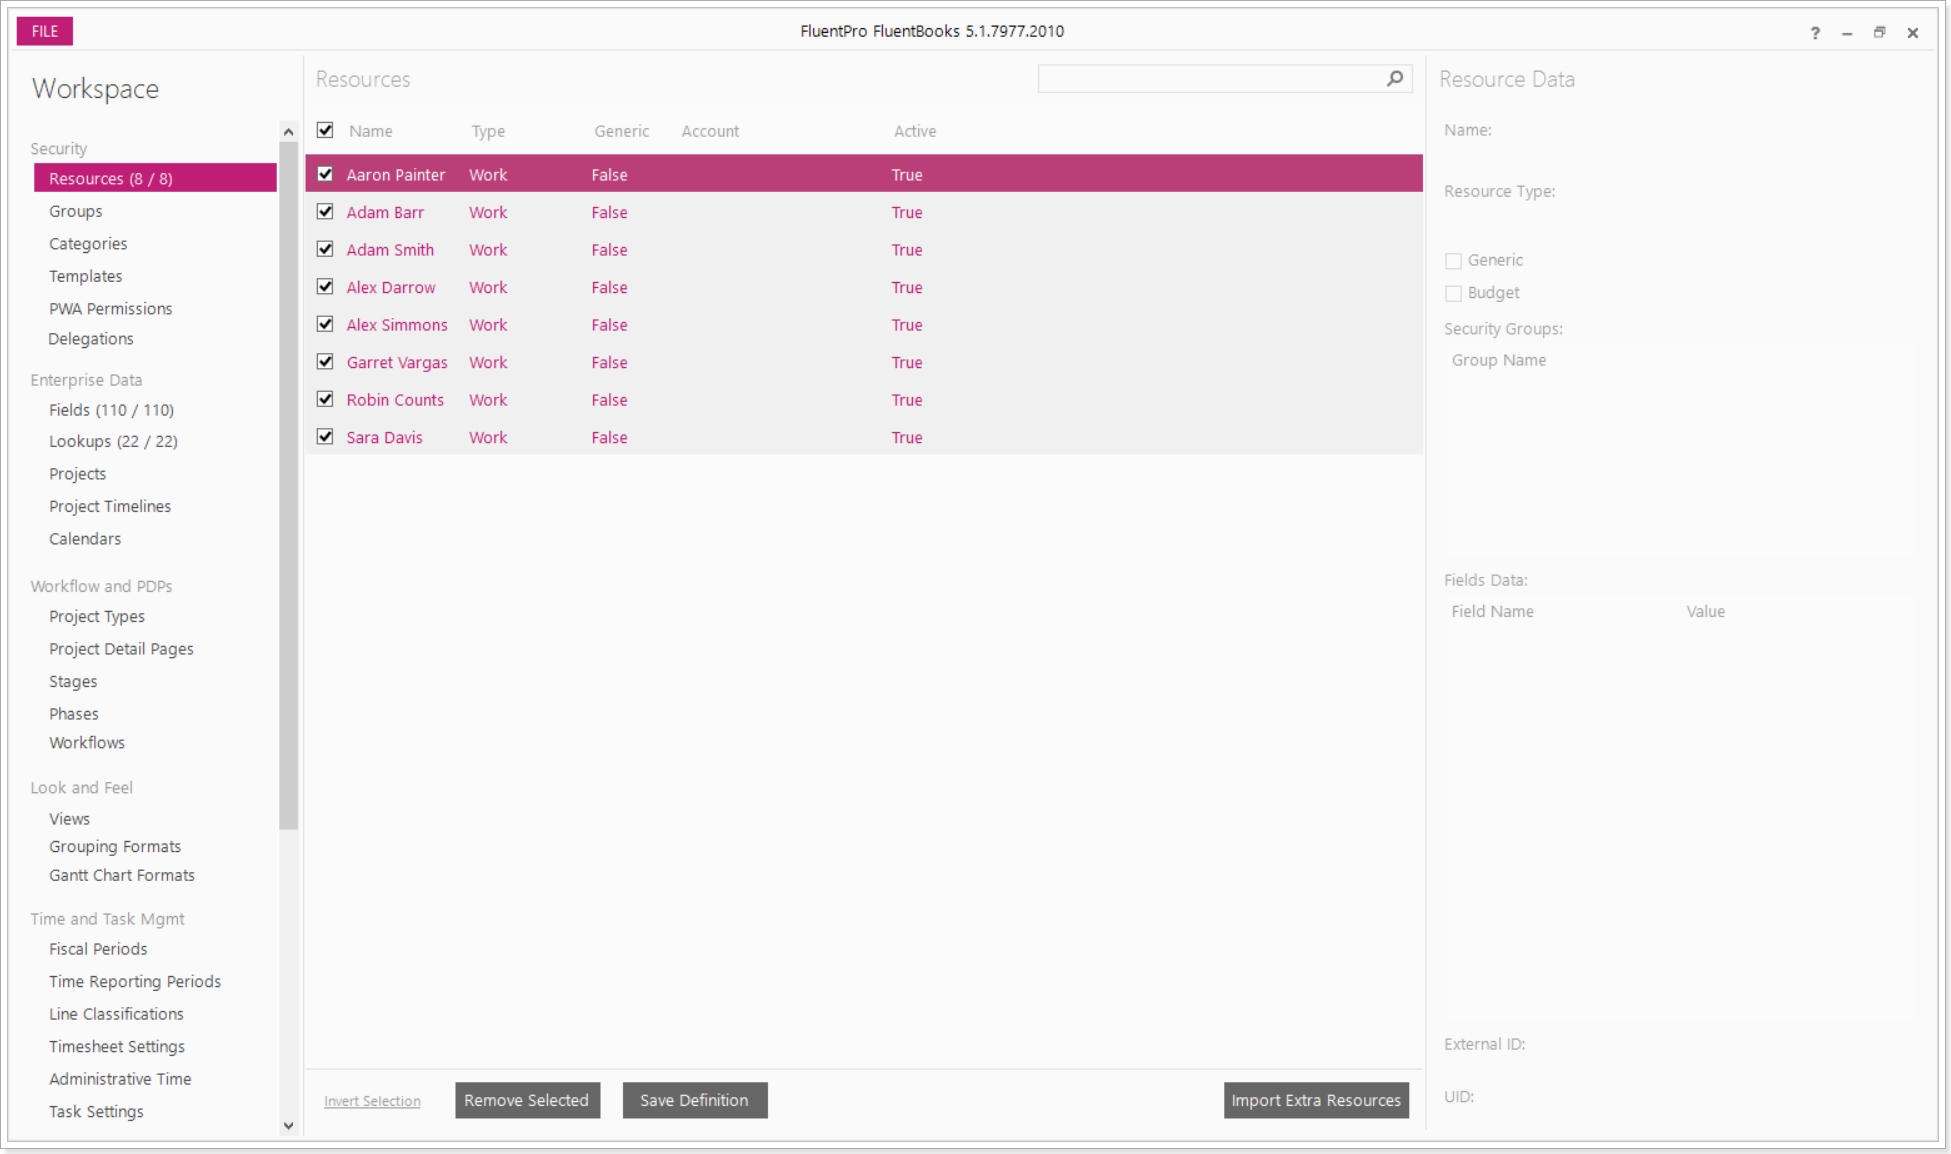
5. Once the import finishes you'll see the resource present in FluentBooks workspace.
1.1. Import Enterprise Custom Fields and Lookup Tables
Apart from a template Resource we will also need a list of Enterprise Custom Fields and Lookup Tables.
Those are needed for us to be able to fill in the resource data (like RBS, Standard Rates, Resource Department, etc) later when we proceed to the bulk creation step.
Switch to the 'Fields' page in the same workspace and choose 'Import Extra' in the bottom left area of the page.
Do the same steps as with the template resource import to import the fields you will be providing information in when bulk creating the resources.
Note, that FluentBooks will also load the Lookup Tables which are associated with the fields you selected.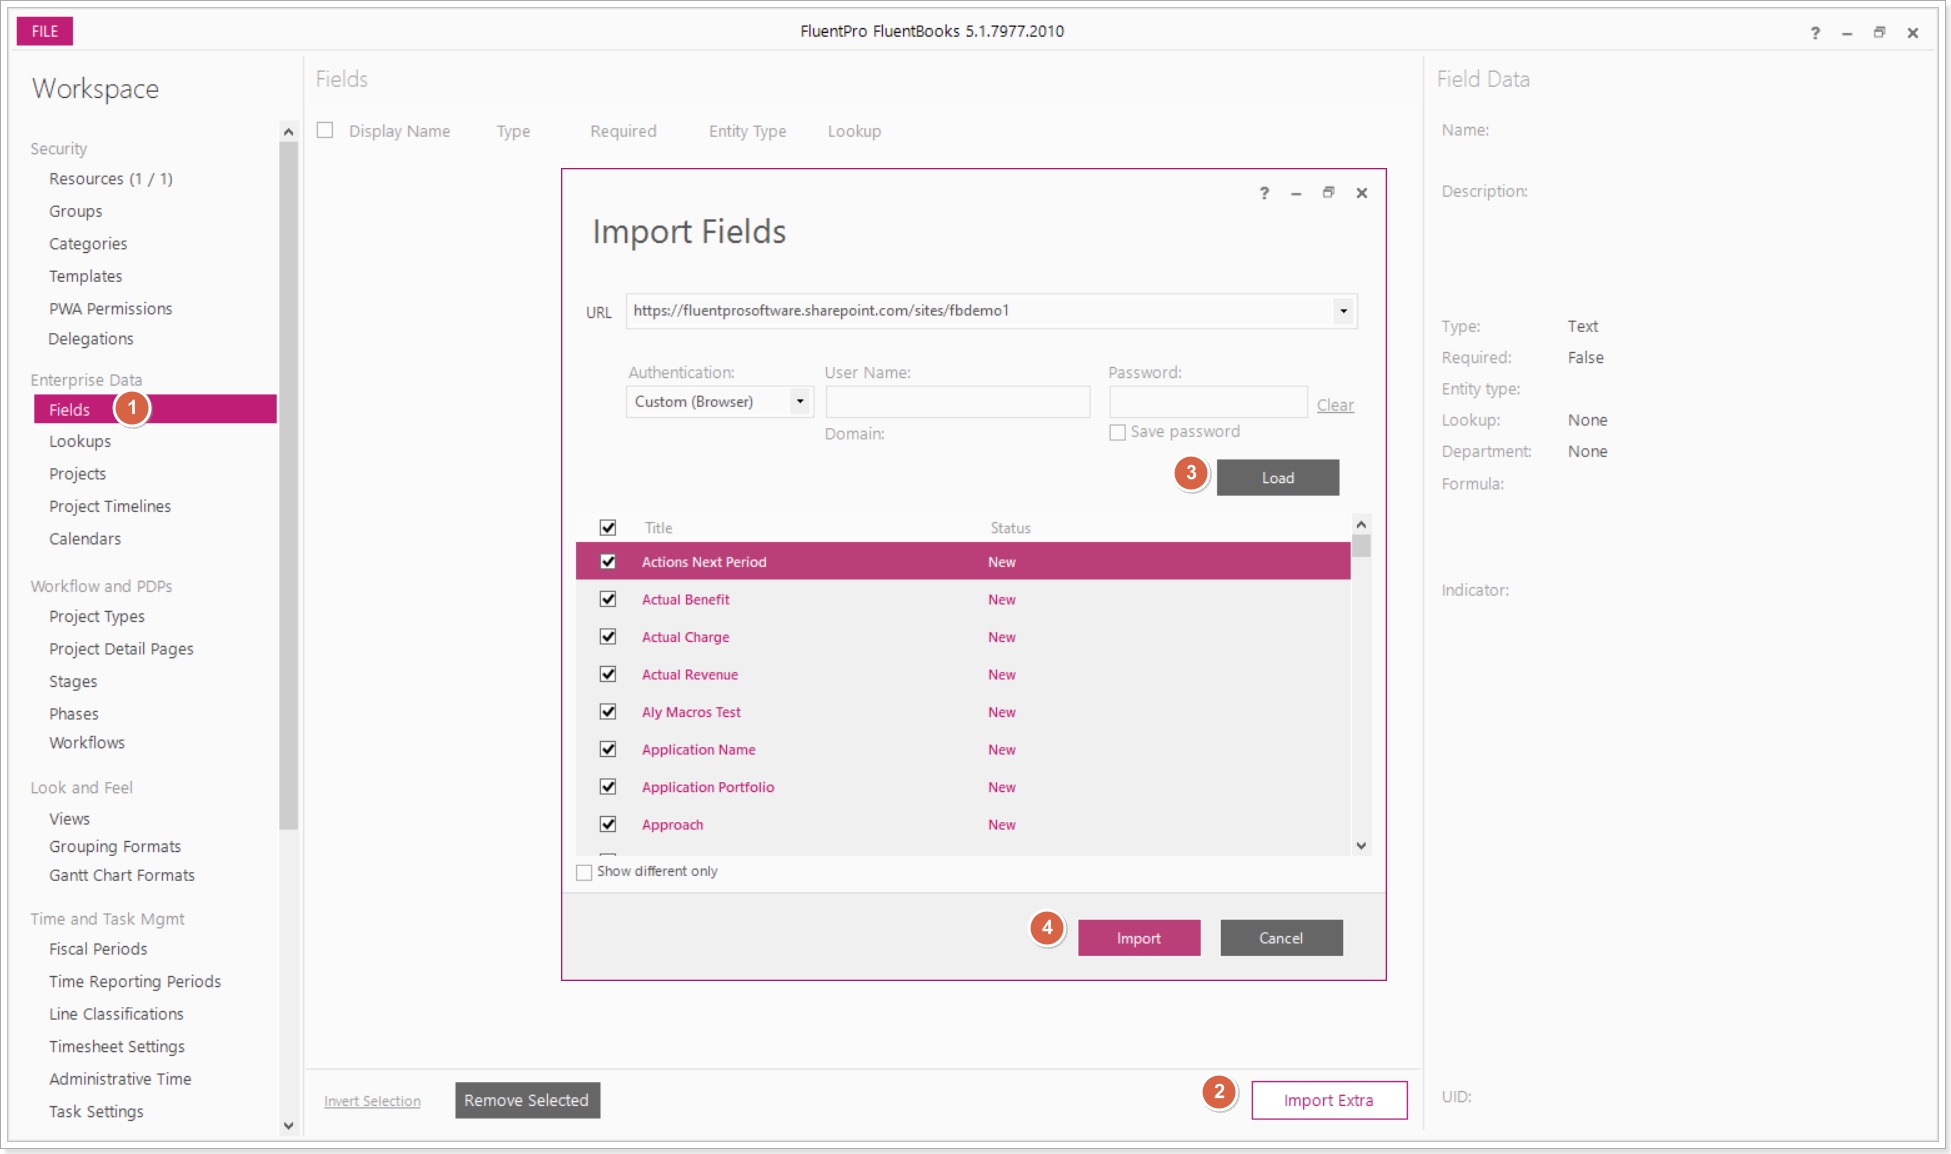
2. Export template Resource to Excel
The next step is to export the template Resource from the FluentBooks Workspace into Excel, where new Resources can be bulk-created. This can be done using the ‘Export Resources to Excel’ wizard.
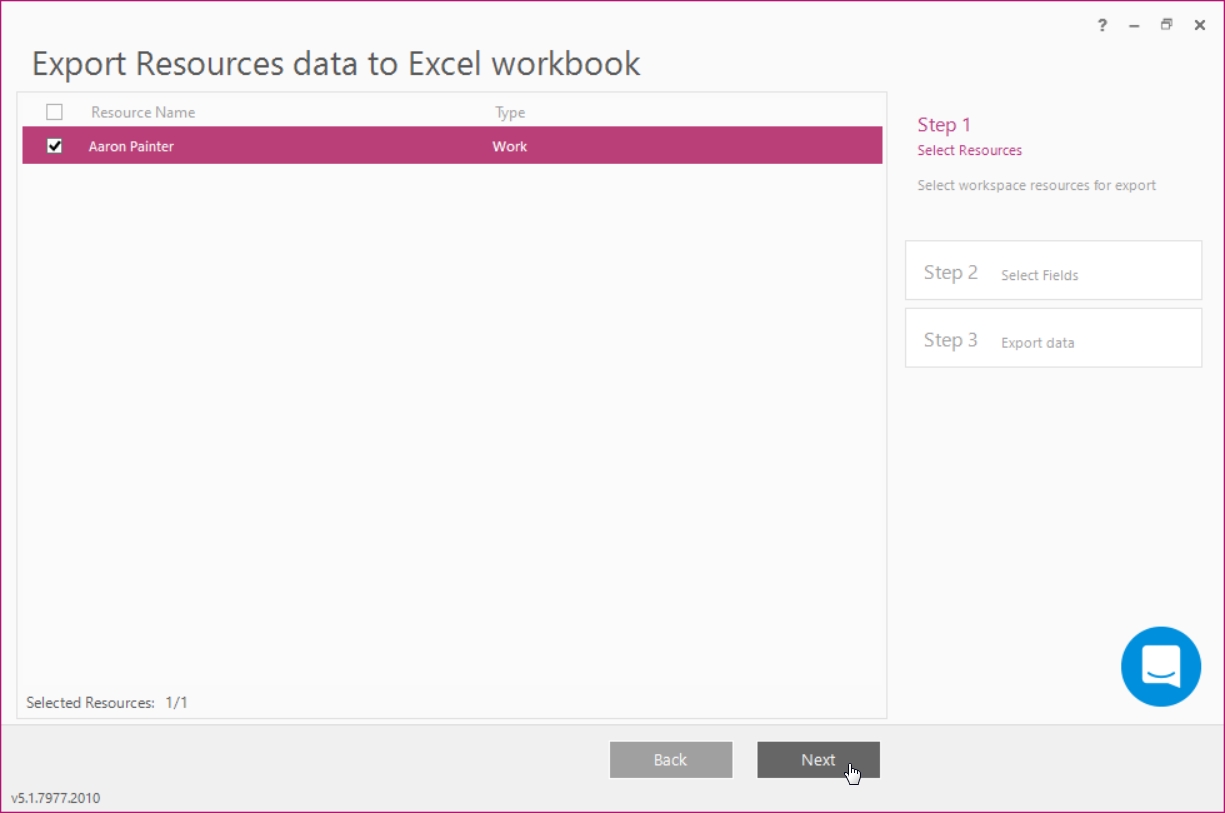
1. Select the Export option from the File menu and then the ‘Export Resources to Excel’ wizard.

2. Select the template Resources for export checking its check-box. Please note, that only resources with checked check-boxes will be exported.
Click Next to proceed.
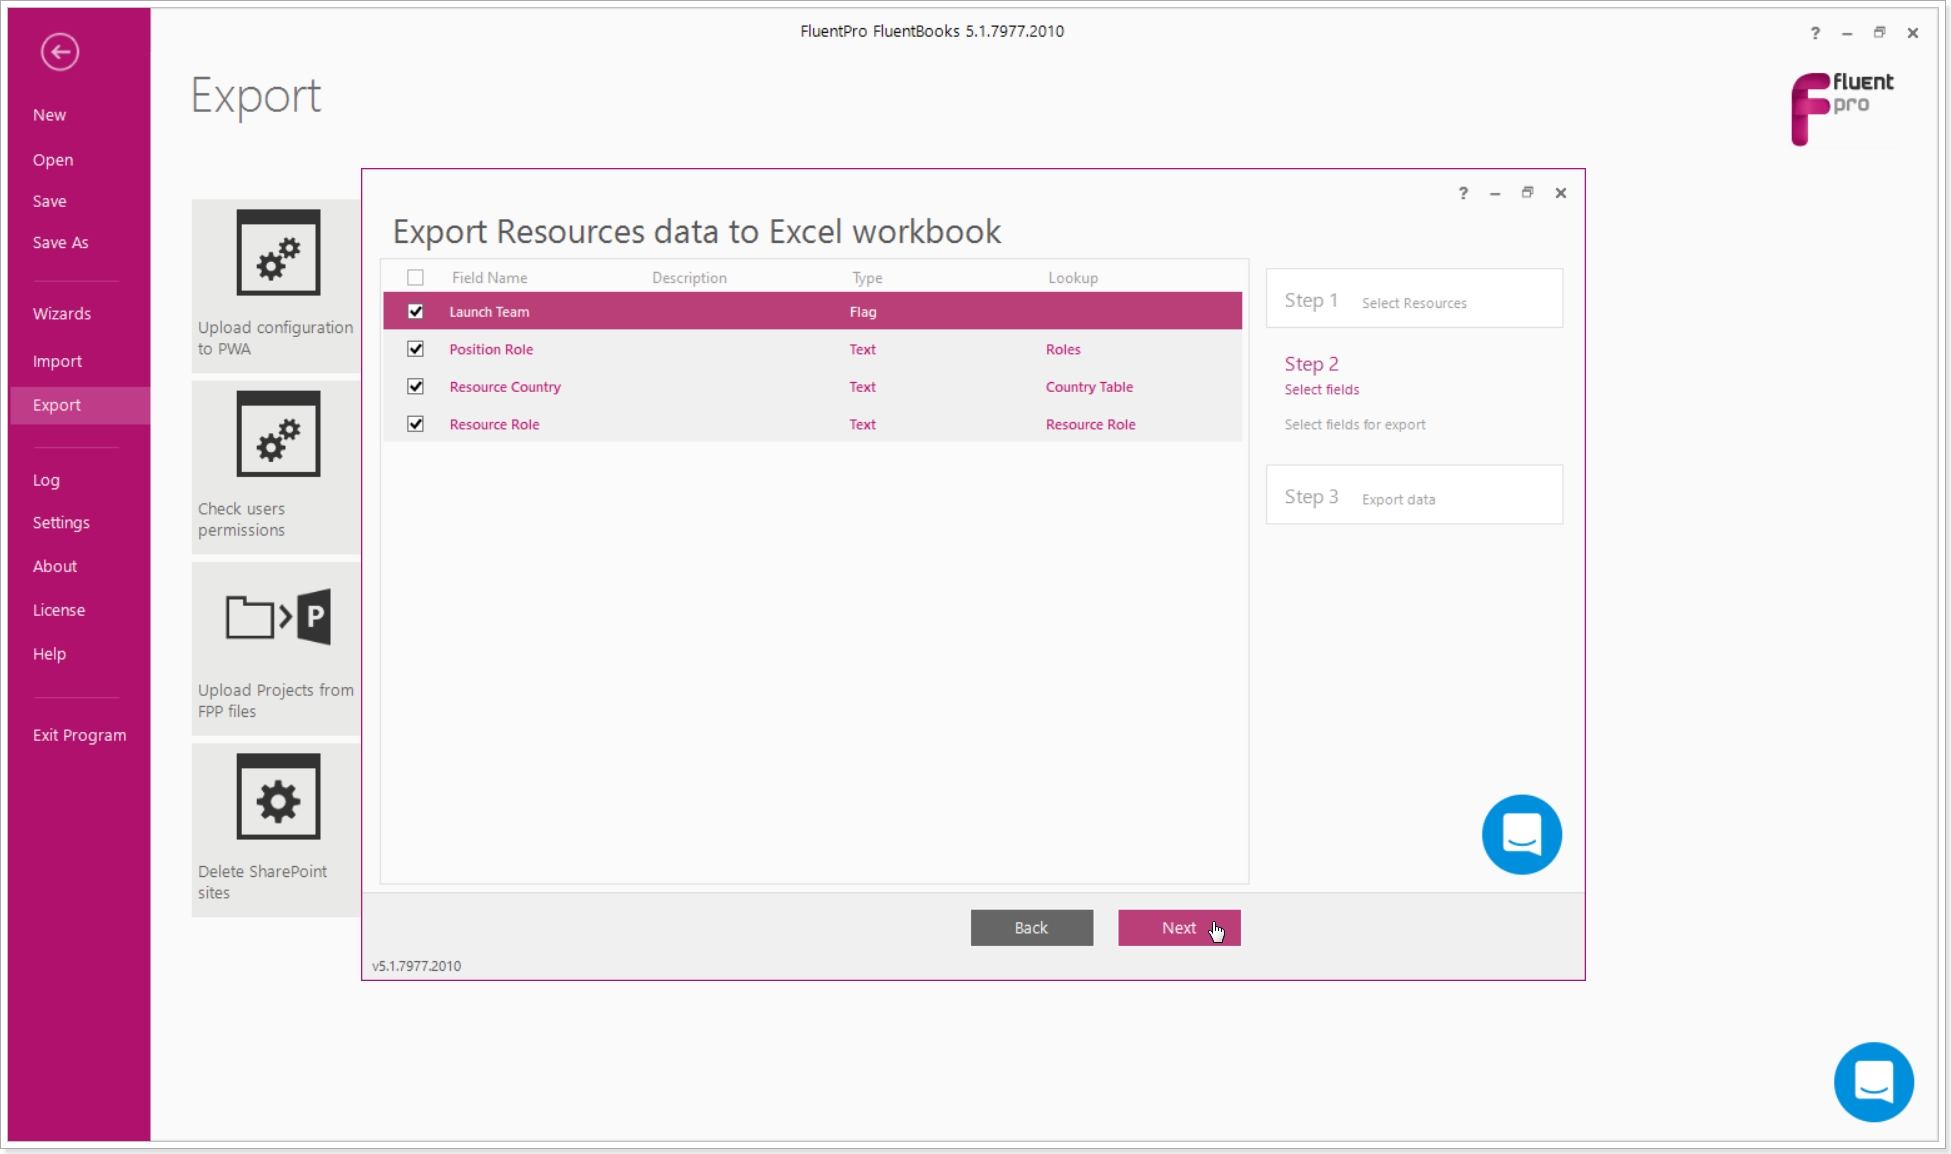
3. Select the Resource Fields to be exported checking their check-boxes, just like with resources, only fields with checked check-boxes will be exported.
Click Next to proceed.
4. Provide the path to the Excel file where Resource data will be exported to and click Export.
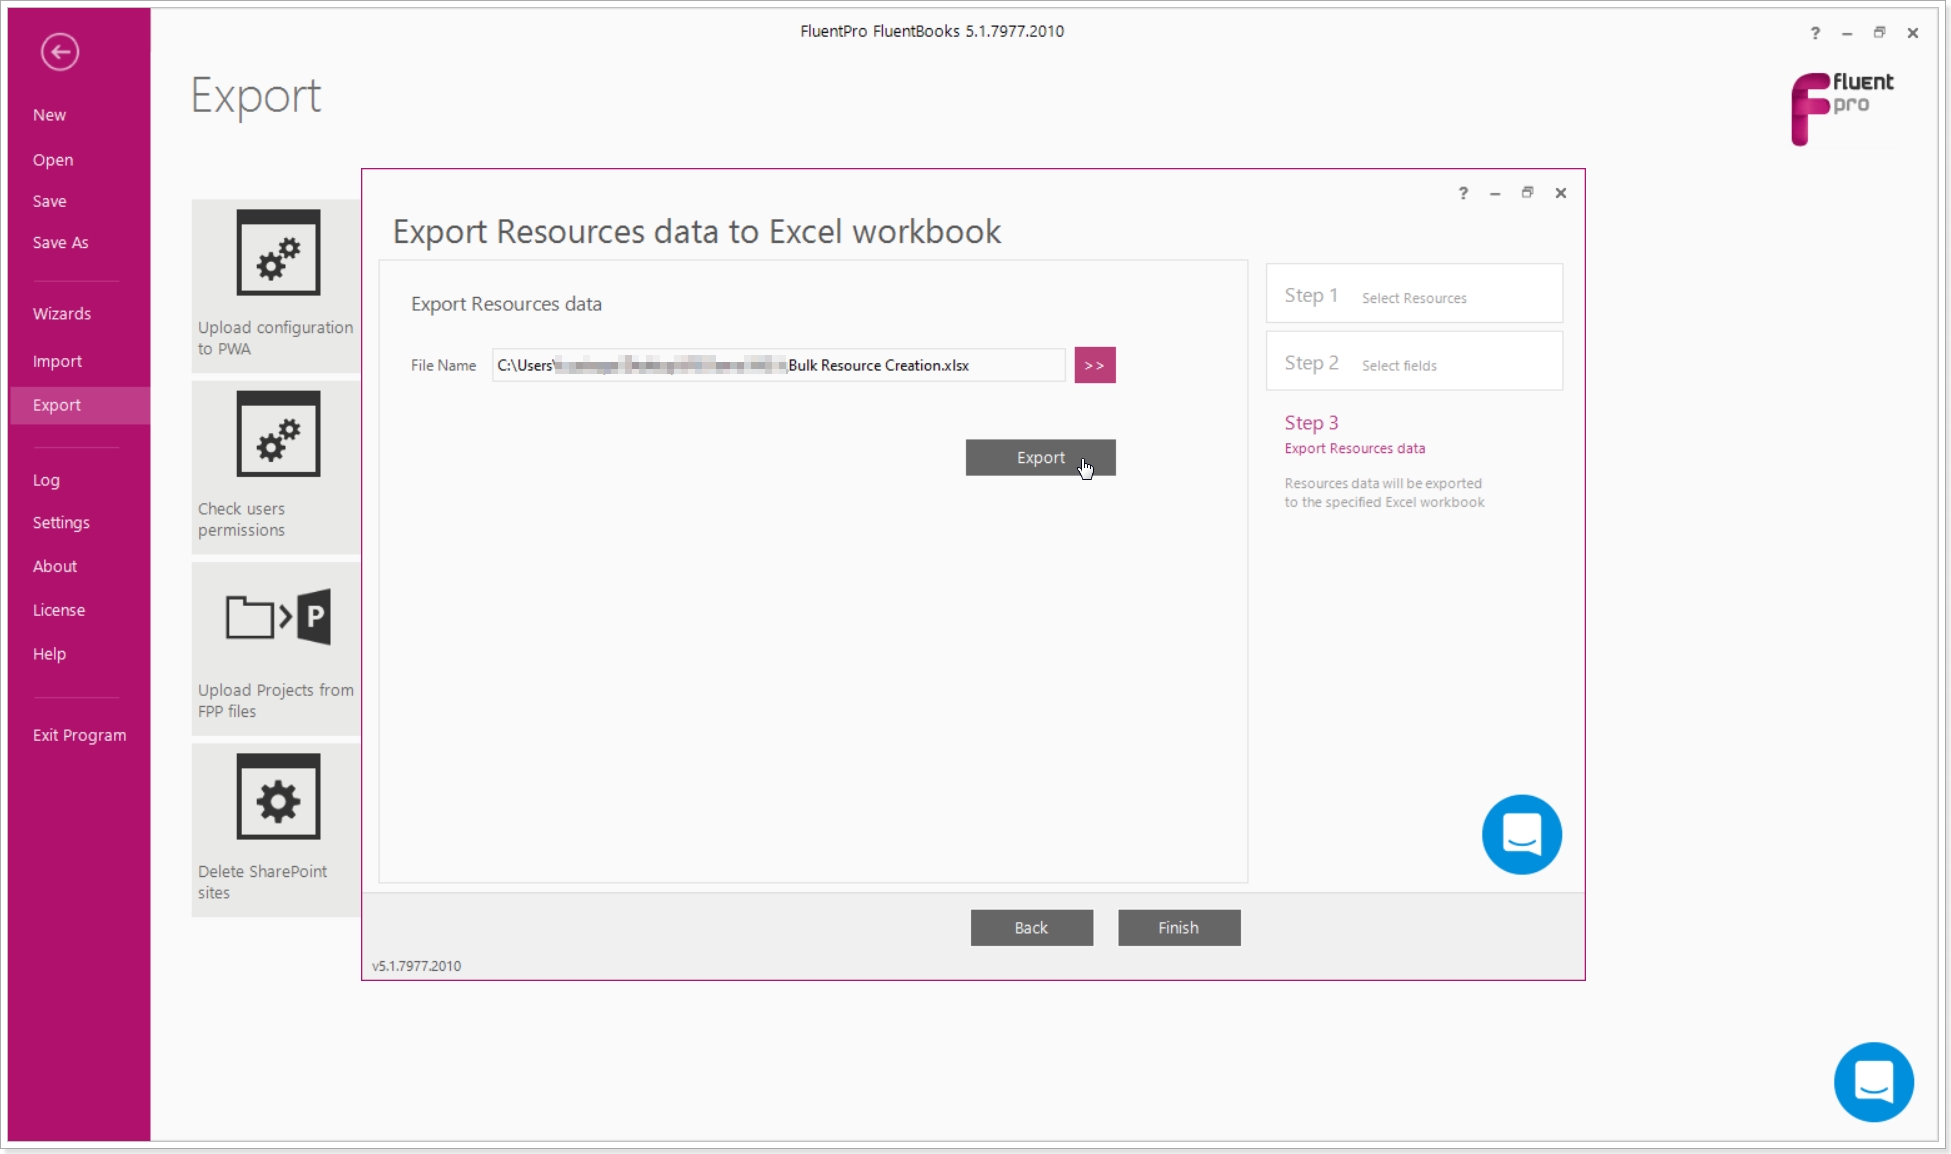
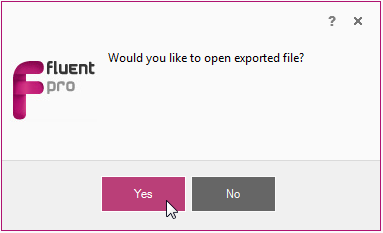
As export completes FluentBooks will offer to open the Excel file with the exported Resource and Resource Fields.
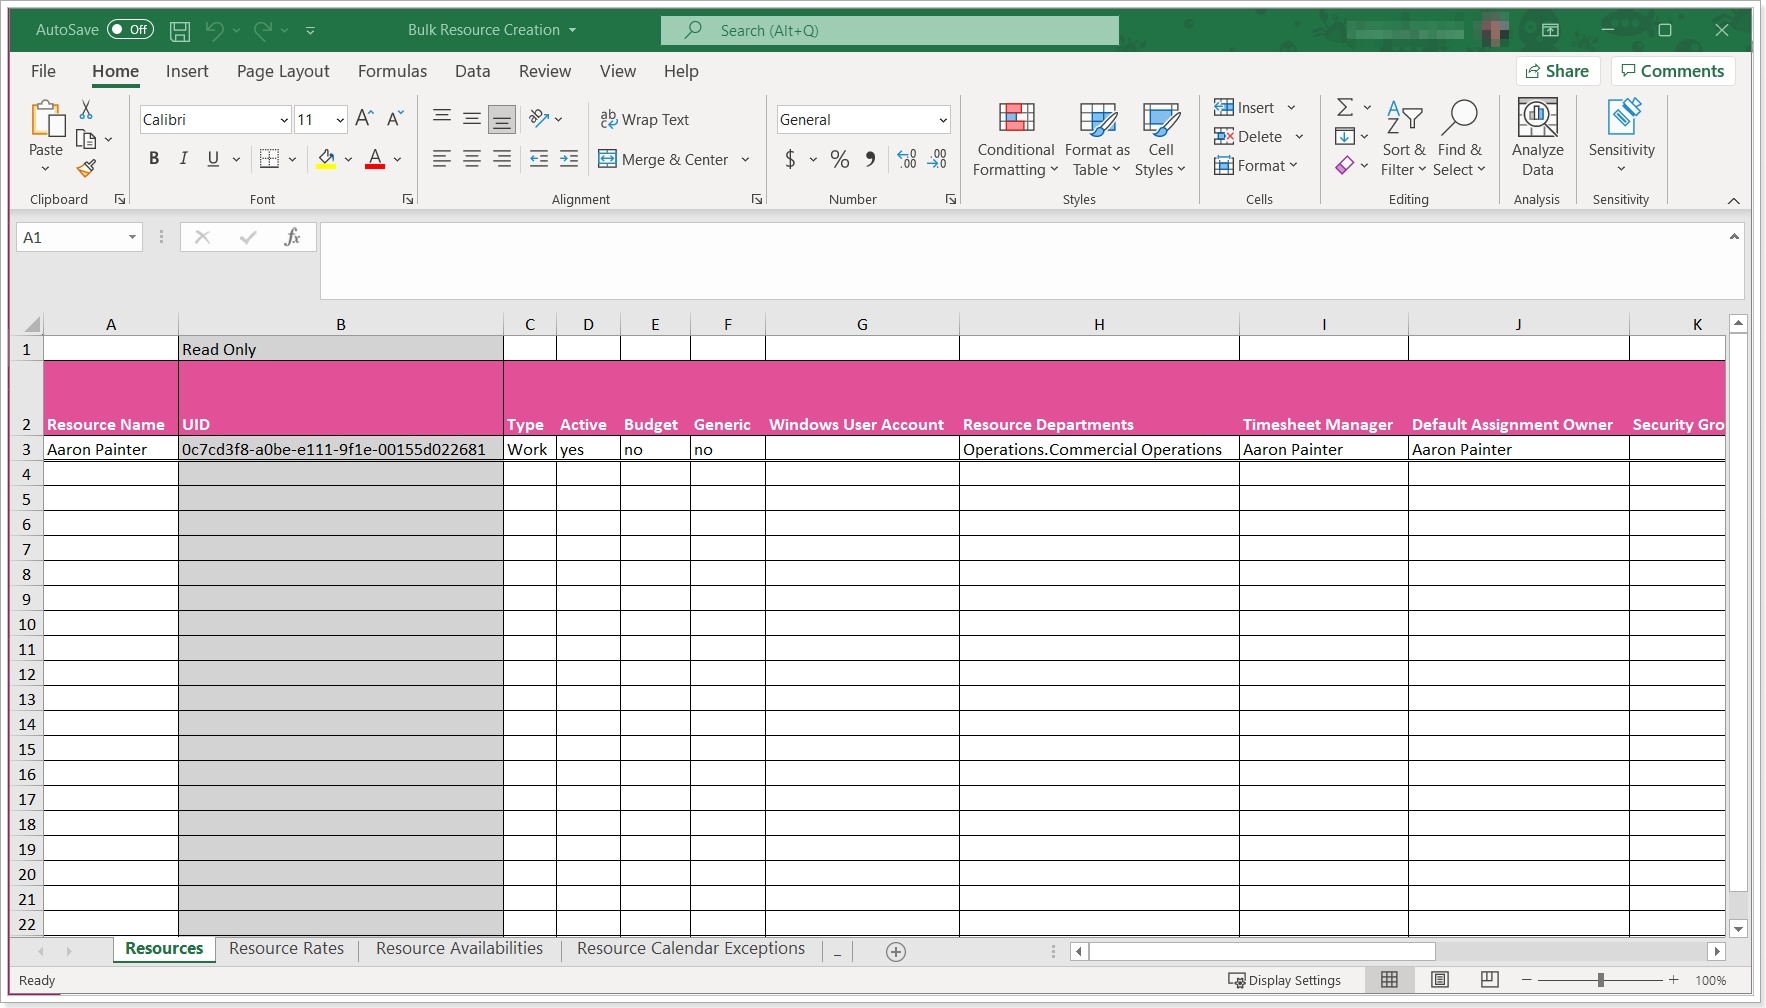
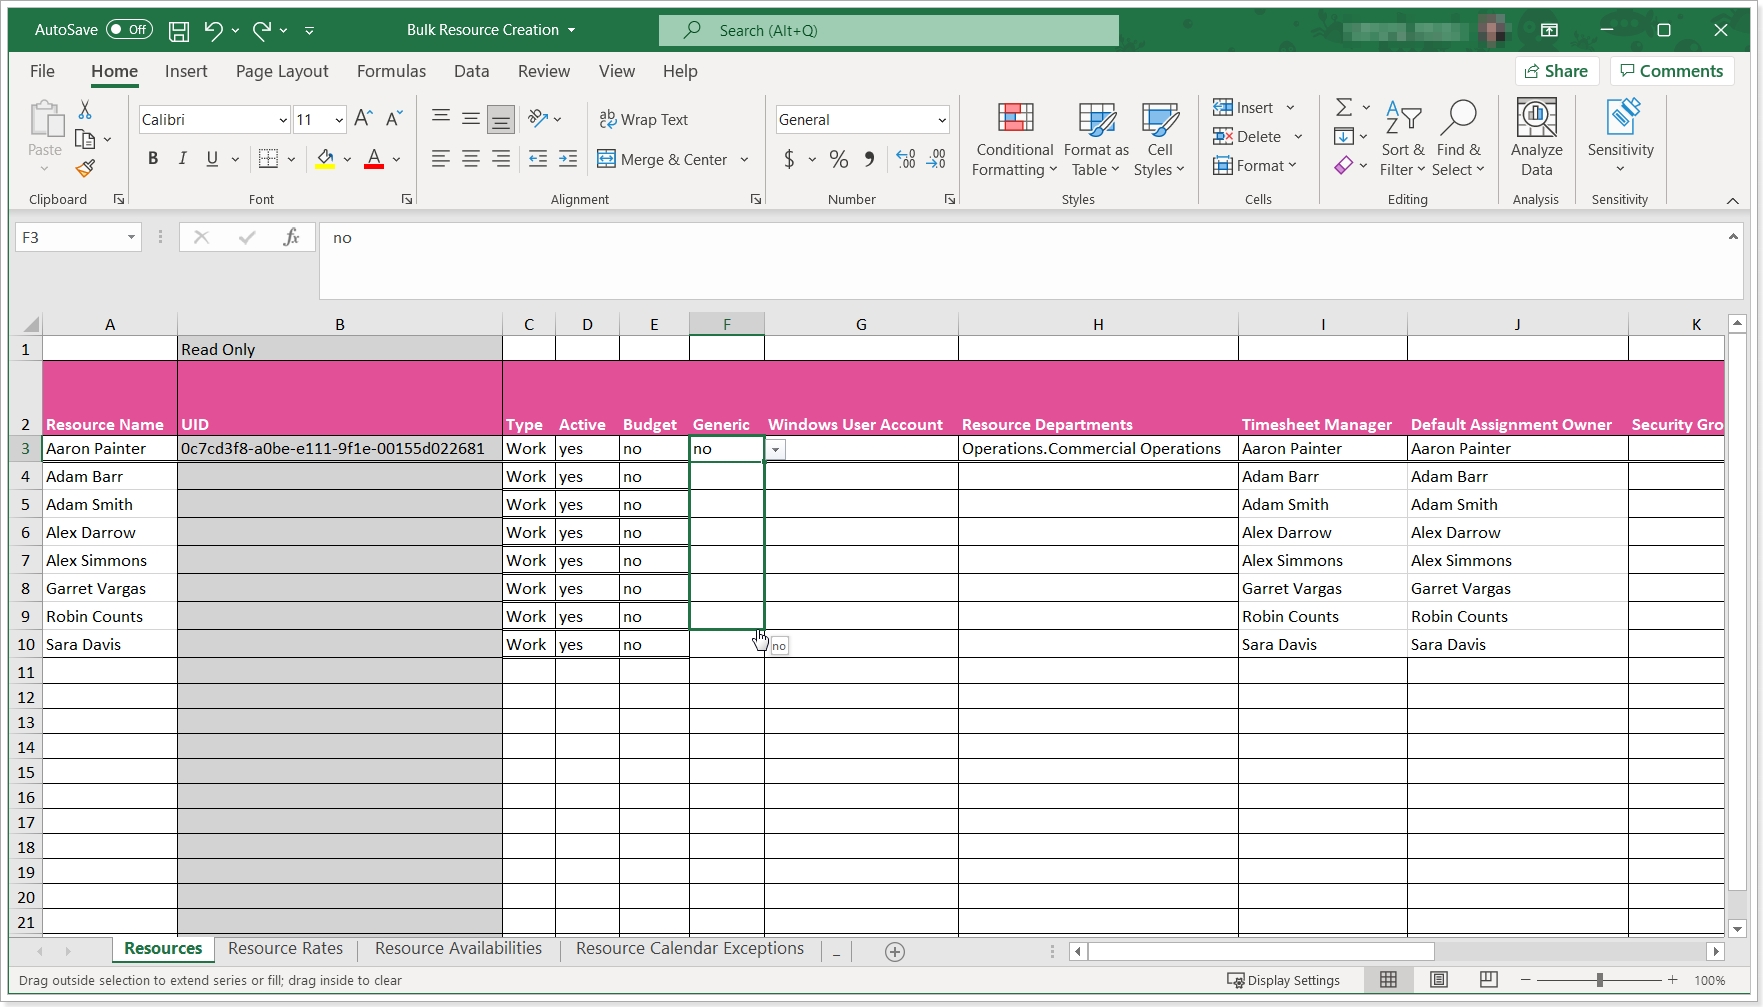
3. Bulk create the Resources in Excel
The generated file can now be used for bulk resource creation. Using Excel tools you can paste the needed details like resource name, etc., and populate values like Type for all resources in the list.
The UID field is locked in this Excel.
There is no need for you to generate UIDs for your new resources. Project Online will be generating them automatically once FluentBooks starts uploading the resources to the resource center.
Once you are done with adding new resources and their data in excel, make sure to save your changes.
Then close the file and close the 'Export Resources data to Excel' wizard.
4. Import new Resources from Excel
The next step is to import the newly created resources from the Excel file back into the FluentBooks Workspace.
1. Select the Import option from the File menu and then the ‘Import Resources from Excel’ wizard.

2. Specify the Excel file where resources should be imported from, and click Import. Allow the wizard some time to complete the process.
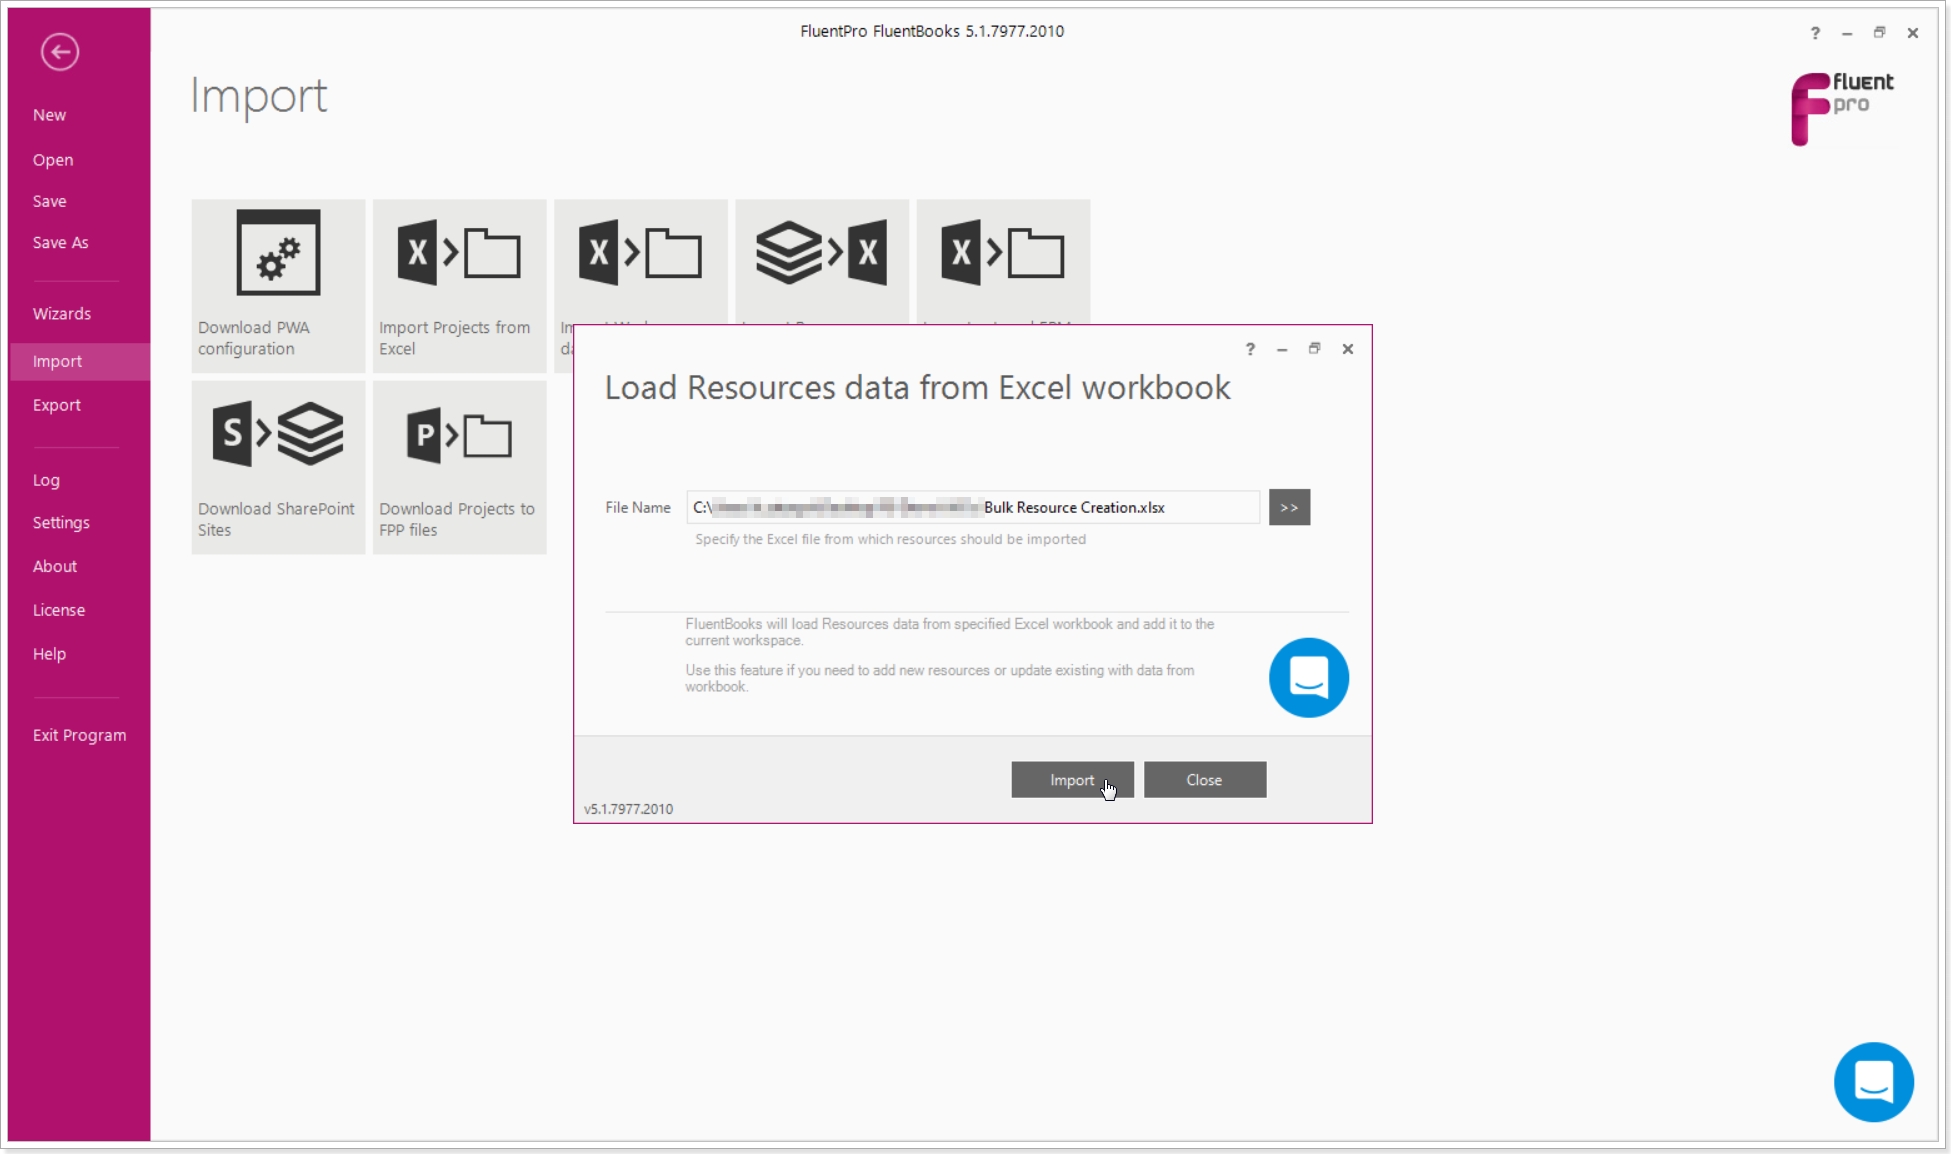
Workspace window will be shown and you'll find your resources from Excel added to the workspace!
5. Upload new Resources to Project Online
The last step is to upload your new resources to Project Online. This can be done using the ‘Upload configuration to PWA’ wizard.
Make sure that all resources that need to be loaded to Project Online are selected with check-boxes in the Workspace.
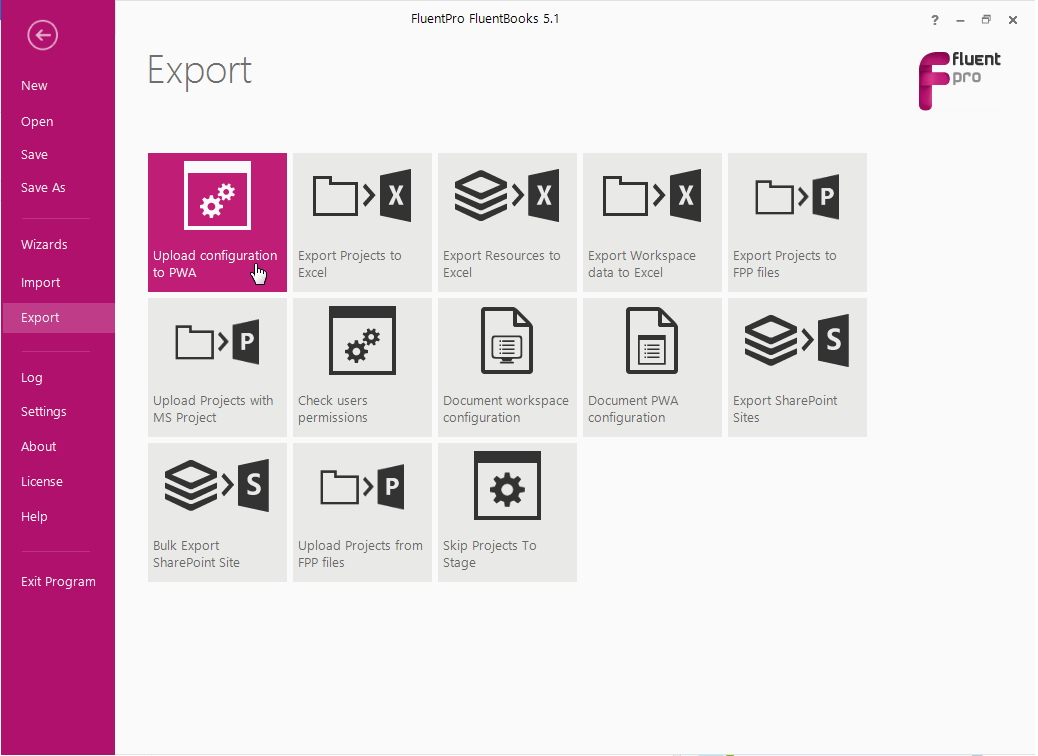
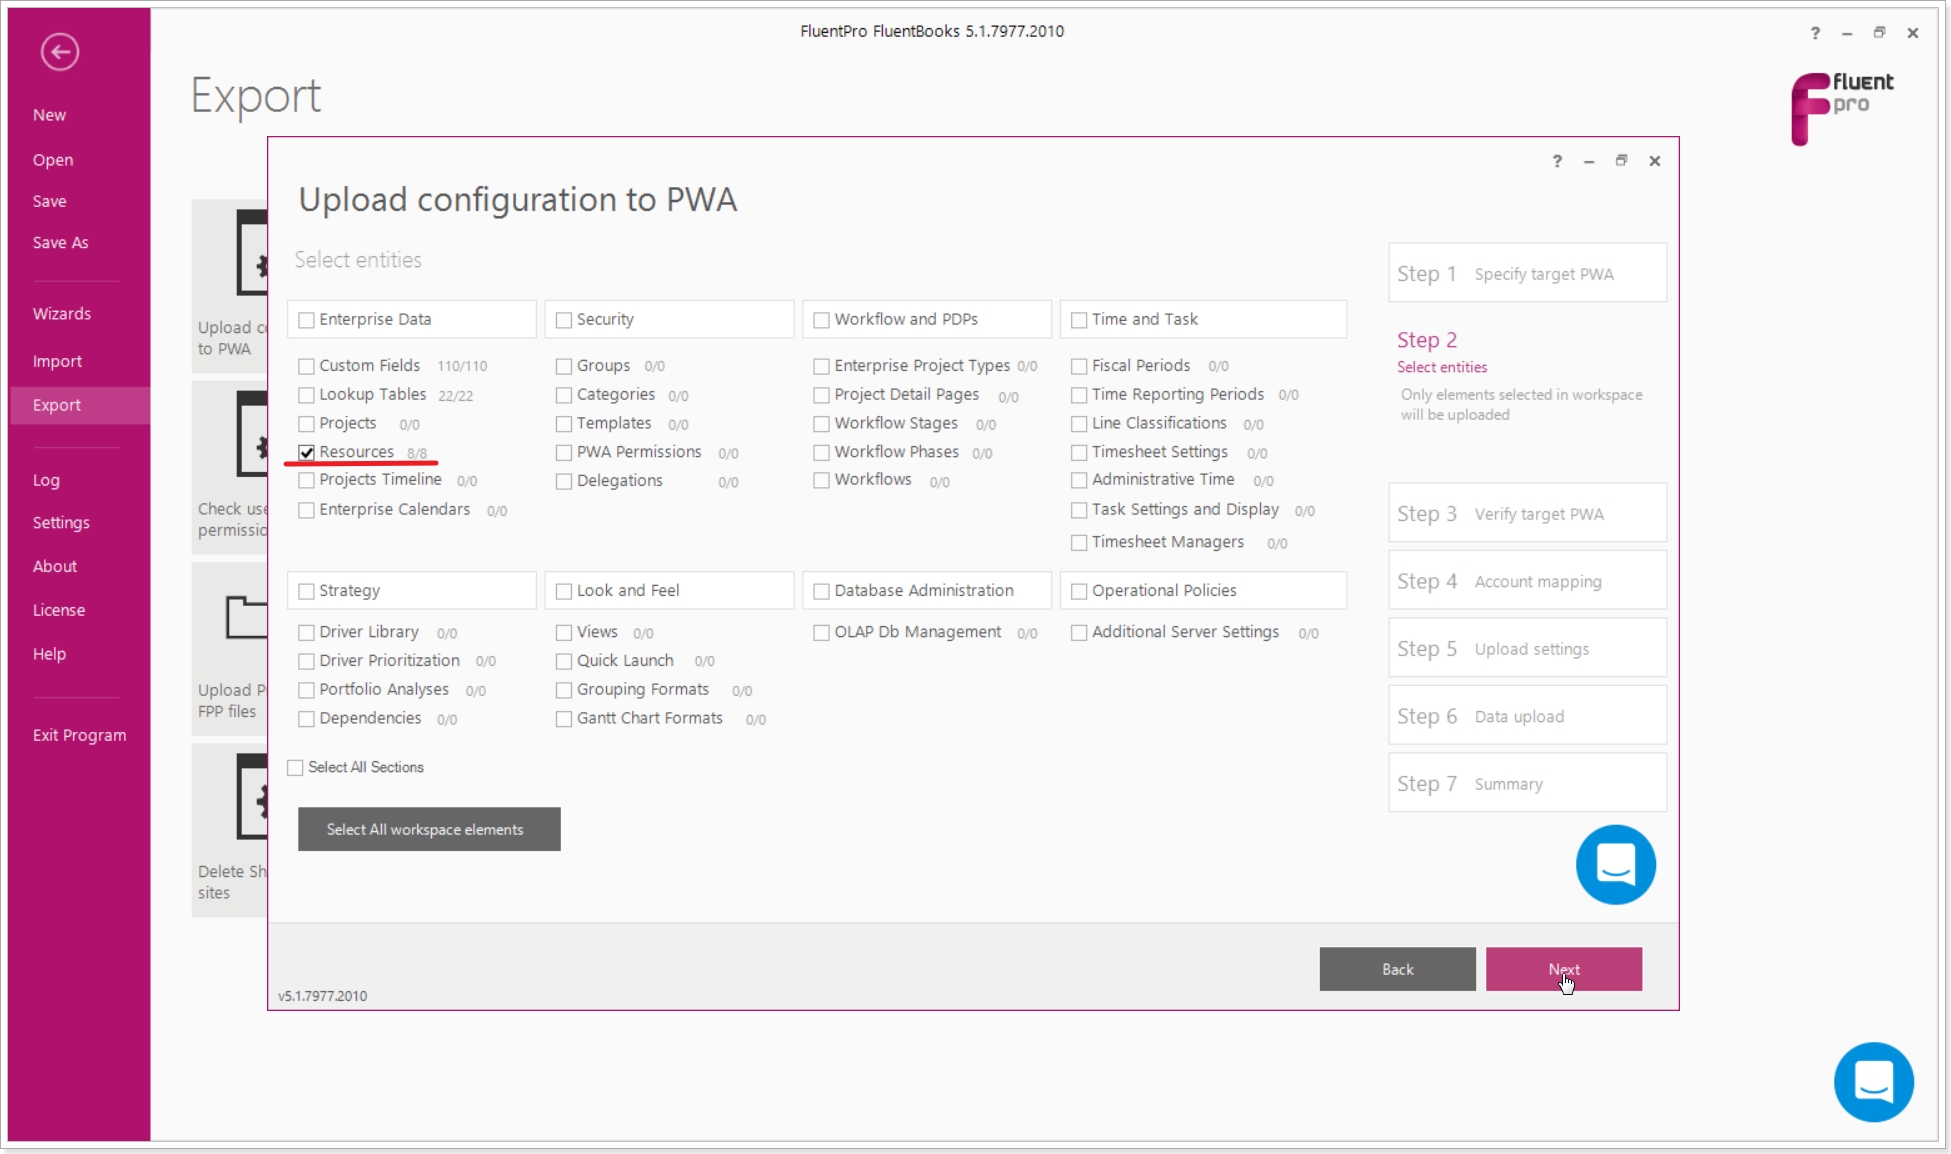
1. Go to File >> select the Export page and then the ‘Upload configuration to PWA’ wizard.
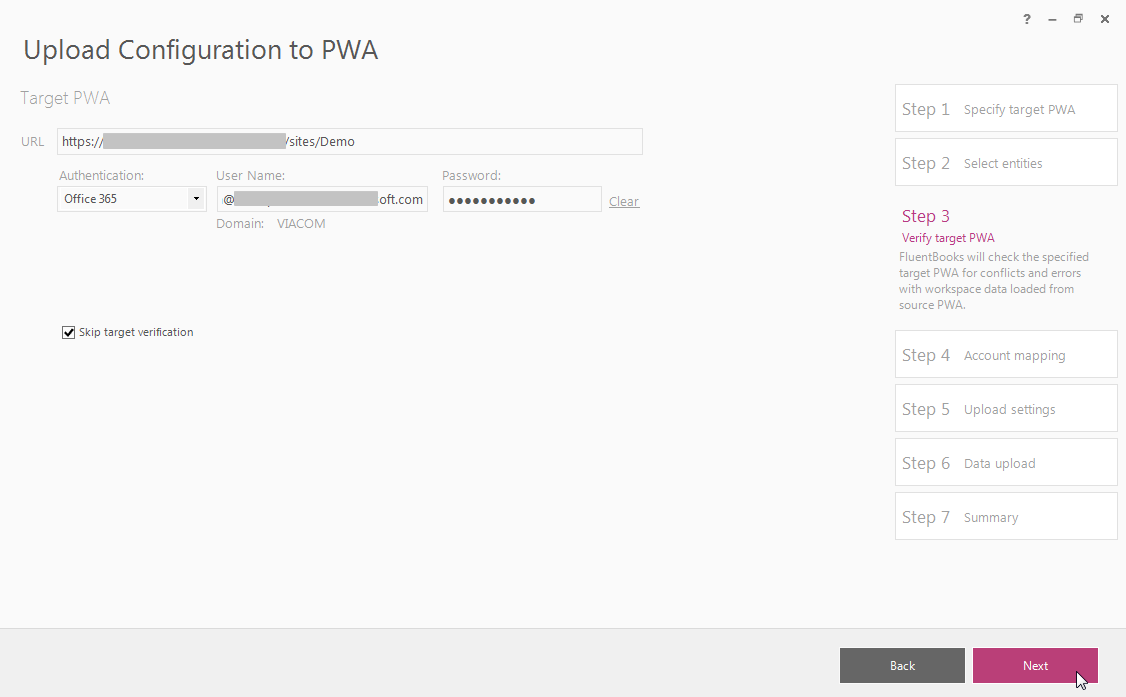
2. Provide the Project Online instance URL, login credentials, and click Next to proceed.
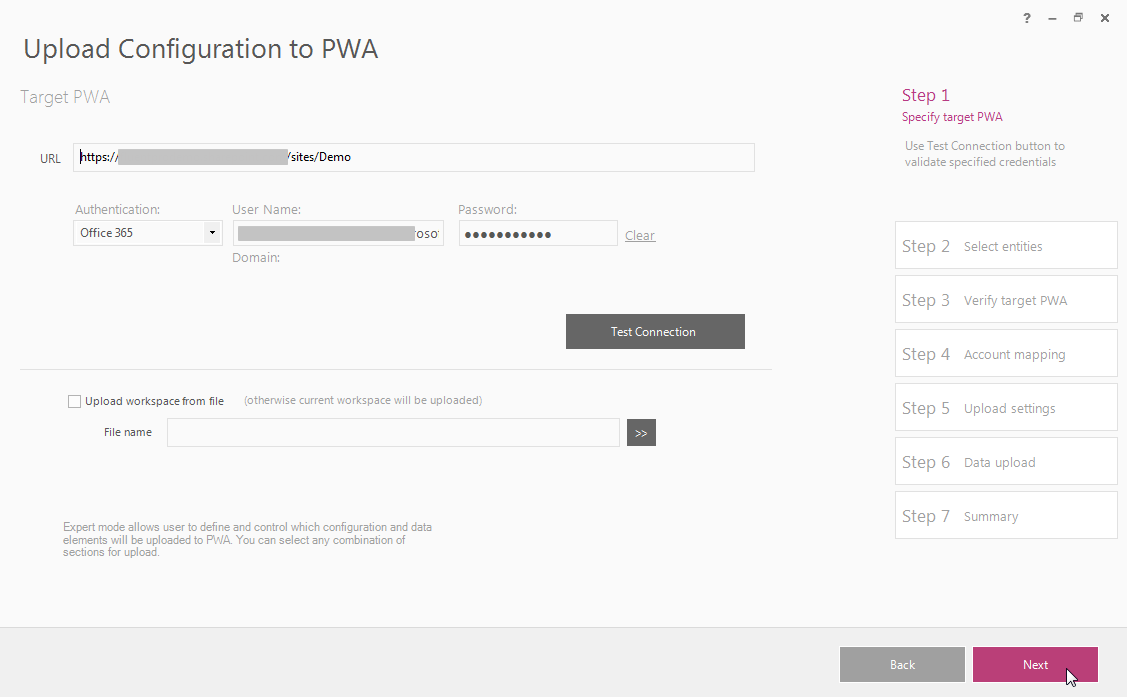
3. Select entities to be uploaded - Resources and click 'Next'. Please note that only selected entities will be uploaded.
4. Make sure that the correct PWA URL and login credentials are displayed and click Next to proceed.
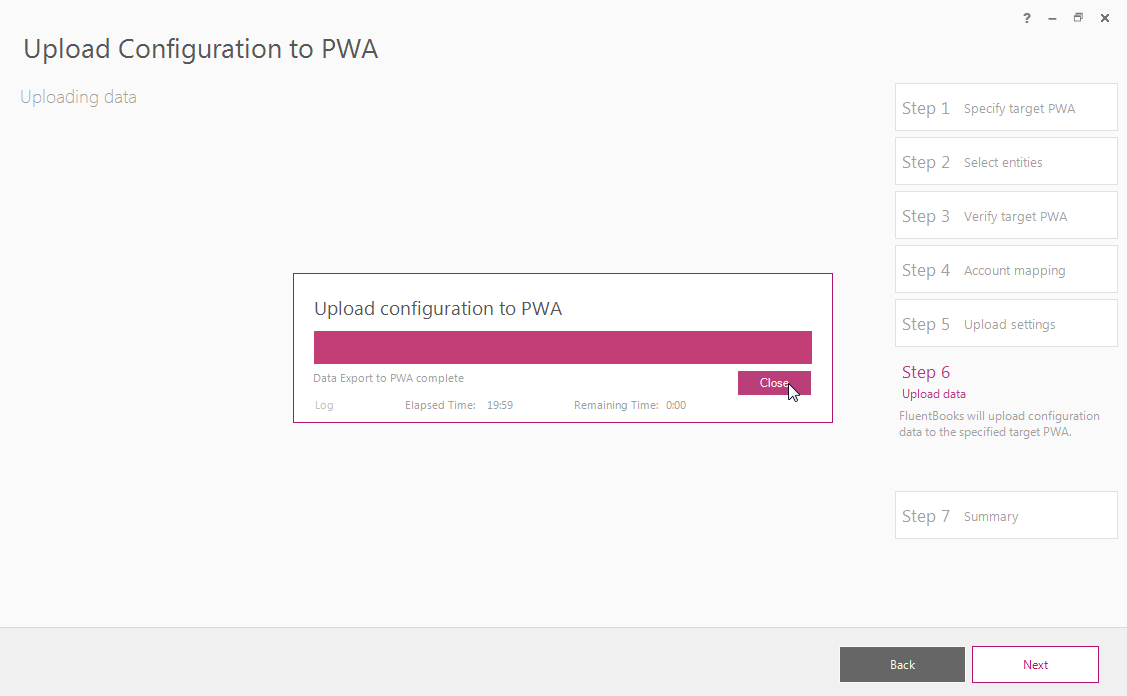
5. Review the upload settings. But rest assured all the necessary settings are turned ON by default.
Click Next to proceed.

6. Allow the wizard some time to upload the resources.
7. Upload Summary page will show the results of the upload.
Click Finish to close the wizard.
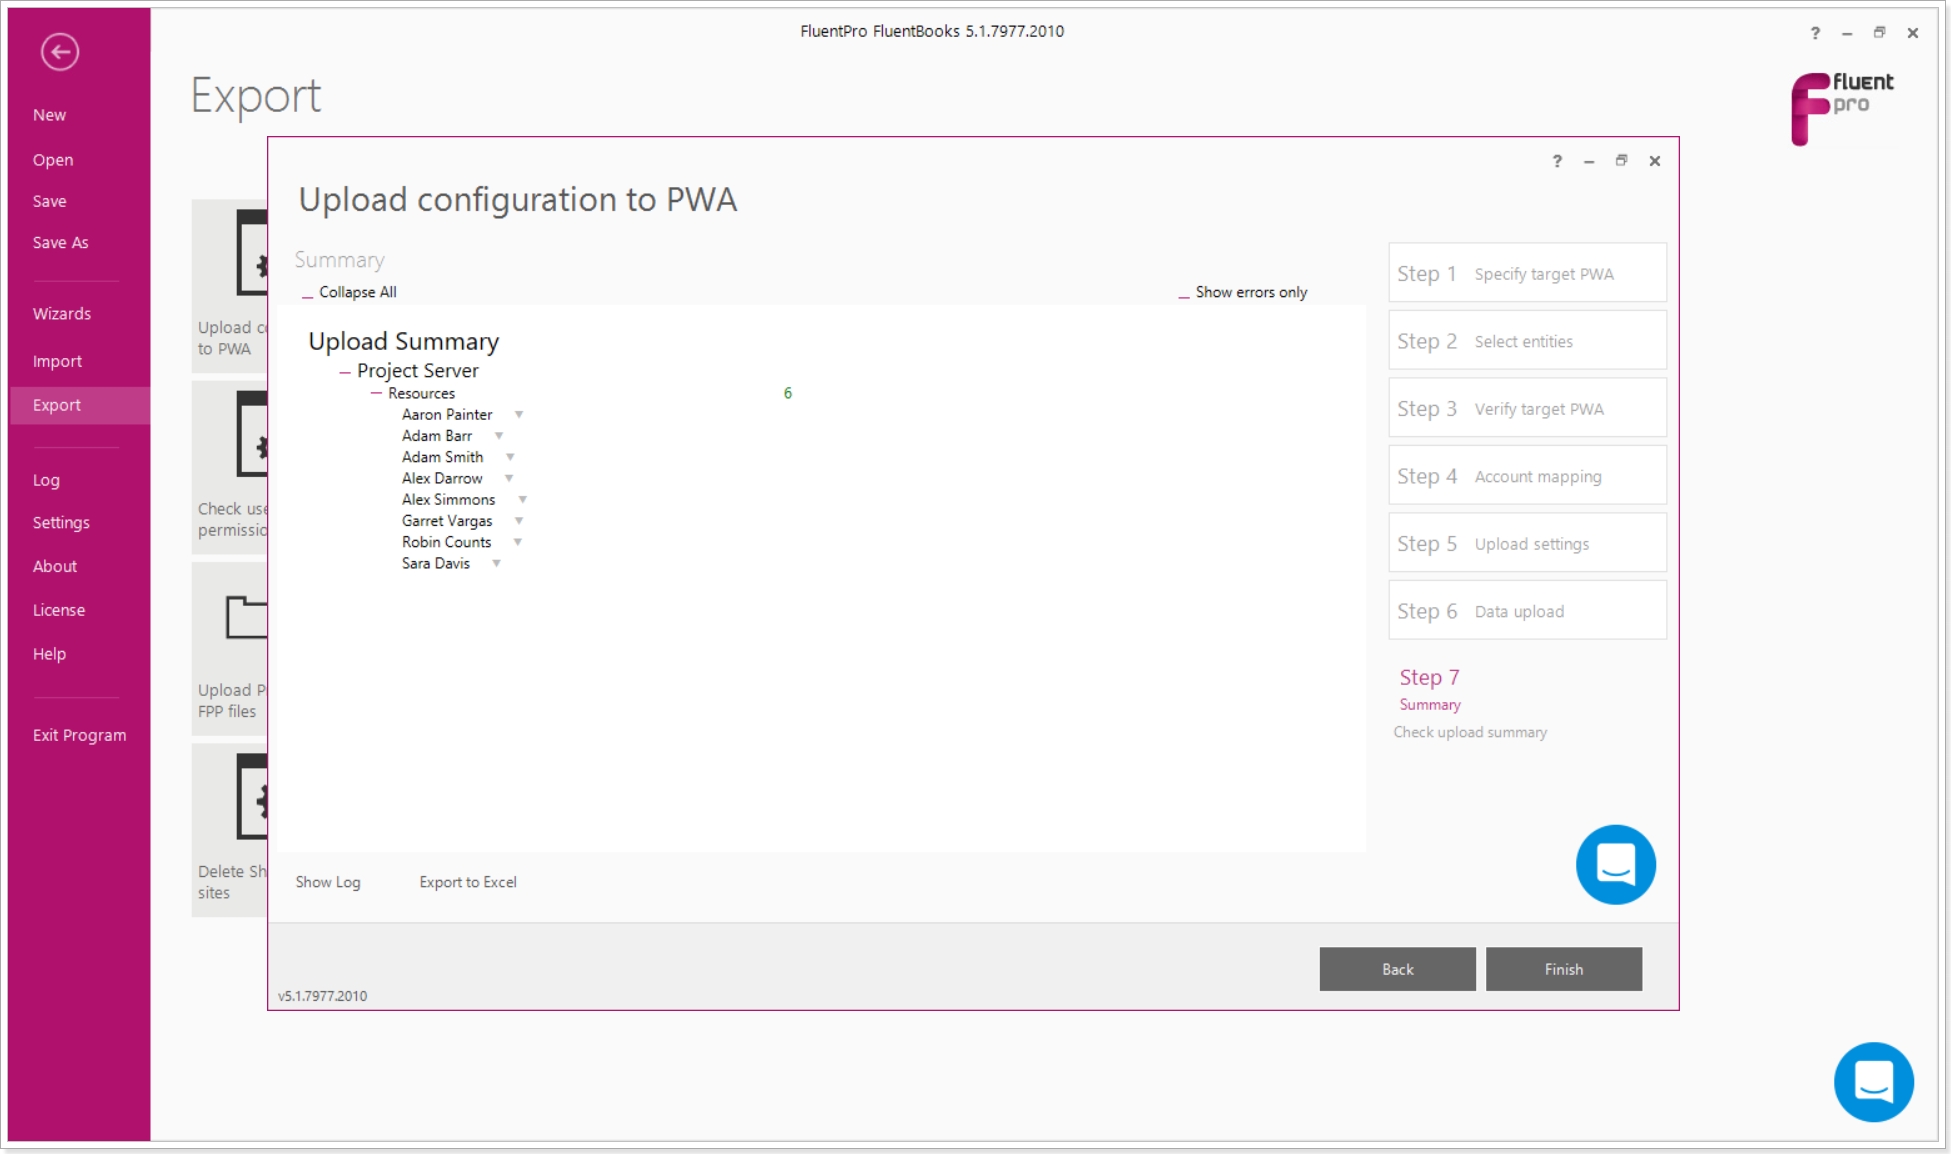
The new resources are now created in your Project Online.
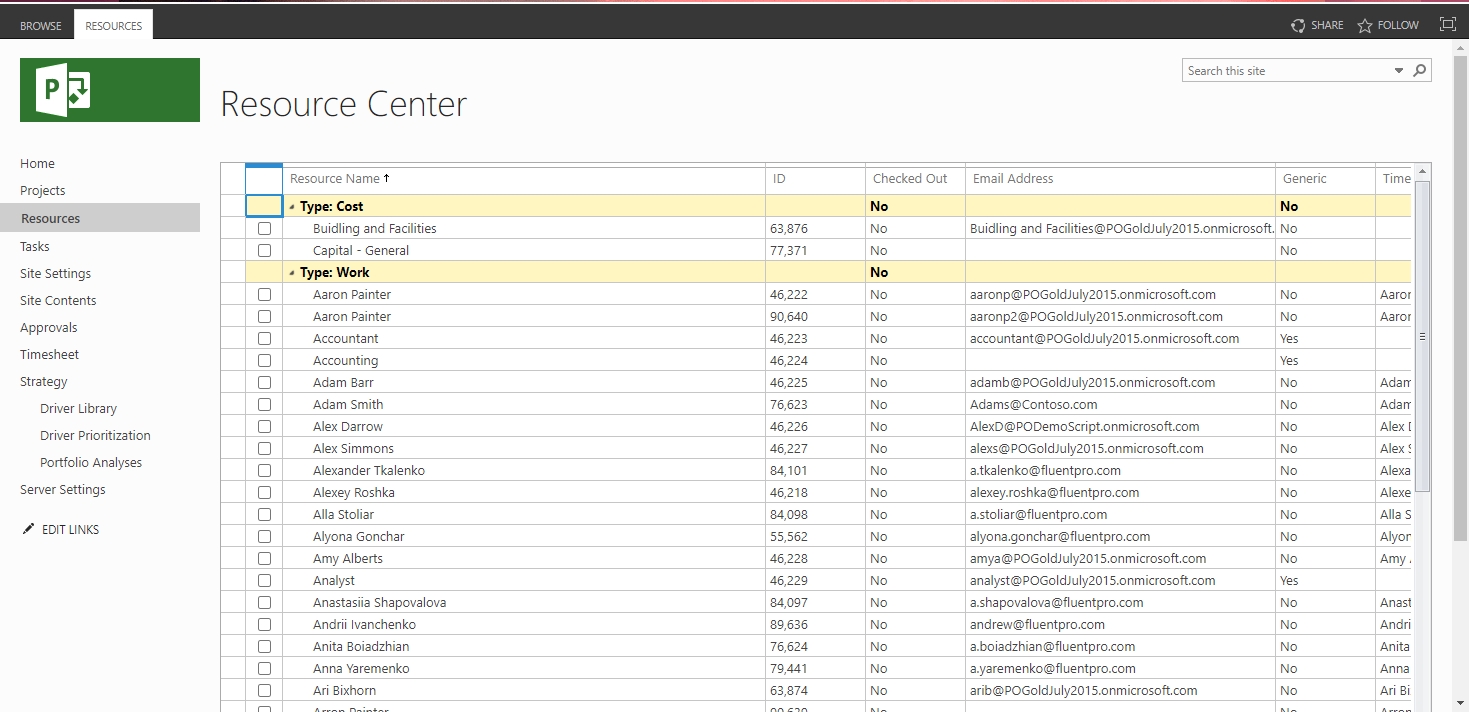
Navigate to the Resource Center and check if all of them are there. Don't forget - if you need to further update the resources you can use the Resources Bulk Edit wizard for that!