
FluentBooks can help a user to update one/multiple SharePoint Sites on a specified target PWA with the following elements that exist in SharePoint Site on a source PWA:
- Add a new column to the Risks and/or Issues List.
- Add a new List.
- Add a new document to Document Library.
This article describes how Download SharePoint Sites and Bulk Upload SharePoint Site wizards can be used in order to perform a bulk update of SharePoint Sites in all three scenarios.
STEP 1 - Download SharePoint Site from the PWA
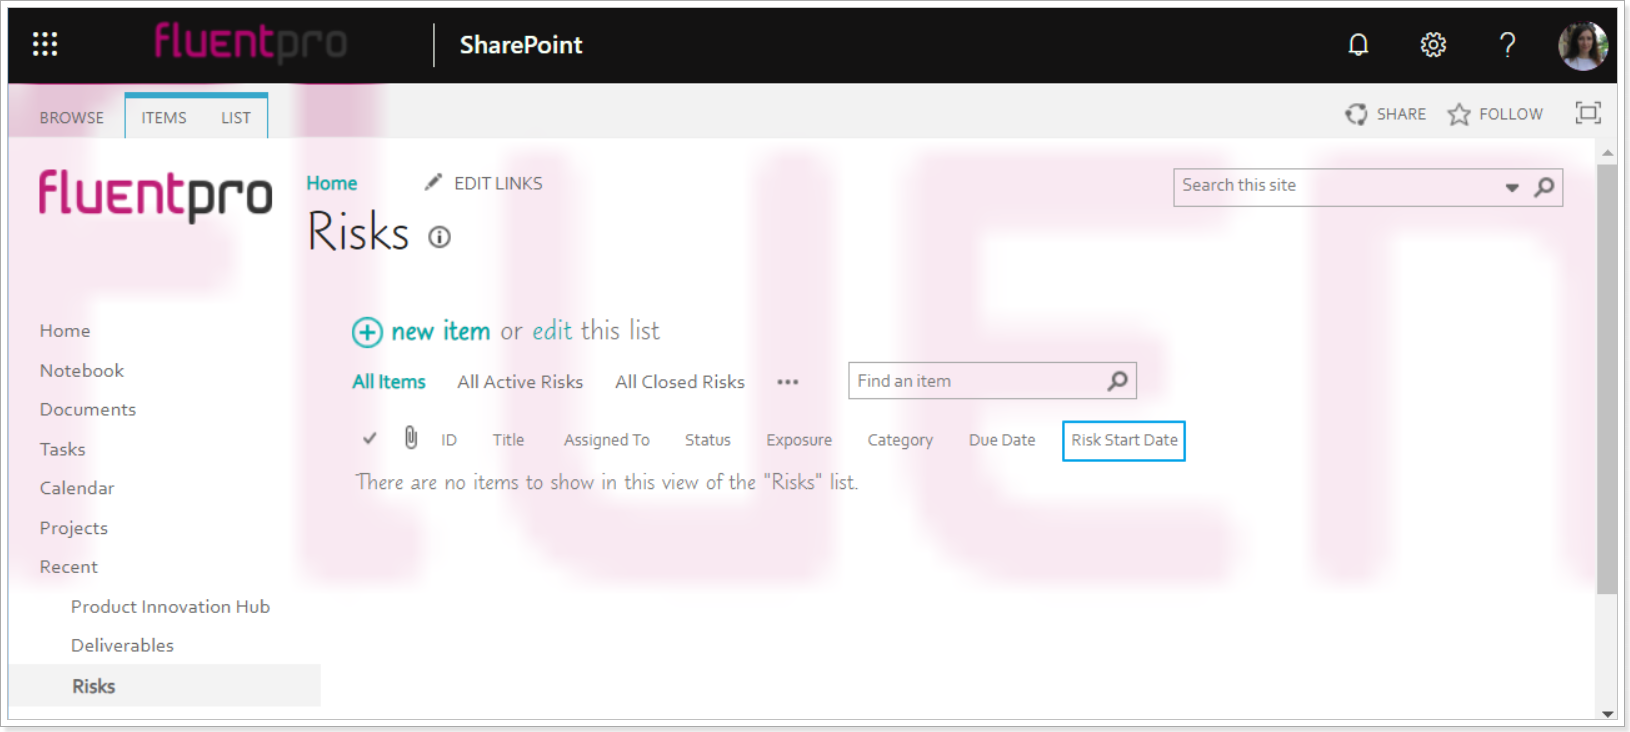
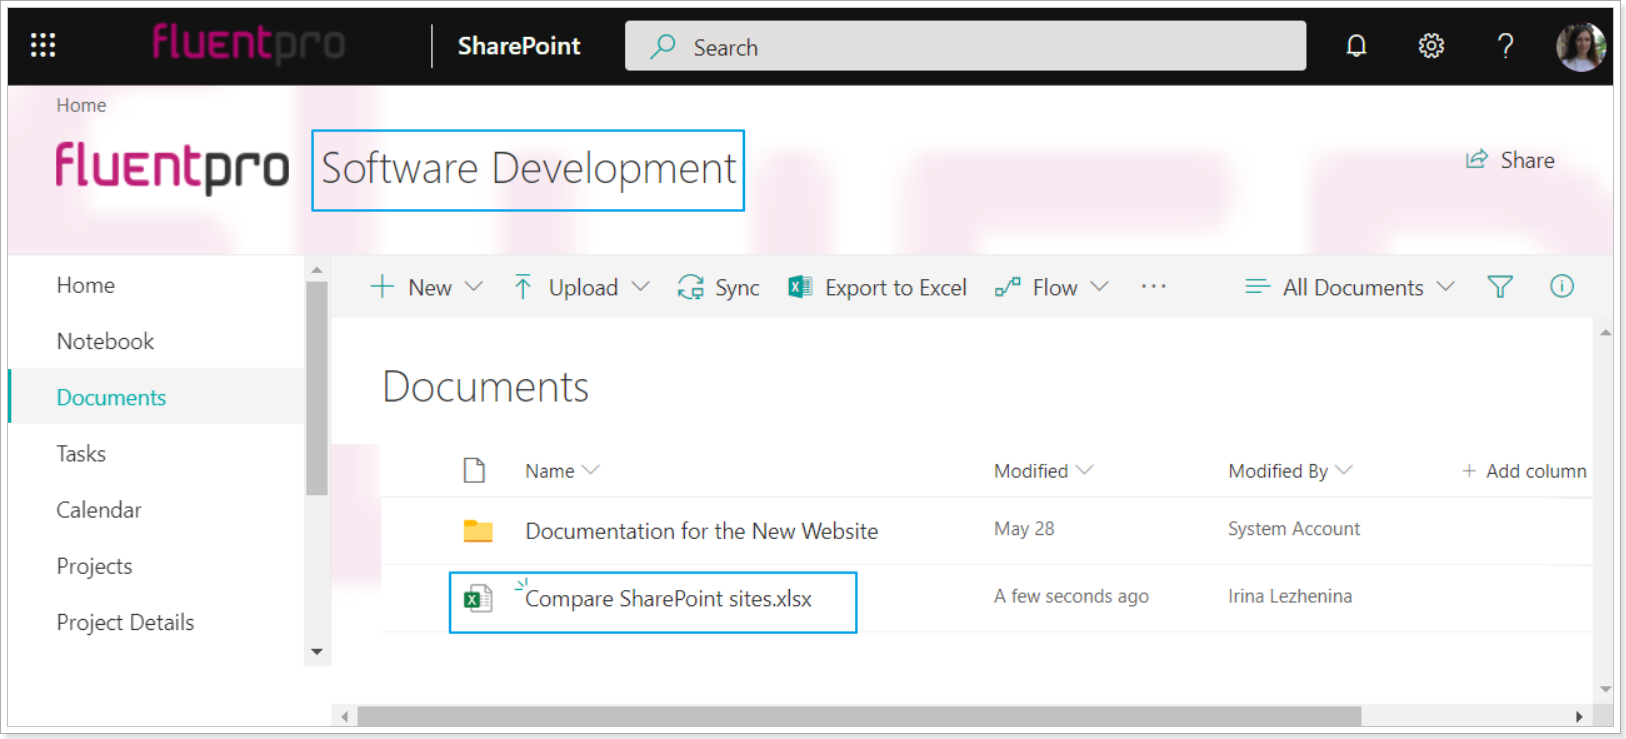
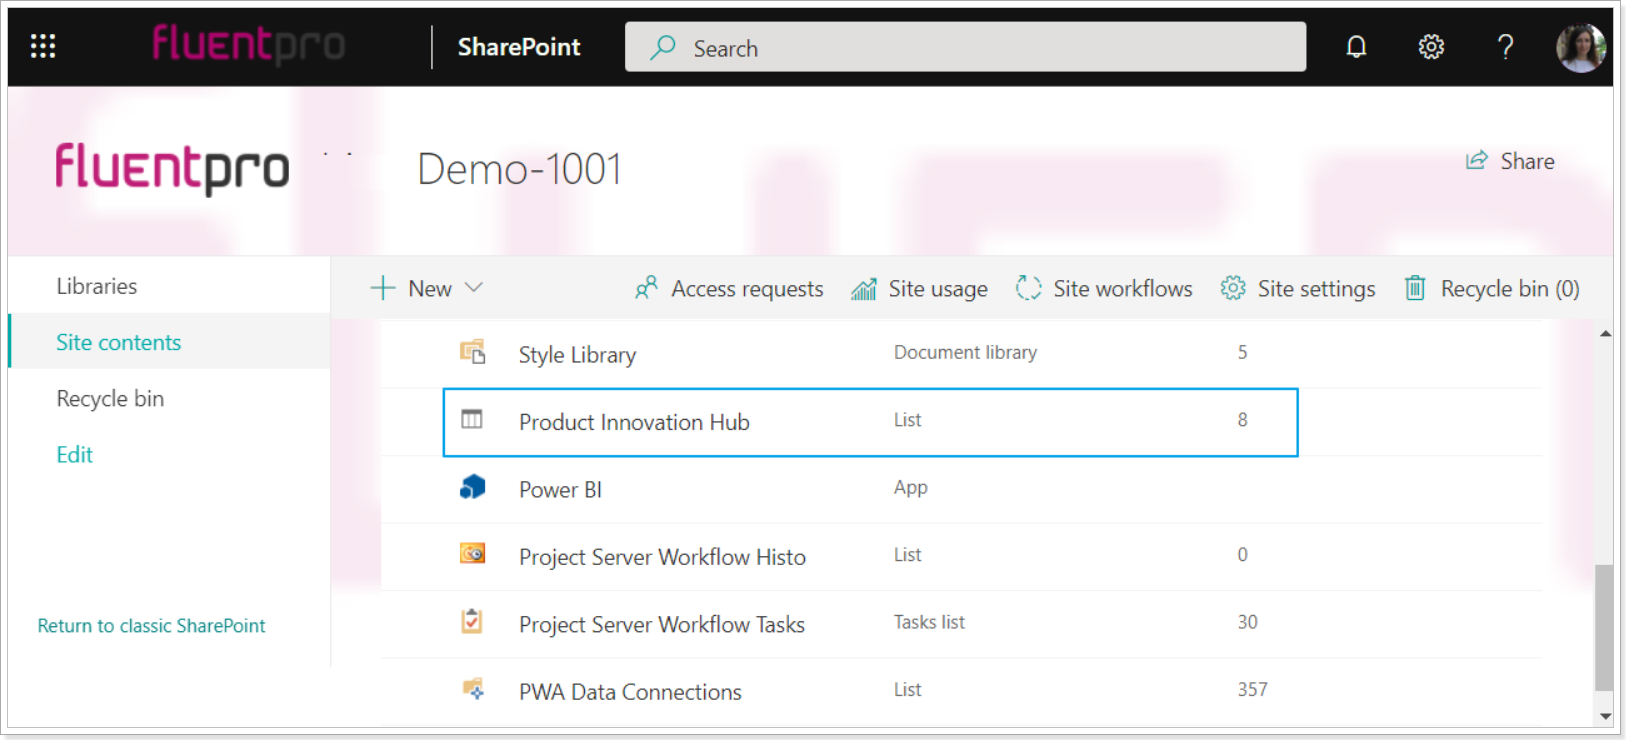
For example, on the source PWA there is a ‘Software Development’ SharePoint Site that has the following custom elements:
1) New column ‘Risk Start Date’ added to Risks list.
2) Compare SharePoint Sites.xlsx document added to Document Library.
New List "Product Innovation Hub' was added to the Root PWA Site.
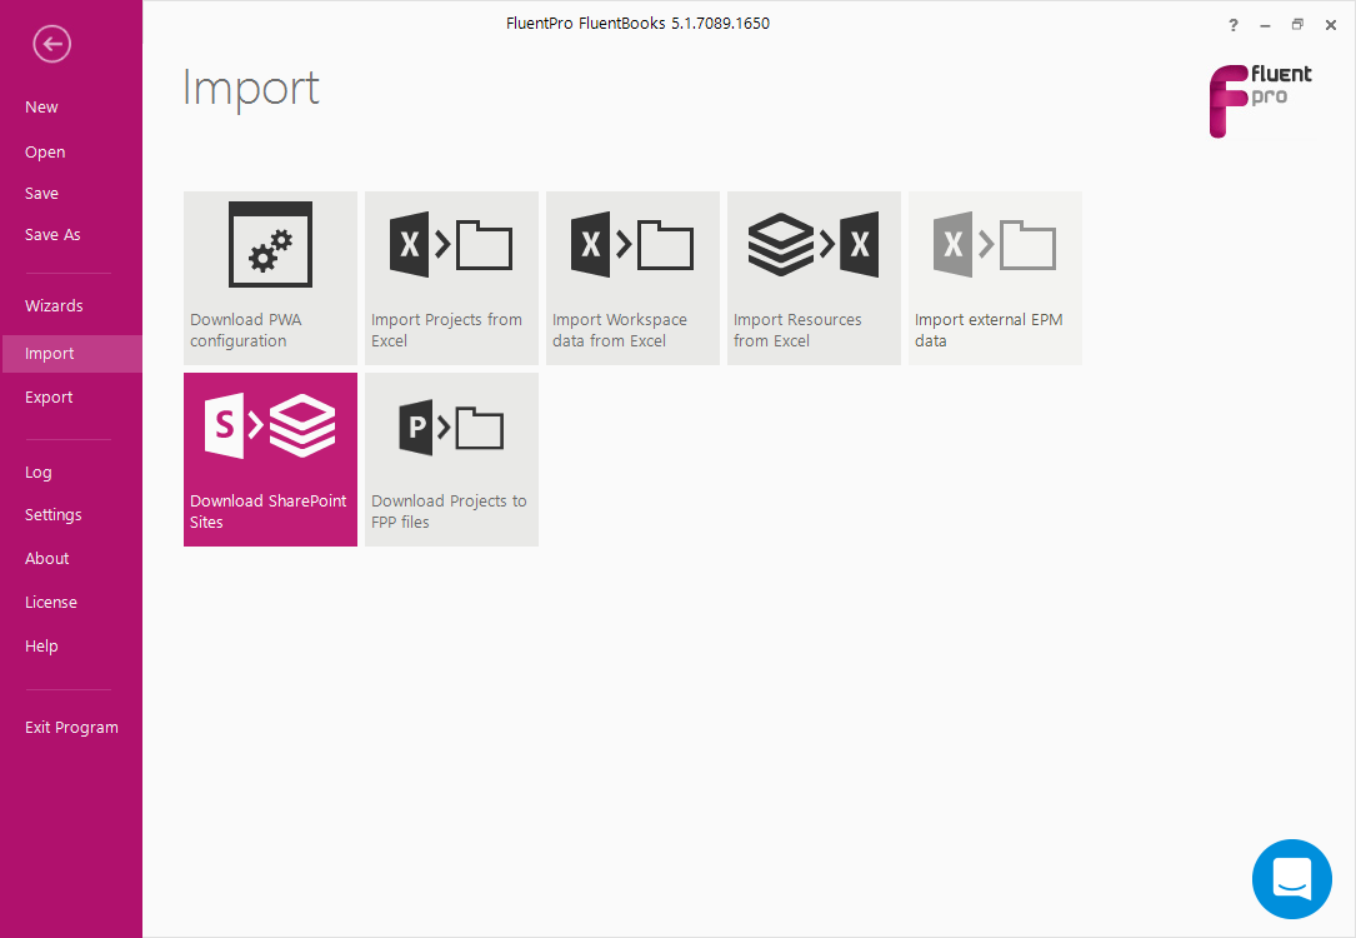
The first step of the bulk update of SharePoint Sites is to import the SharePoint site from the source PWA.
1) Run FluentBooks, select the Import option from the File menu, and then ‘Download SharePoint Sites’ wizard.
2) Specify the Root Site URL of the source PWA, login credentials and click Next to load the sites list.
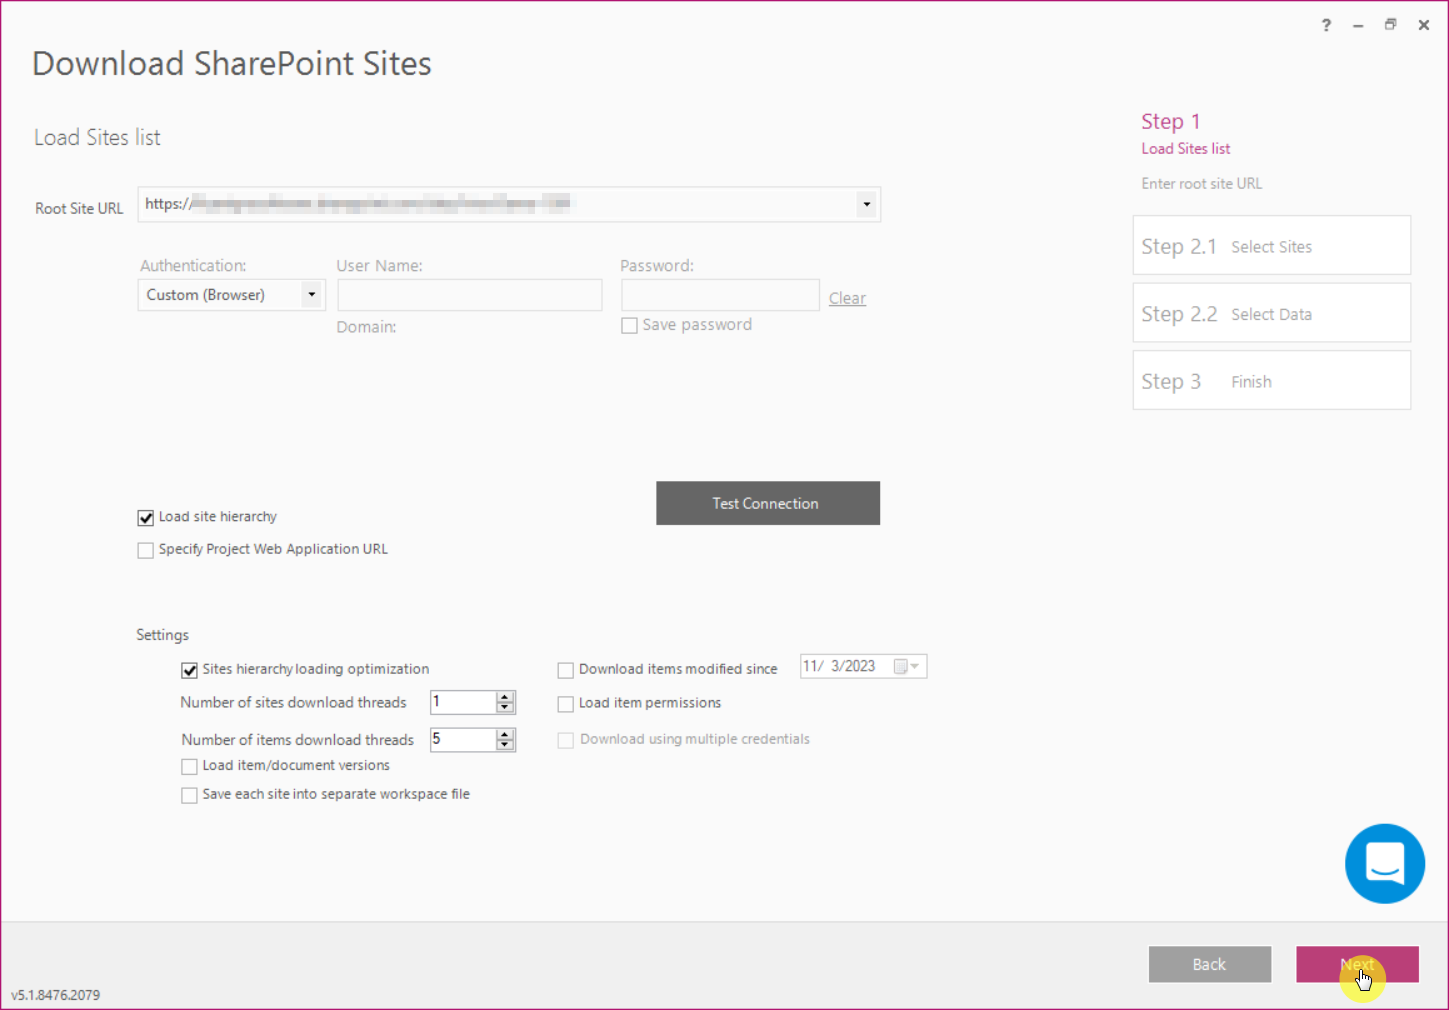
Please note: Make sure, that the Root Site URL is provided, not the URL of the SharePoint Site with the content that will be used to update the SharePoint Sites on the target PWA.
The user account that is used by FluentBooks when migrating SharePoint content should have Site Collection Administrator rights.
If the user account does not have Site Collection Administrator rights, then FluentBooks will not be able to create a new Site. The existing Site might be updated successfully, but it is strongly recommended to use a user account with Site Collection Administrator rights to avoid unexpected issues.
3) After the site hierarchy is loaded select the SharePoint sites to be downloaded by checking their checkboxes.
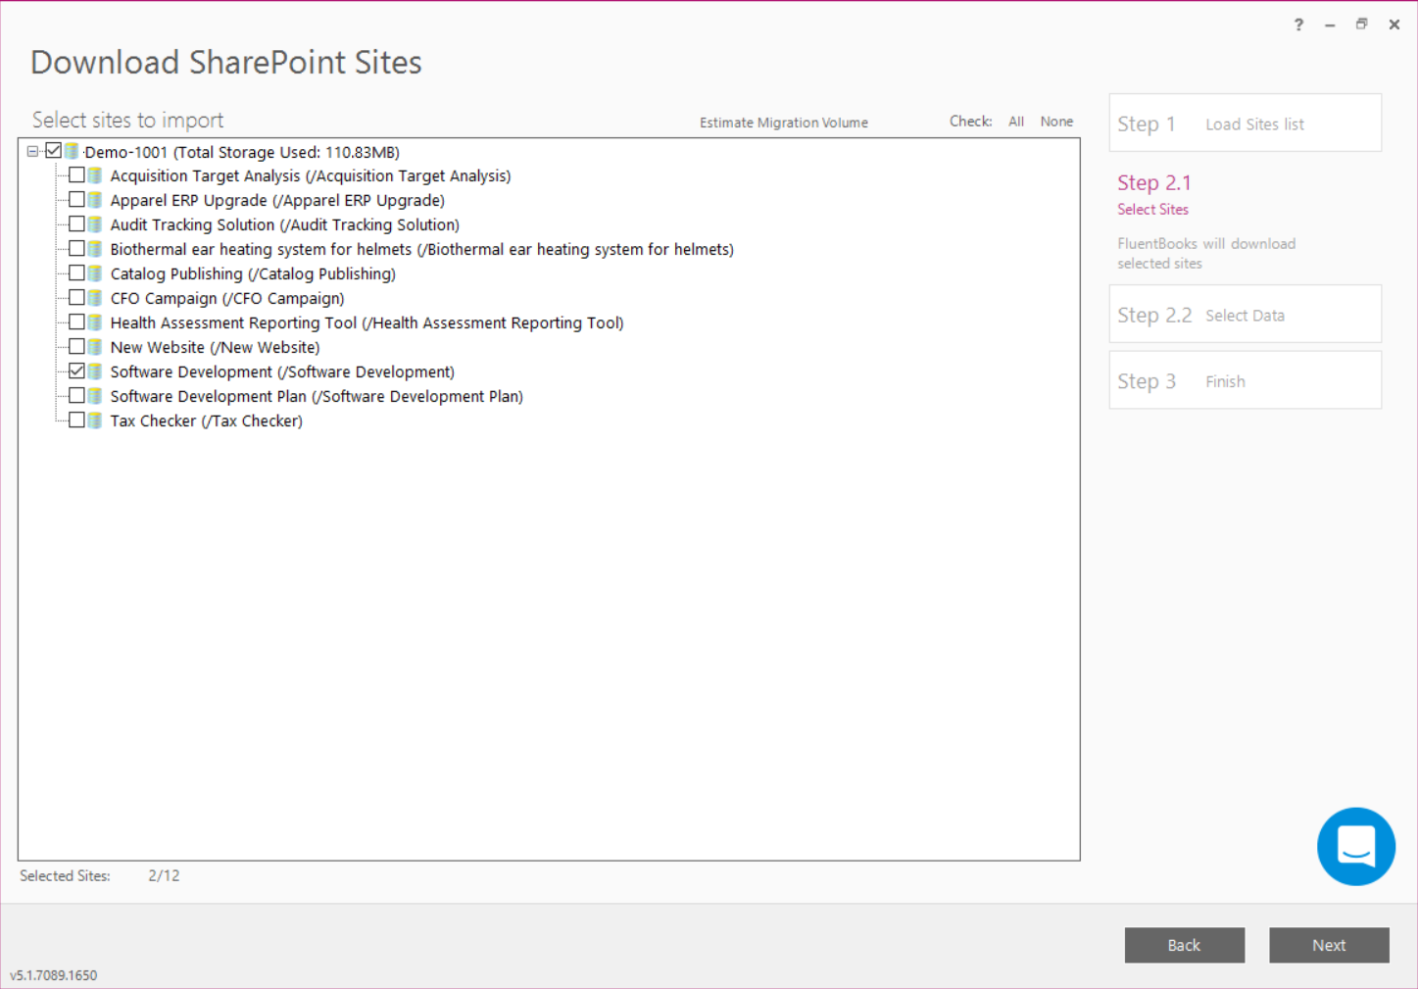
Click Next to proceed.
4) Select the SharePoint Site data to be imported from the source PWA.
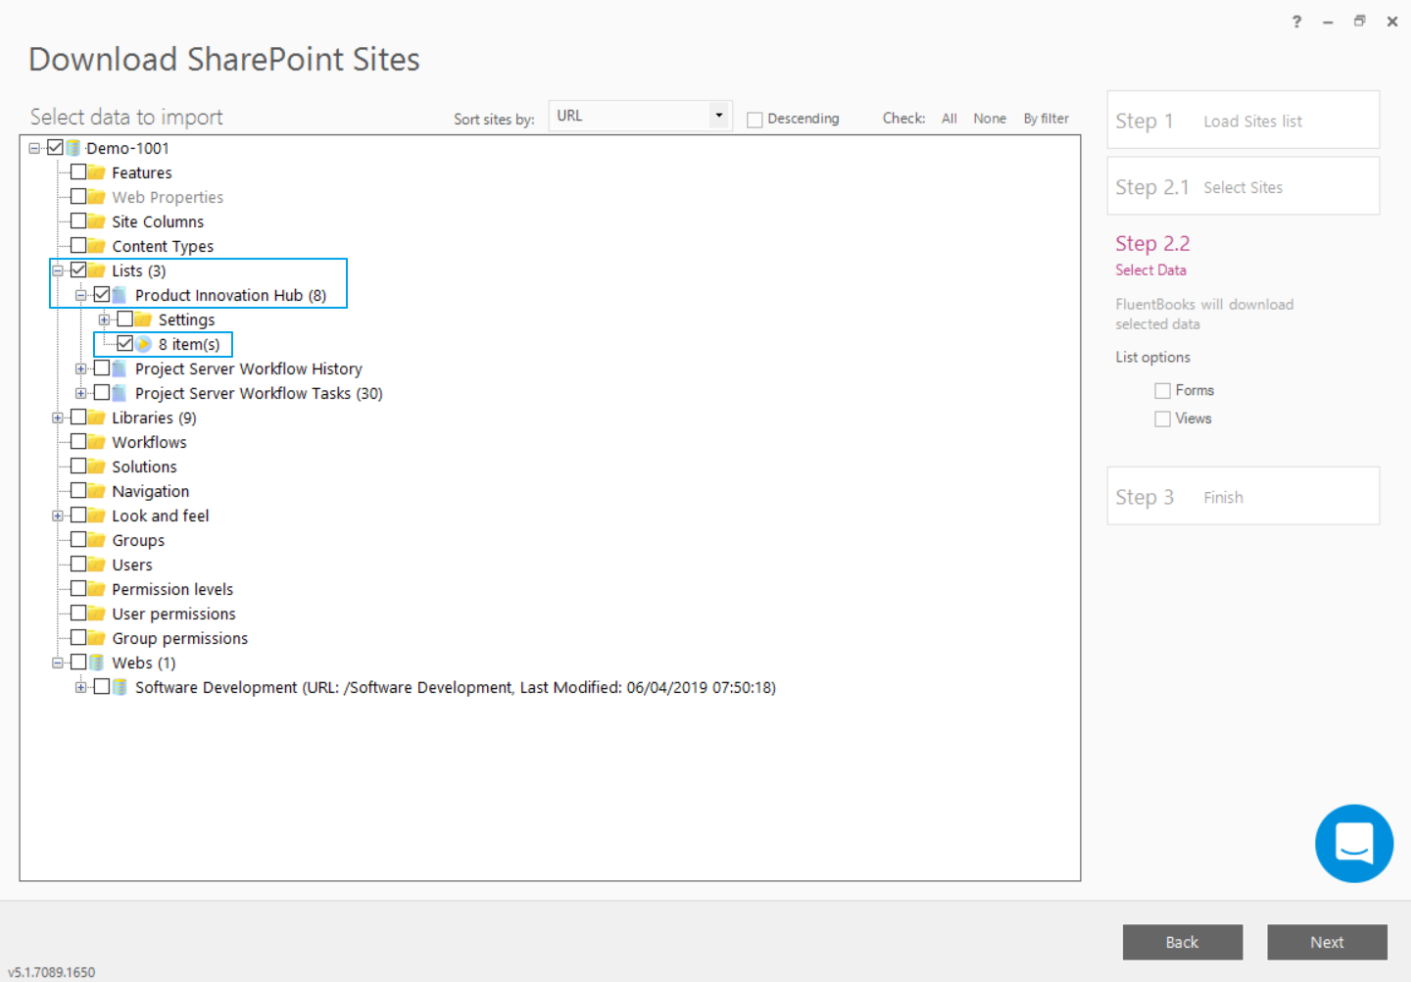
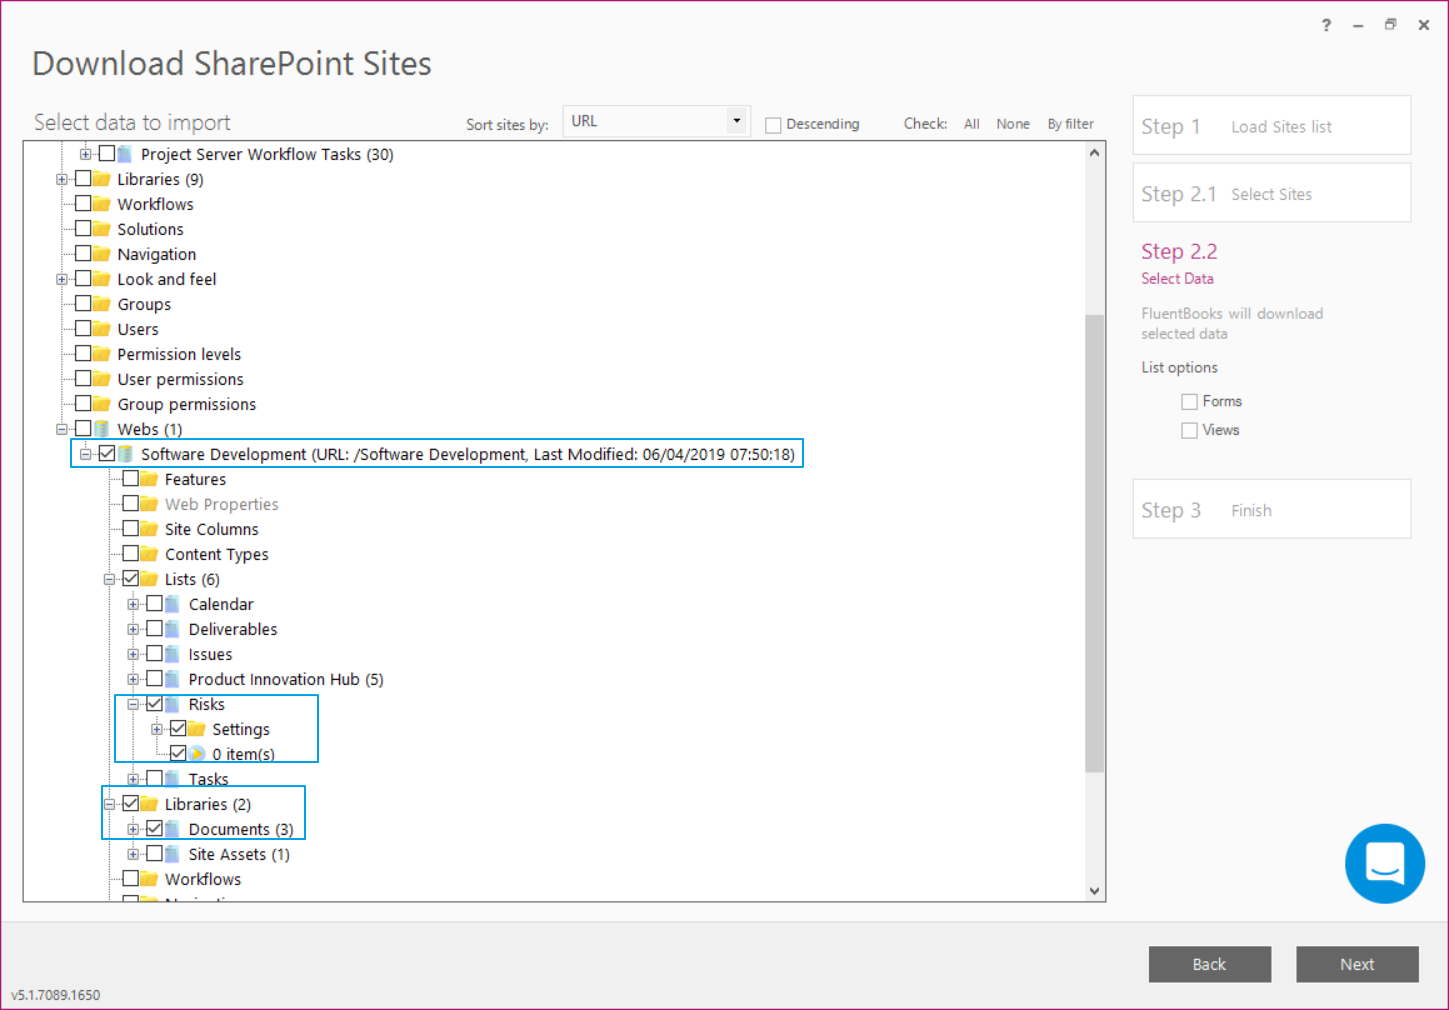
Click Next to start the loading process.
Please note: To load Lists and their columns ‘<List Title>’ (e.g. Issues or Risks) and ‘Settings’ should to be selected (‘Lists’ will be selected automatically). To load library documents 'Libraries', 'Documents' and ‘1 document(s)’ should be selected.
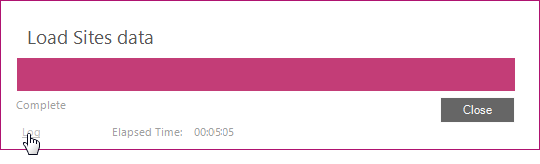
Review the log file for the errors after the Sites data load is completed by clicking the Log link. Then click Close to close this window.
5) The Summary displayed after the load process is finished will show the SharePoint Sites that were loaded from the source PWA.
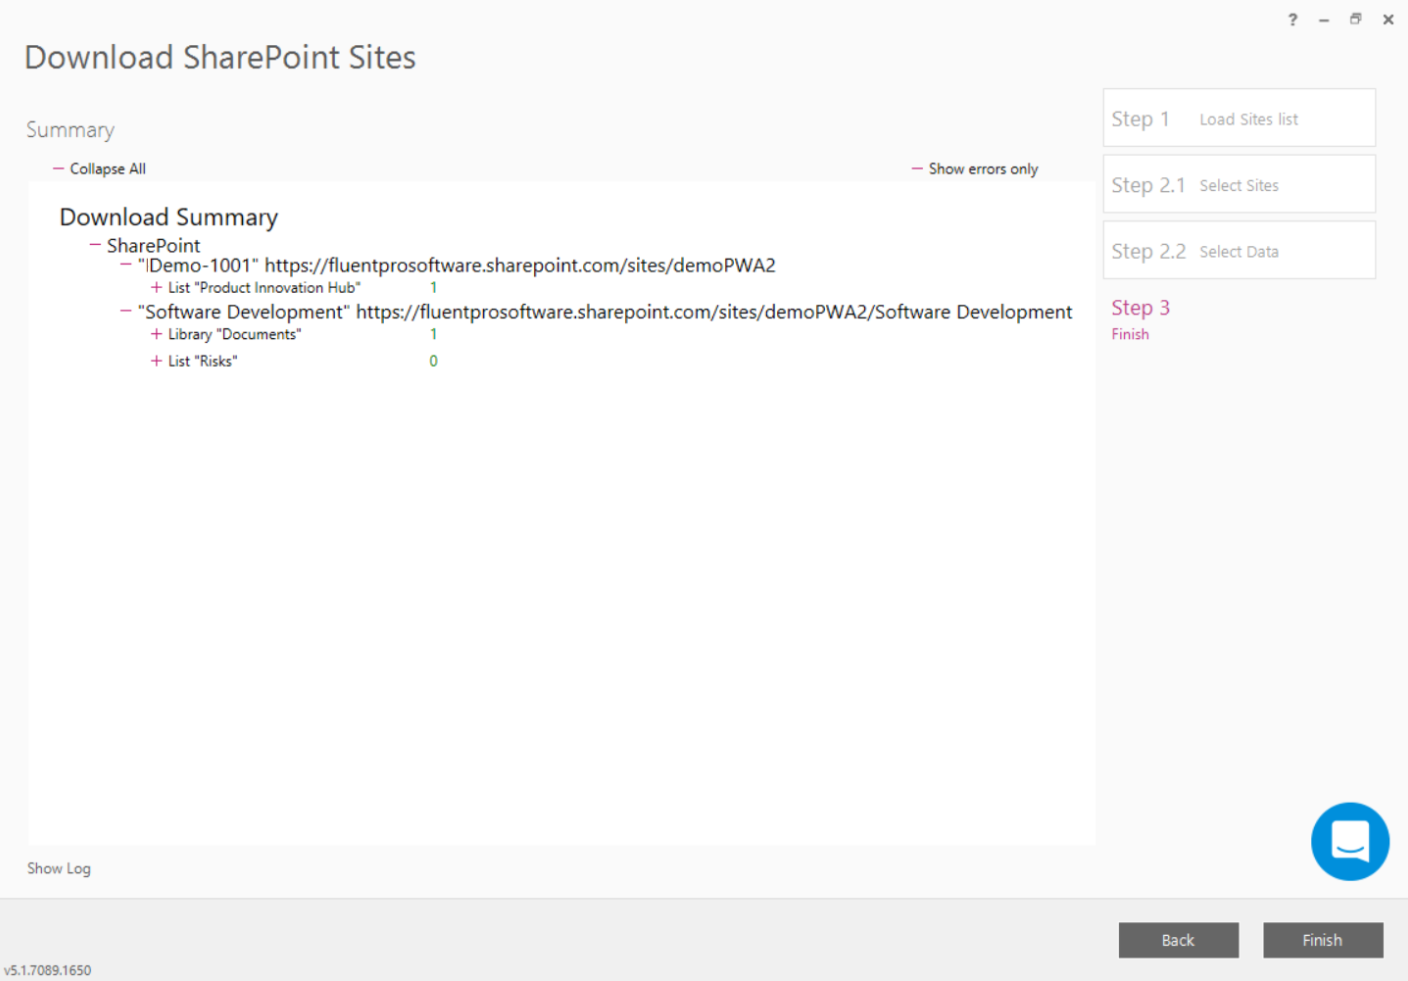
Click Finish to complete this step.
STEP 2 - Select Sites Items for Upload
As the required sites were downloaded and saved in the workspace, the workspace will be opened and the sites and their particular items can be selected for the bulk upload.
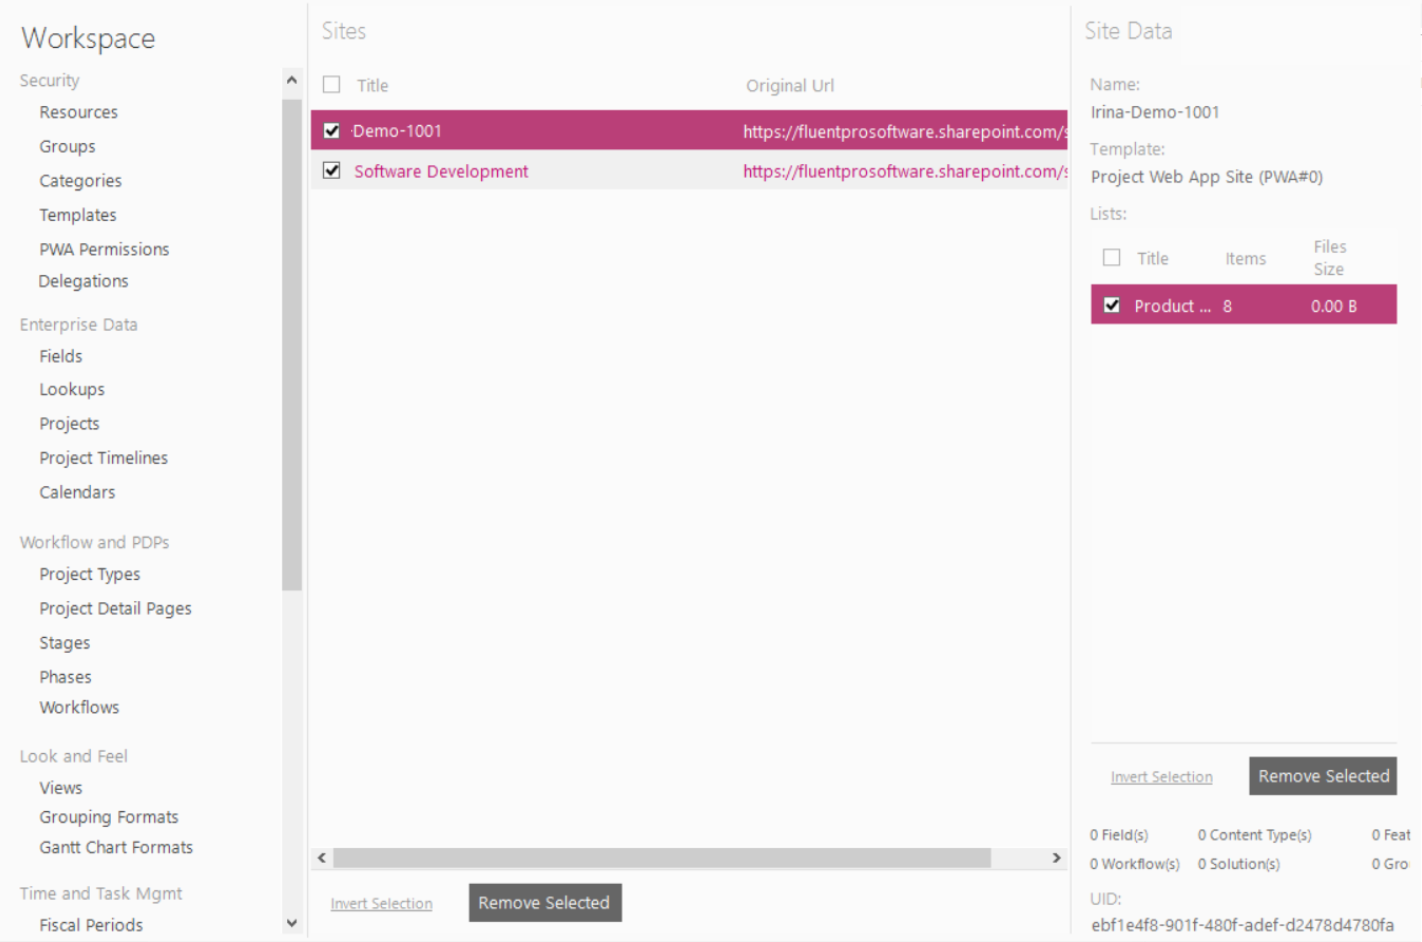
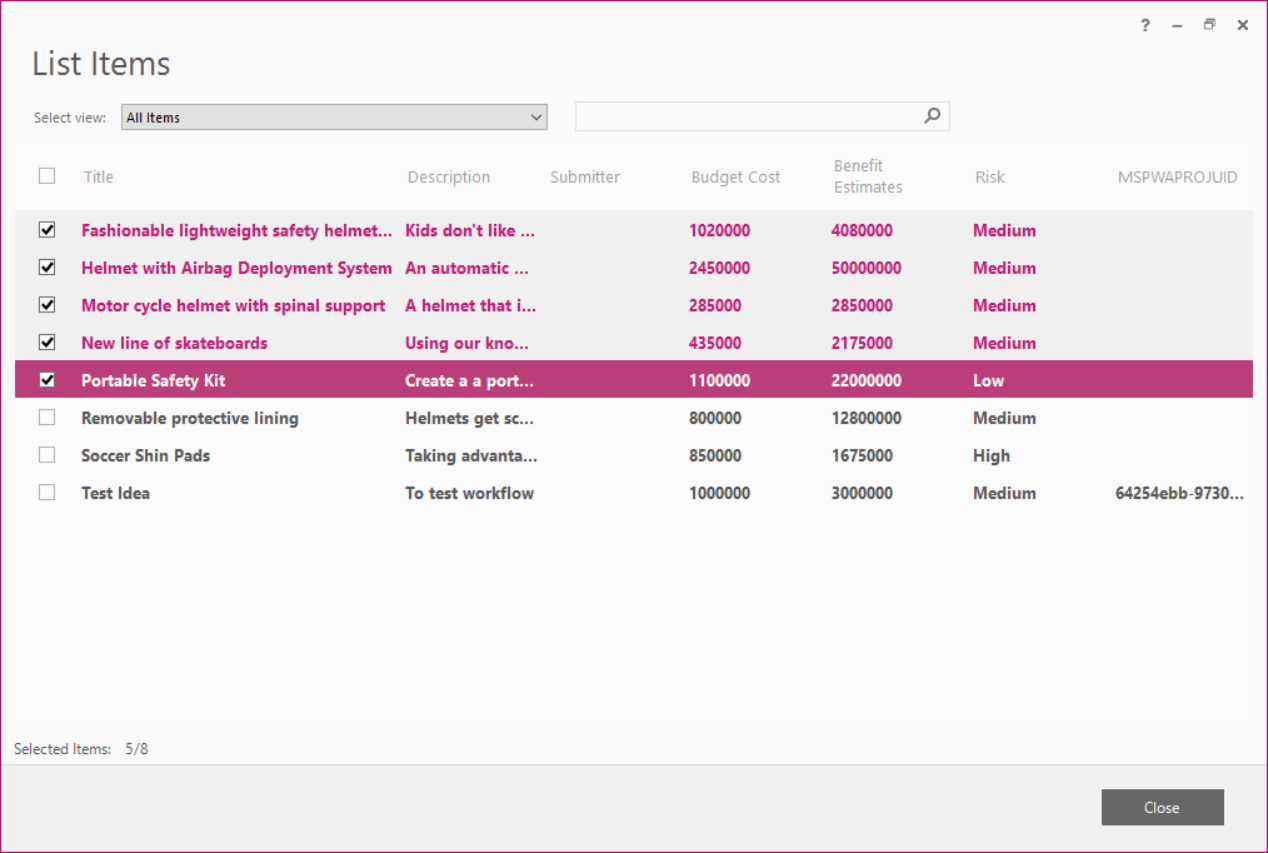
Please note: If you select the required site and double-click on the list on the right, a window will be opened where you can select what items exactly you would like to populate to multiple sites on your PWA.
The items in the List Items window can be sorted by any field (Risk filed on the example below)
Please note: list items can be selected not only from the workspace but during the upload process, from FluentBooks Bulk update SharePoint Sites wizard directly.
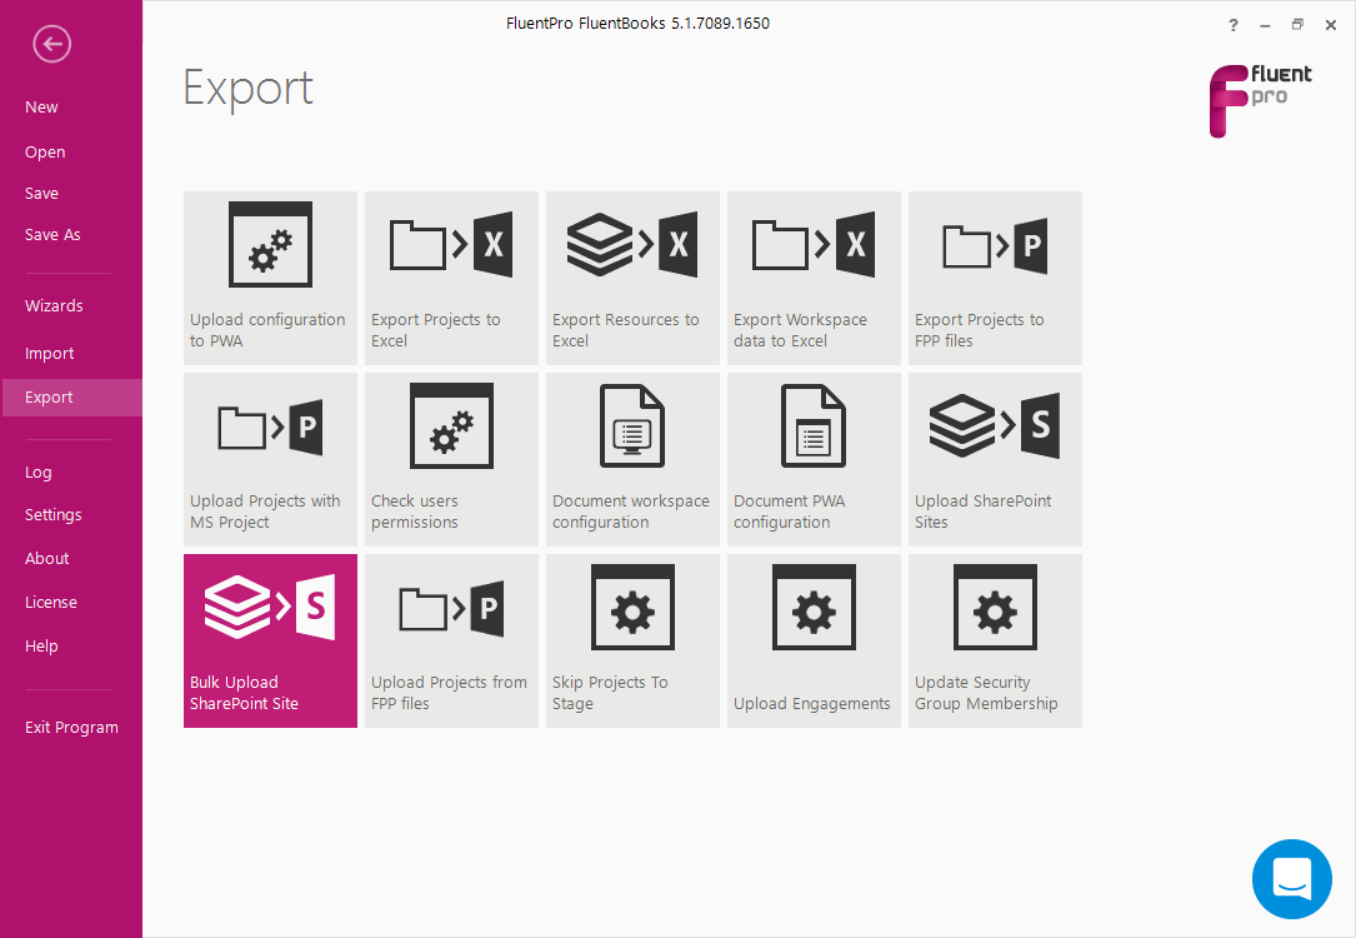
Step 3 - Bulk Upload site Items
As you are ready to select site list items the next step will be to upload these items to multiple sites on the PWA.
1) Open the Export option from the File menu and then Bulk Upload SharePoint Sites wizard.
2) Specify the Root Site URL of the PWA where you would like to upload the selected site items. Provide login credentials and click Next to load the sites list.
The user account that is used by FluentBooks when migrating SharePoint content should have Site Collection Administrator rights.
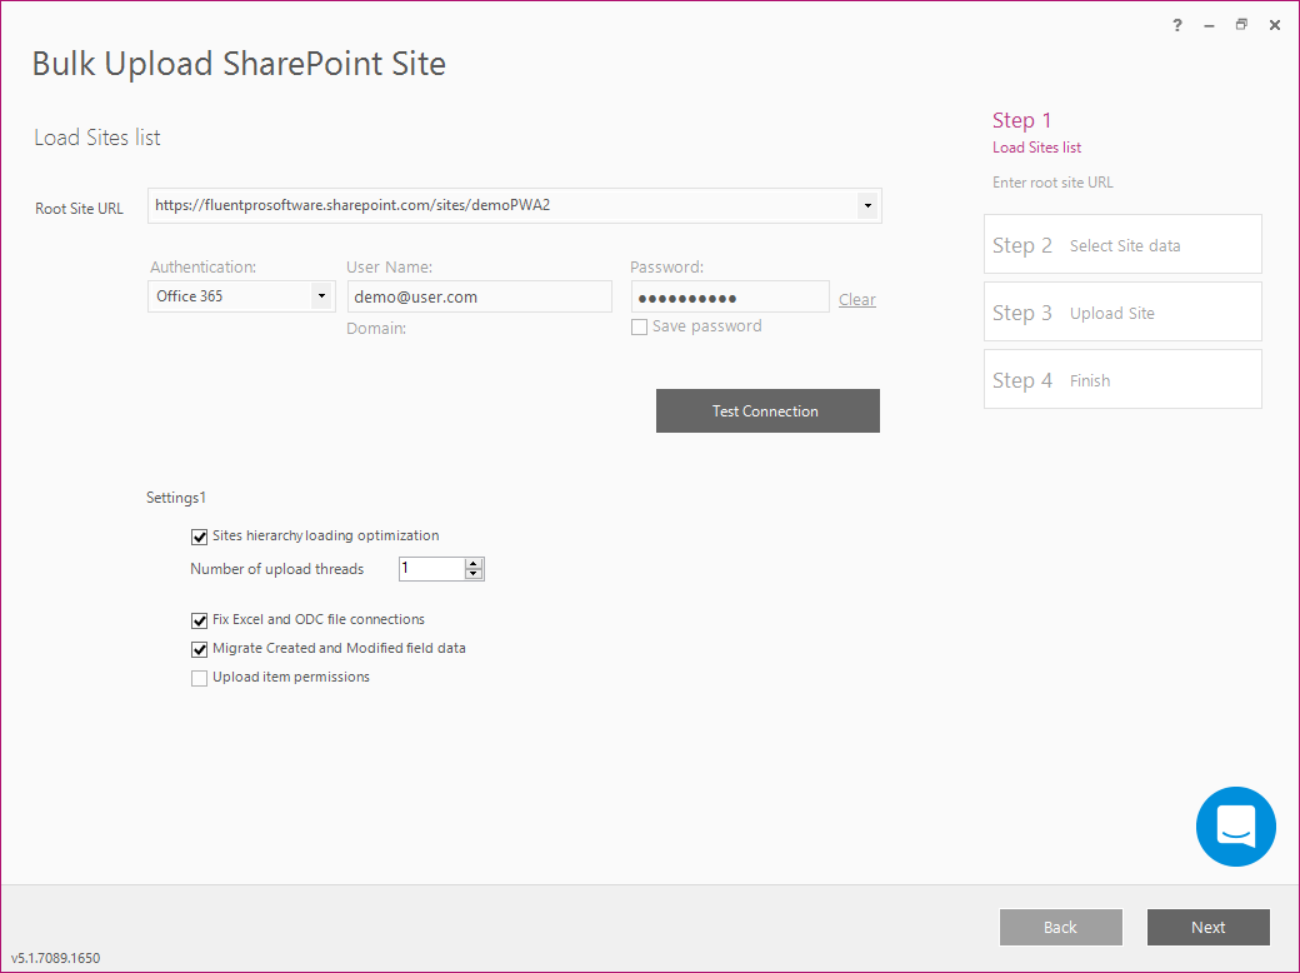
Site hierarchy loading optimization - check this checkbox to optimize the loading of sites hierarchy, this setting allows to create multiple download threads to speed up the process.
In case your target migration direction is Project Online, it is recommended to upload SharePoint sites in one or maximum in two threads. And if you select 2 upload threads, it will be necessary to monitor the upload process and review the log file in order to track if everything is being migrated successfully.
If the sites upload to the Project Online instance is done in more than 2 threads with the same migration account, it may cause throttling, jobs queue, and other unexpected results.
If you have a great number of sites to migrate and would like to speed up the upload process, we may suggest the following approach:
1) Download the sites to separate workspace files dividing them in batches.
2) Then, upload each site batch using two FluentBooks instances installed on separate machines. It is required to use different migration accounts for the parallel sites upload in this way. You are welcome to find more information about running FluentBooks on several machines at the same time in the article.
Fix Excel and ODC file connections - check this checkbox to process Excel Reports and ODC files during import and to update Data Source URLs from the source PWA URL to the target PWA URL;
Migrate created and Modified field data - check this checkbox to migrate the values of the “Created” and “Modified” fields.
Upload item permissions - check this checkbox to upload the permission of the selected items.
3) Select site items that need to be populated to multiple sites on the provided PWA.
Please note: List items can be selected on this step if they were not selected in the workspace. Just double-click on the items, List items window will be opened for selection.
If some of the selected elements exist on the target sites already, FluentBooks will export only missing elements and will update the existing ones with the new information. Nothing will be deleted.
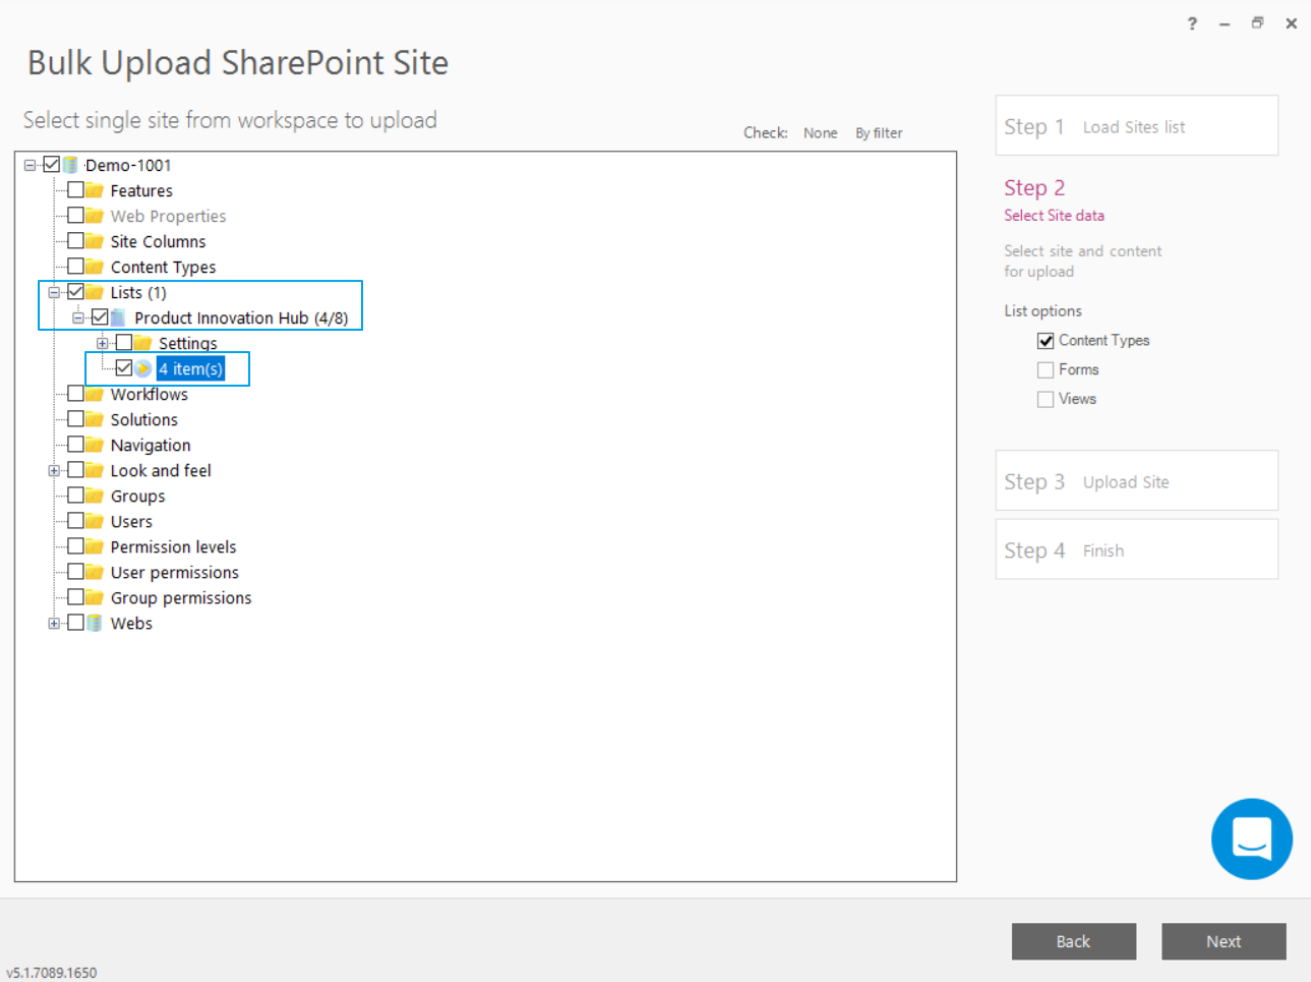
Select only the items you need to populate to other sites.
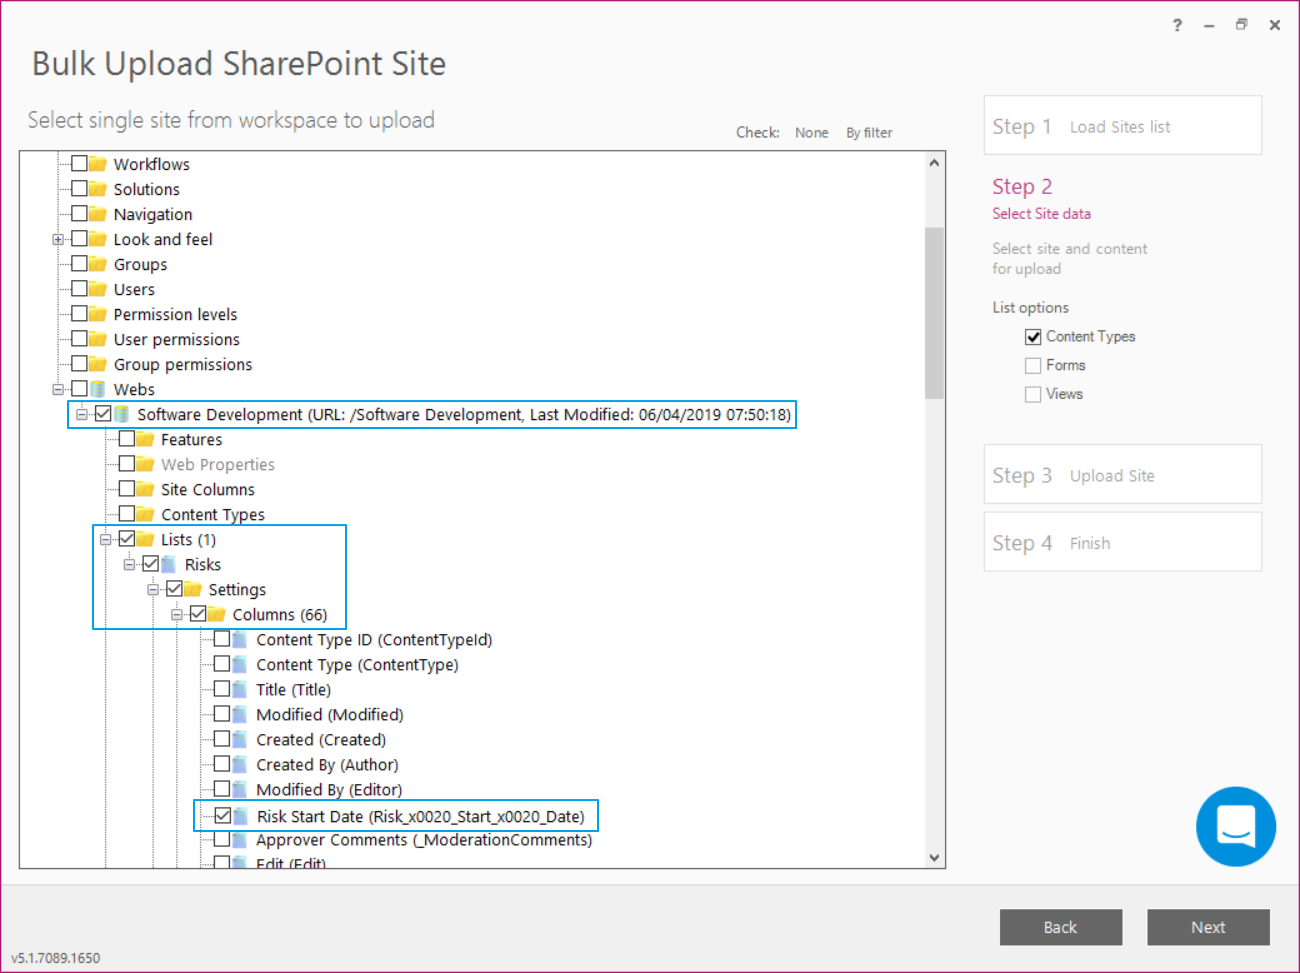
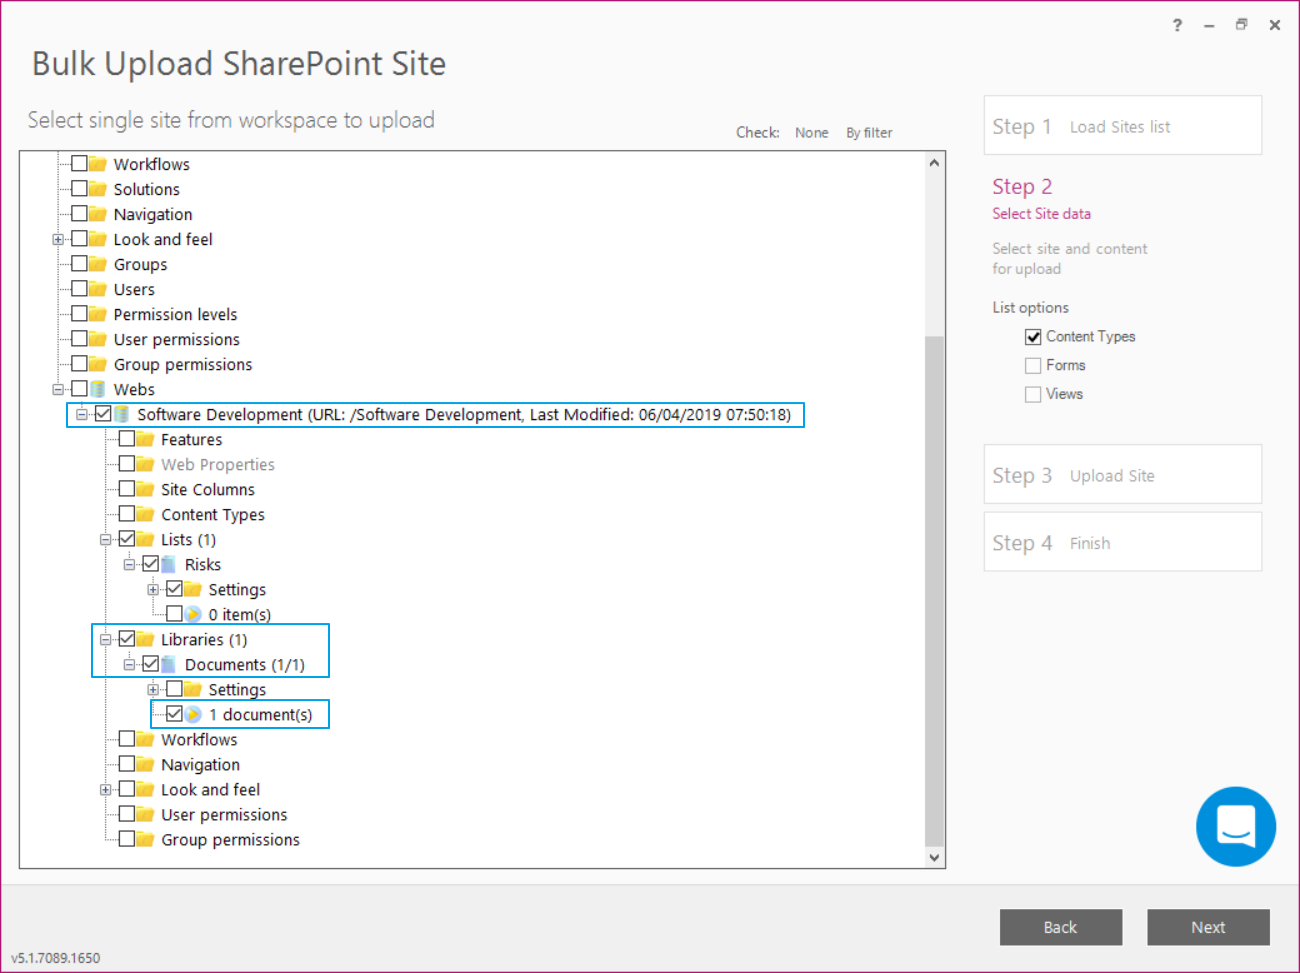
Click Next to proceed.
4) Select the site URLs where you would like to populate the selected site list items.
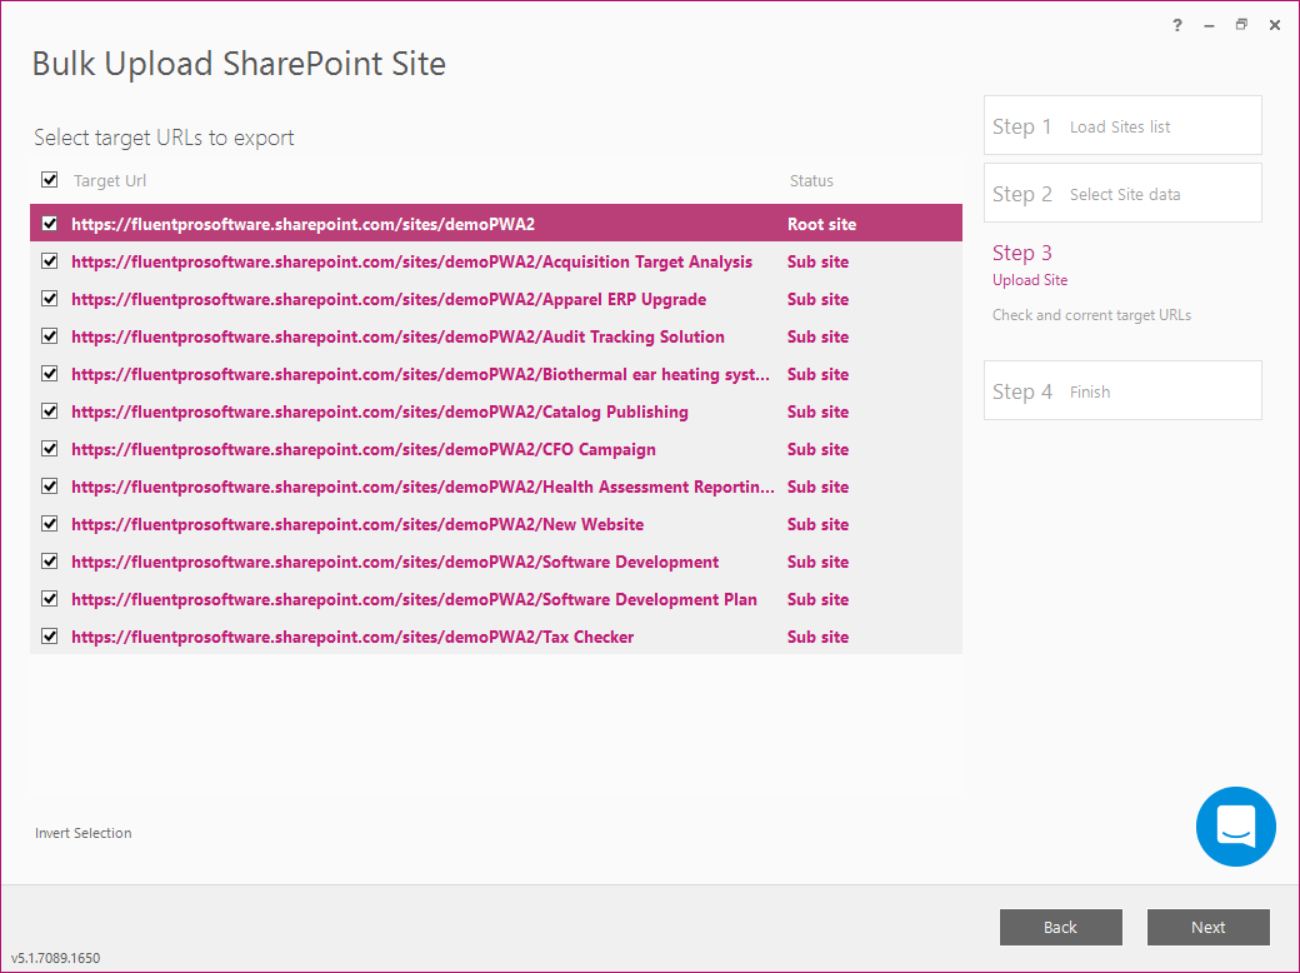
Click Next to start the upload process.
Allow FluentBooks some time to complete this operation.
5) On the summary screen, check if the upload process was successful.

Show Log option can be used to review the log file for errors after the Sites data upload is completed.
Click Finish to complete the process.
Open the PWA and check if the information is now present there.