
This article describes User Account Mapping that needs to be performed while migrating PWA data with FluentBooks.
Why Account Mapping is required
FluentBooks migrates PWA Resources and Users, given that the appropriate user account already exists in the destination Entra ID (formerly Azure AD) and account mapping was performed correctly.
If user accounts on the source and target PWAs differ (at least one letter, or the order of the name/surname differs), Account Mapping needs to be performed to make sure that the resource fields values for resources from the source PWA go to the corresponding resources on the target PWA.
For Resources that have User Accounts and can log in to the PWA, there are several actions that need to be taken to migrate them correctly from the source PWA to the target:
- User Accounts should be added to the target Entra ID (Azure AD). If needed, user Accounts can be added manually or synchronized from Entra ID (formerly Azure AD) to the PWA.
Please note: If User Accounts are synchronized from Entra ID (formerly Azure AD), the synchronization should be performed before uploading Resources using FluentBooks in order to avoid duplicates. - Account Mapping should be performed while uploading Resources to the target PWA. It is performed to map user accounts from the source PWA to the accounts on the target PWA and make sure that information for resources will be transferred correctly.
If an appropriate account already exists in the Entra ID (formerly Azure AD) on the target PWA, while uploading Resources, FluentBooks will find it by Display Name and only if it is 100% match with the source user account, FluentBooks will set the values to the resource fields of the selected user.
Please review these articles if you have the following scenarios:
- Accounts Mapping with Entra ID (Azure AD) Resource Pool Synchronization enabled.
- Account Mapping with Entra ID (Azure AD) Resource Pool Synchronization is NOT enabled in the target PWA.
Account Mapping can be skipped if migrating within one tenant/farm, if user accounts already exist on the tenant/farm level. In this case, FluentBooks will be able to create a resource and associate it with the existing user account in the process of Resource Pool migration and assign the user to security groups and categories according to the source PWA. However, if there were changes to the accounts within the tenant, it is required to perform the mapping (for example, if there is an account brian.johnson@fluentpro.com on the source and this account became b.johnson@fluentpro.com on the target).
Account Mapping while uploading Resources as a part of PWA Configuration
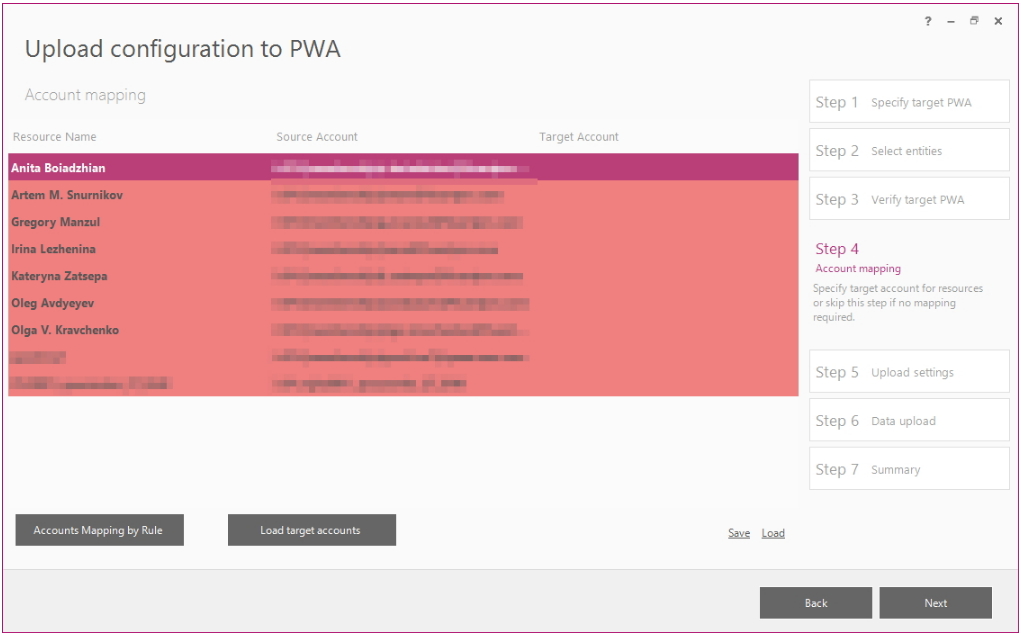
As you upload Resources as a part of the PWA Configuration upload, on the fourth step of the Upload Configuration to PWA wizard, you will get to the Account Mapping screen.
In the Account Mapping screen, you can specify target accounts for resources.
Please note: We recommend using the Save option to save the mapping results for future migrations. The file will be saved in the XLSX extension. As you carefully review and correct the accounts as needed in this Excel file, they can be saved and later reused while uploading SharePoint Content. The load option can be used to load a previously verified, corrected, and saved user mapping file.
FluentBooks provides three ways to specify target accounts for resources:
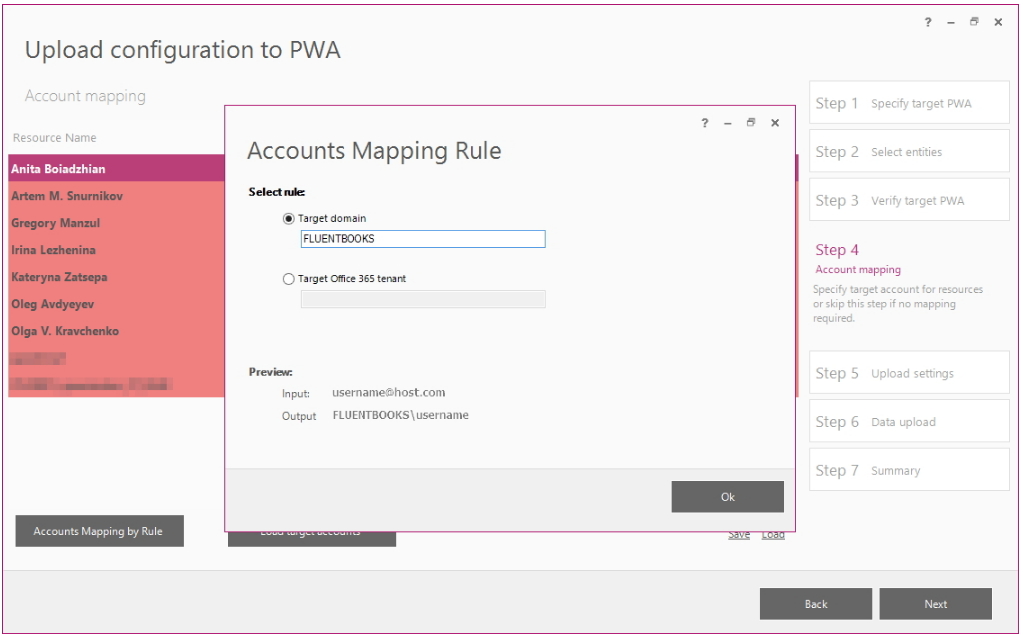
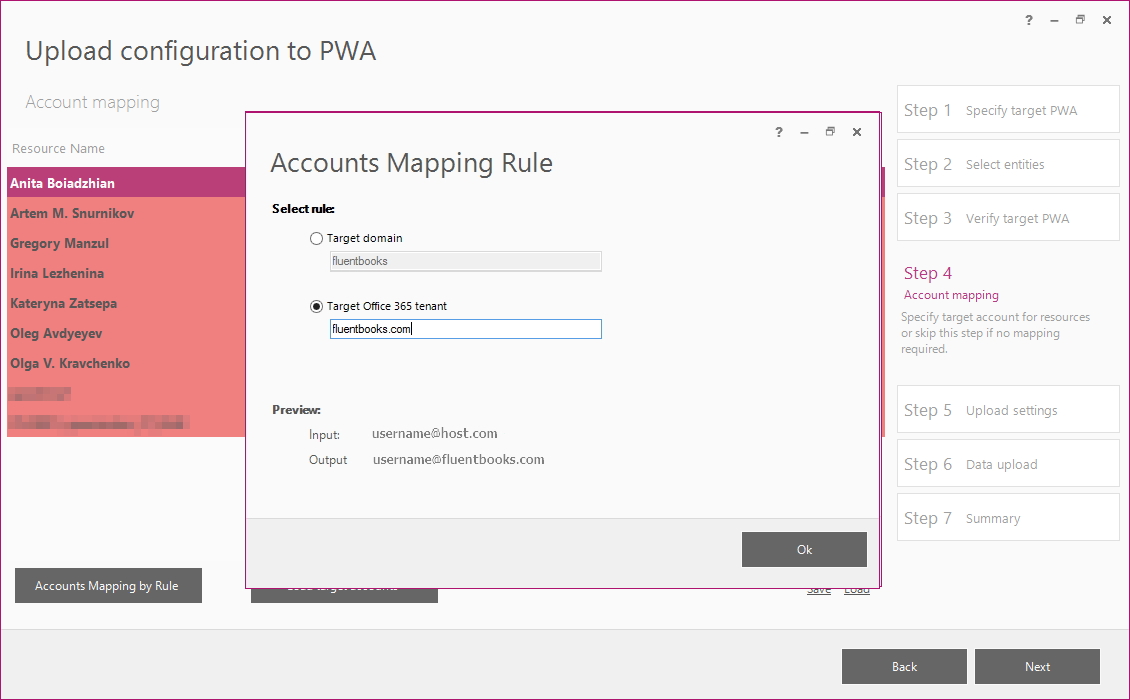
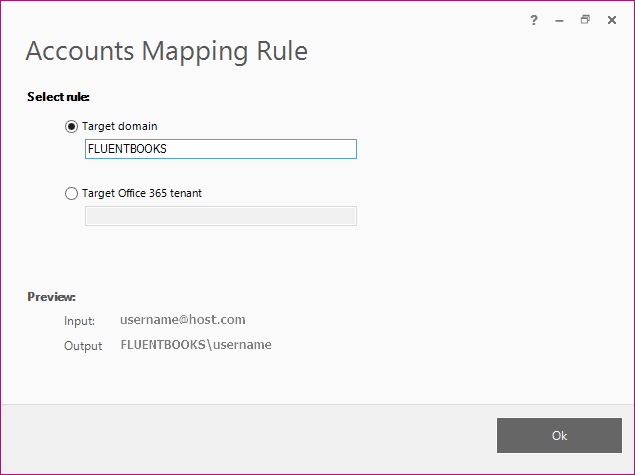
1) Accounts Mapping by Rule: This option allows performing bulk update of the target accounts and to set either ‘Target domain’ or ‘Target Office 365 tenant’ login type for all target accounts at one go.
Click the “Accounts Mapping by Rule” button, select either of the rules, and provide the domain or Office 365 tenant. The preview section will show how the accounts will look like after the rule is applied.
Click OK to apply the selected rule.
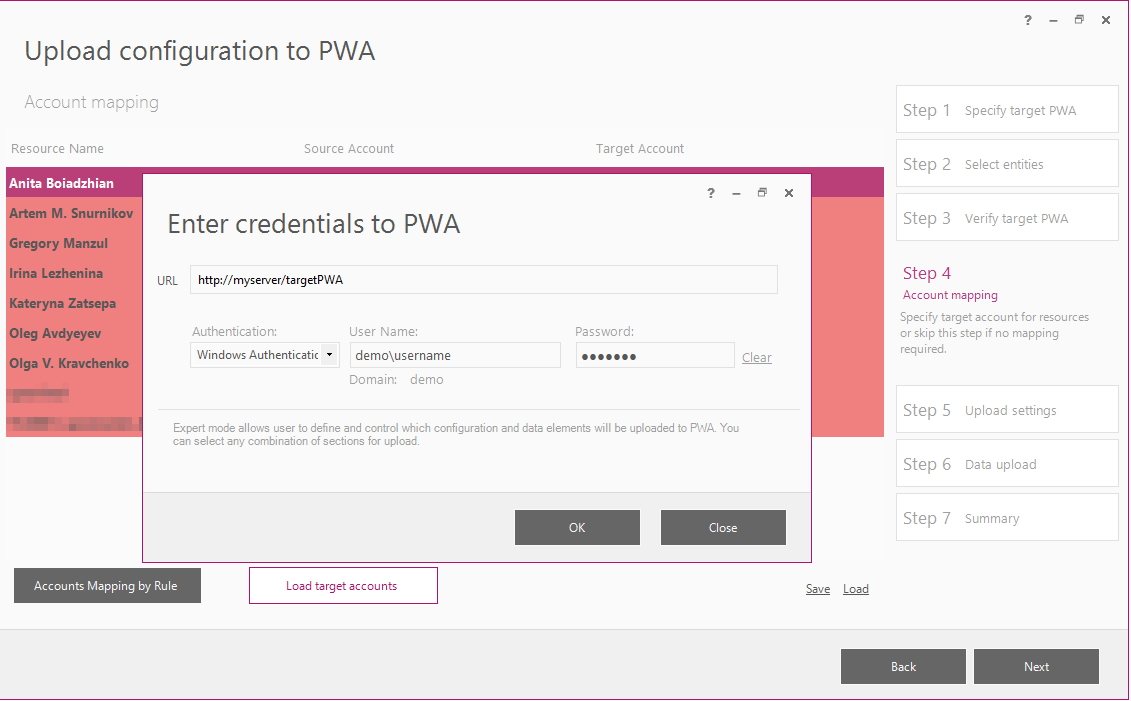
2) Load target accounts: This option allows you to map accounts automatically.
Click the “Load target accounts” button to load accounts from the target PWA. FluentBooks will request the credentials to PWA, provide the credentials, and click OK:
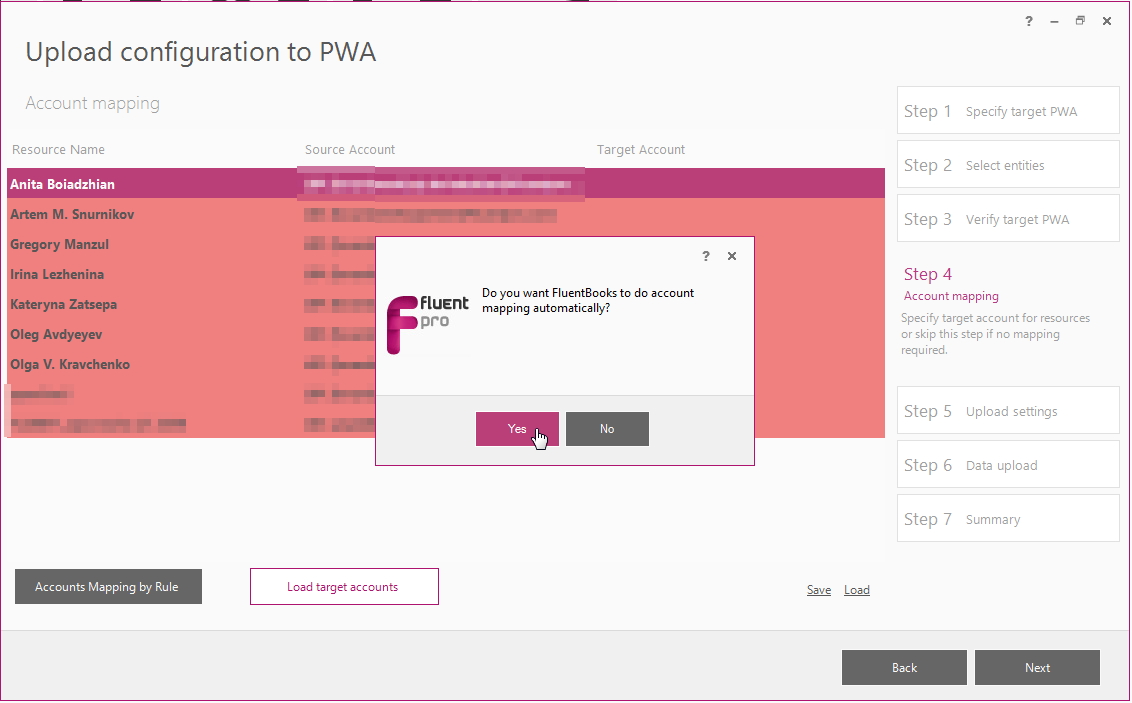
After accounts are loaded, FluentBooks will ask if you want to do account mapping automatically. Click Yes to map the source and target accounts.
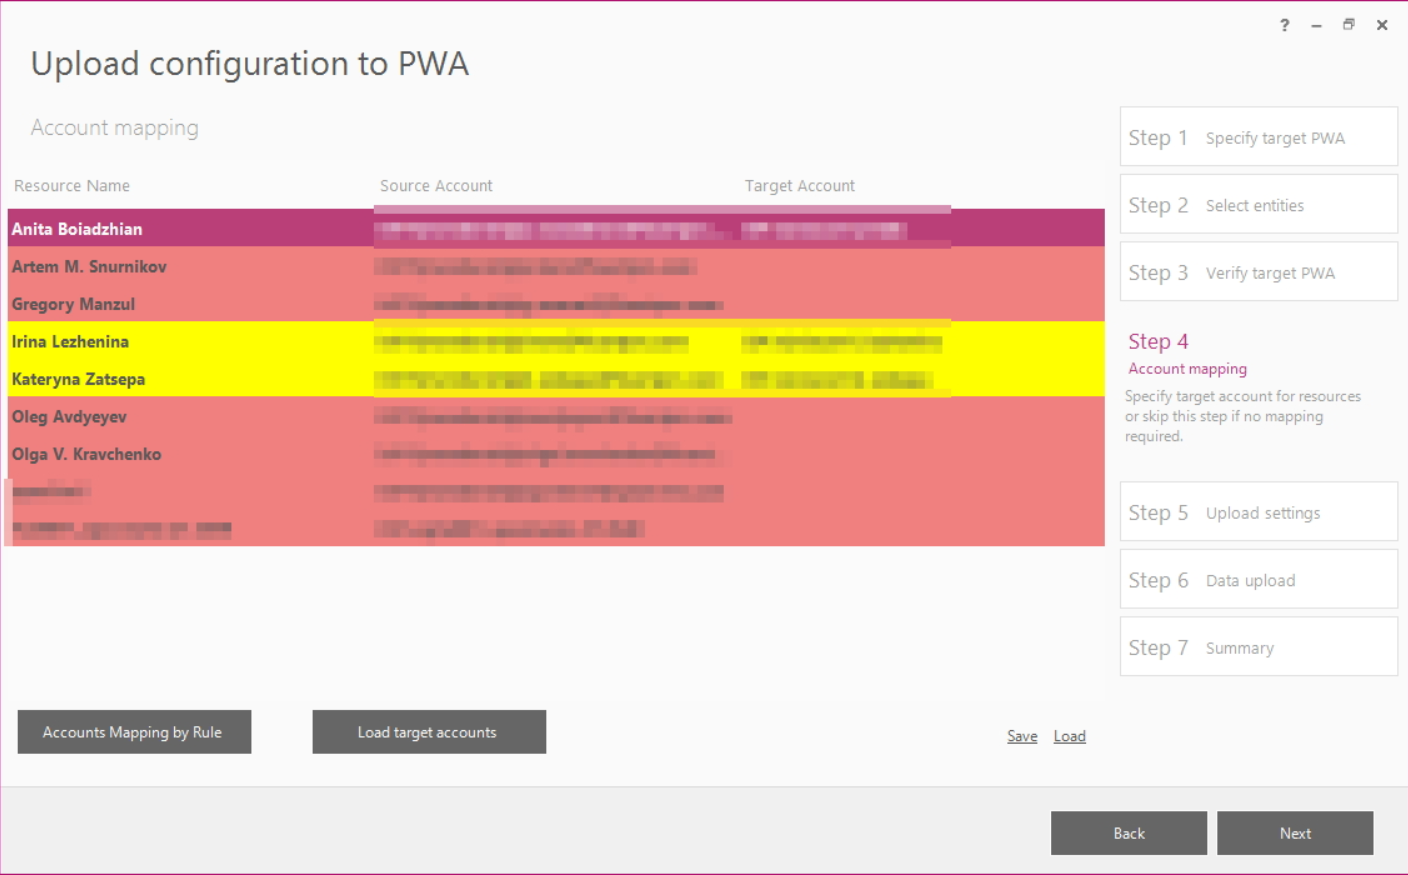
As FluentBooks finishes mapping the accounts, it is advisable to check that all accounts for resources are mapped correctly and edit inaccuracies manually if there are any. They can be edited either in FluentBooks directly or saved to an Excel file using the Save option and corrected in the Excel file. We recommend saving it to an Excel file, as you need to edit the accounts only once there, and it can be later reused multiple times using the Load option on the Account Mapping screen.
- If FluentBooks finds the corresponding account, it will be marked white;
- If there is no corresponding account found in the target environment, it will be highlighted in red;
- If the target account does not fully correspond, it will be marked yellow.
3) Map accounts manually Target accounts can be edited manually, to do this double-click the target account name and it will become editable, click the Enter key to confirm the changes.
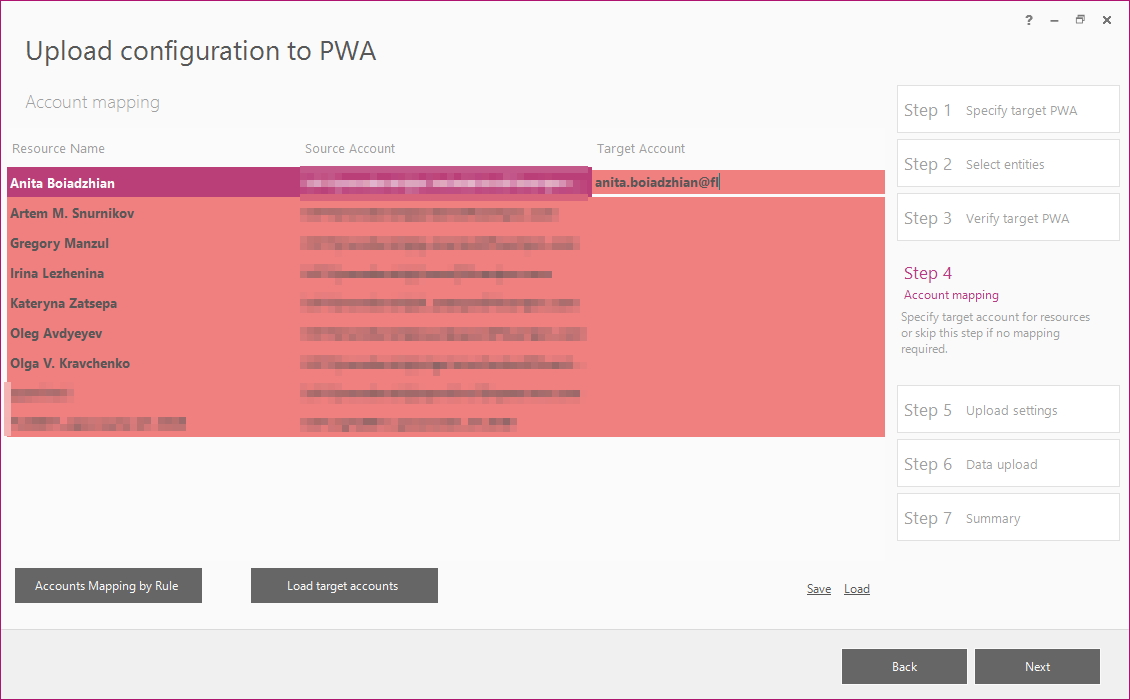
As you make sure that all accounts are mapped correctly, click Next to proceed with the upload process.
Account Mapping while uploading SharePoint sites
Account Mapping is required while uploading SharePoint sites, if there are values in the Author and Editor fields on the source PWA that need to be transferred to the target PWA or if SharePoint Groups are migrated, user accounts will be added to these groups during the upload process, so they need to be mapped as well.
Please note: Account Mapping can be skipped if migrating within one tenant/farm if user accounts already exist on the tenant/farm level. However, if there were changes to the accounts within the tenant, it is required to perform the mapping (for example, if there is an account brian.johnson@fluentpro.com on the source and this account became b.johnson@fluentpro.com on the target).
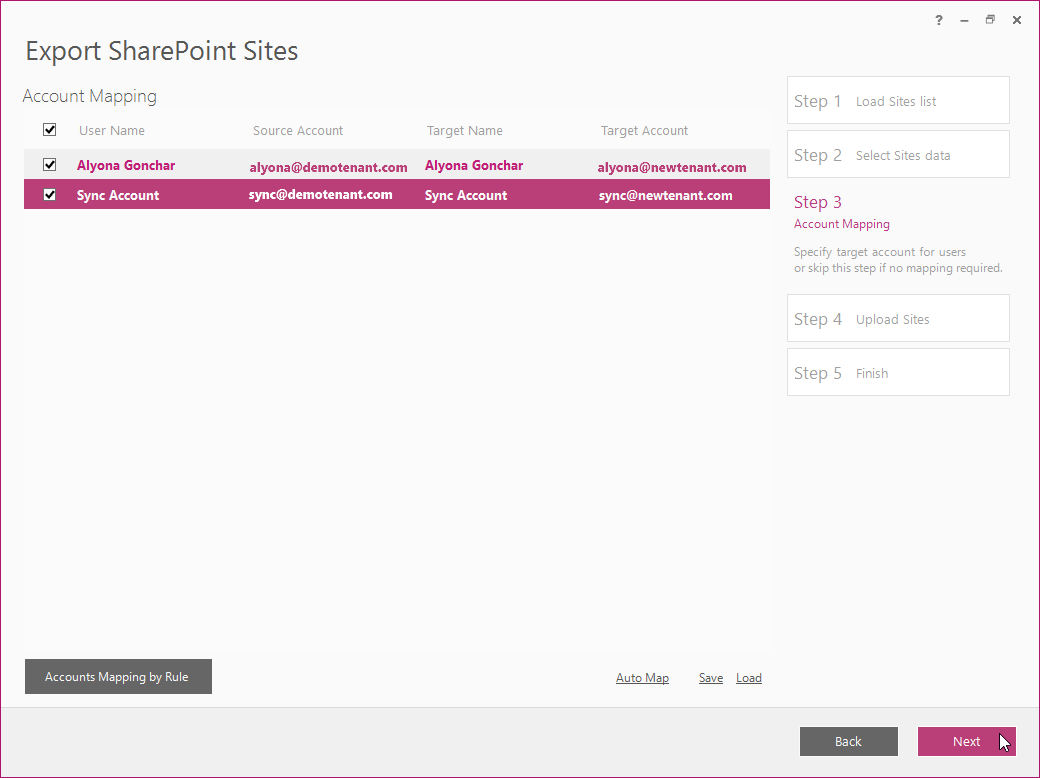
To perform account mapping while uploading SharePoint sites, the Upload SharePoint Sites wizard will be used.
If User Mapping setting is turned OFF on the first step of the Upload SharePoint Sites wizard, you will go straight to the Sites Upload step.
If User Mapping setting is turned ON on the first step of the Upload SharePoint Sites wizard, FluentBooks will load accounts from the source PWA.
Save - you can use this option to save the mapping results for future migrations. The file will be saved in the XLSX extension.
Load - in case you have previously saved a user mapping file, choose this option to load it.
FluentBooks provides two other ways to map accounts:
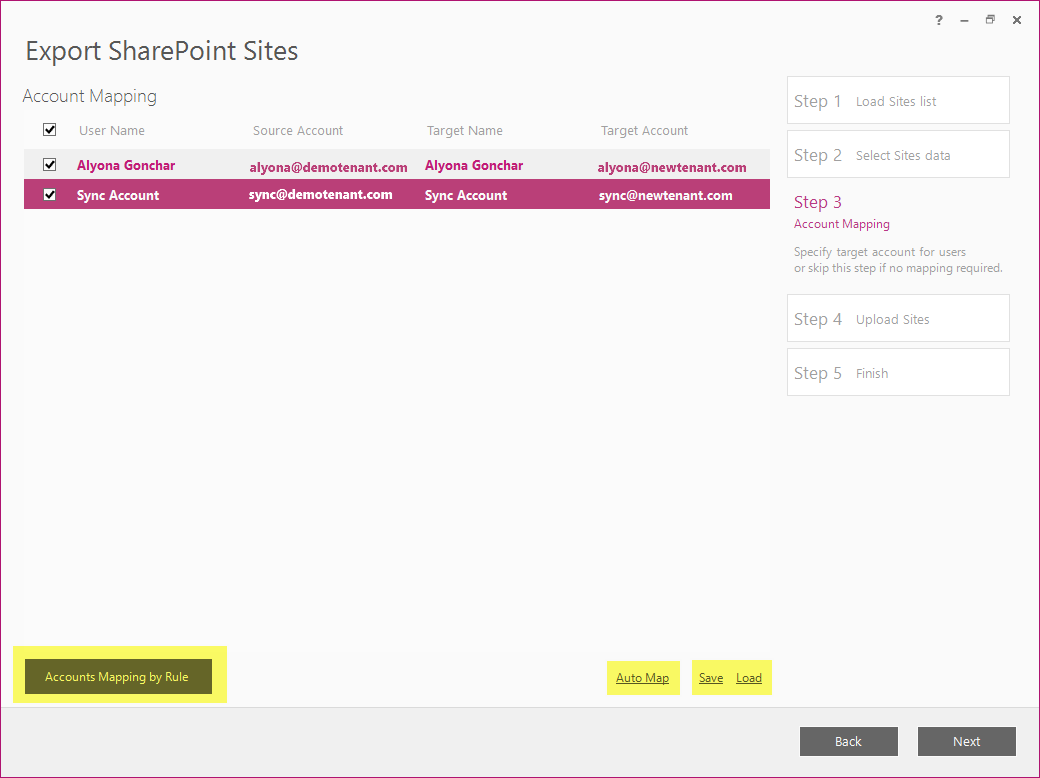
1) Accounts Mapping by Rule: This option allows performing a bulk update of the target accounts and to set either ‘Target domain’ or ‘Target Office 365 tenant’ login type for all target accounts at one go.
Click the “Accounts Mapping by Rule” button, select either of the rules, and provide the domain or Office 365 tenant.
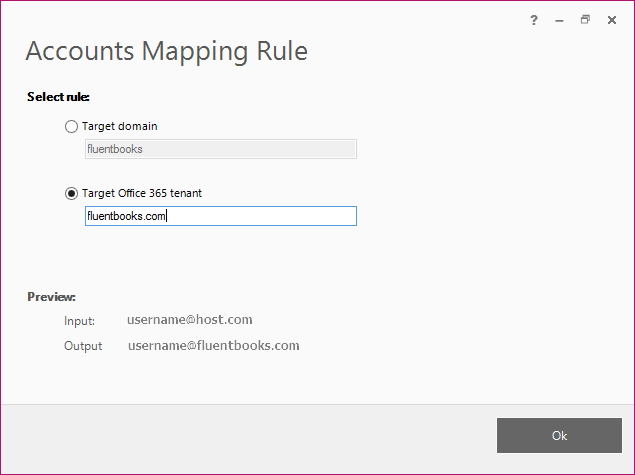
The preview section will show how the accounts will look like after the rule is applied.
Click OK to apply the selected rule.
2) Auto Map option: If you choose this option, FluentBooks will load the target users and attempt to map them automatically by name.
Update the mapping if needed.
Target account can be edited manually, to do this double-click the target account name, and it will become editable, click Enter key to confirm the changes. If there is no corresponding user in the target PWA, the line for that user will be left blank.
Click Next after you finish user mapping to proceed with site upload.
Please refer to the Accounts Mapping (Project Server 2013 -> Project Online with Entra ID (formerly Azure AD) Resource Pool Synchronization enabled) if this is your usage scenario.