
This article describes the process of G.A. Suite On-Premises installation.
Before the deployment process starts, please review the Governance and Administration Suite On-Premises Deployment Prerequisites:
Description |
1. Governance and Administration Suite On-Premises prerequisites |
|
1.1 Firewall ports should be opened:
|
|
1.2 Certificates:
|
|
1.3 ASP.NET 4.8: https://dotnet.microsoft.com/en-us/download/dotnet-framework/thank-you/net48-web-installer |
|
1.4 Accounts for database:
|
|
1.5 SQL requirements: SQL Server and Windows Authentication mode should be enabled (if Web, App and SQL Servers not in the same Active Directory domain). Azure SQL database serverless or Amazon databases can be used as well. The following databases will be created automatically during installation process:
|
|
1.6 IIS requirements: Common HTTP Components
Health and Diagnostic
Performance
Security
Application Development
|
|
1.7 External URLs requirements: The following URLs should be allowed for G.A. Suite to work correctly:
|
If you are sure that you have everything from the list above, please proceed to the next steps.
We will review the following topics:
- Preconditions
- App Installation
- Worker Installation
- Web Installation
Preconditions:
The best scenario is when the on-premise environment where G.A. Suite will be installed consists of four virtual machines:
- gas-app-prem. This virtual machine will be used to install app section. App section consists of Job Scheduler, Backup Scheduler, File System Manager, Background Task.
- gas-worker-prem. This virtual machine will be used to install Queuing. One Project Professional queue and two SharePoint queues are installed by default.
-
gas-web-prem. This virtual machine will be used to install G.A. Suite web part.
Please note: IIS is required to be deployed and started on this virtual machine. - gas-sql-prem. MS SQL database will be deployed on this virtual machine and we will review this case as an example, however, MS SQL can be installed on a local machine, if required. Azure SQL database serverless or Amazon databases can be used as well.
We are describing the best possible scenario, but it is not obligatory. G.A. Suite on-premises can be installed on two or one virtual machine as well.
The user who will be installing G.A. Suite on-premises on these environments should have local admin permissions for these environments. If you do not have the required permissions, please, contact your System Administrator.
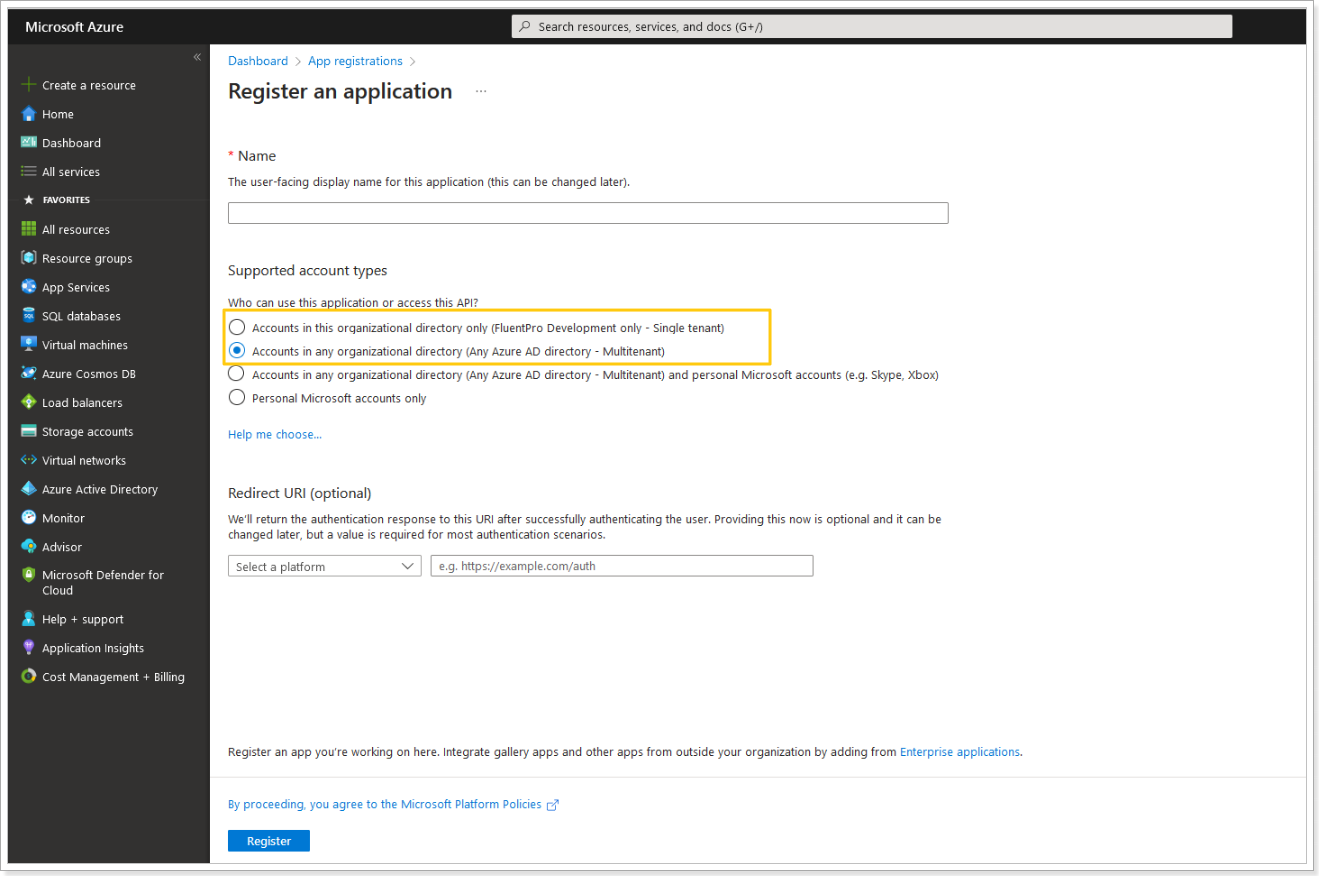
If you would like to use Microsoft authentication, it is required to register an app in Azure in advance. For this purpose perform the following:
1. Navigate to https://portal.azure.com and select App Registrations.
2. Click New Registration and provide the app name.
3. Select one of the options:
- "Accounts in any organizational directory (Any Entra ID (formerly Azure AD) - Multitenant)"
- "Accounts in this organizational directory only (Custom Development only - Single tenant)"
Please note that it will be necessary to select the same option on the G.A. Suite installation.
Click Register.
After the app is generated, open this app and perform the following:
- Navigate to Certificate & Secrets and generate a new Client secret and save it.
- Navigate to Authentication and add callback URLs, the URLs are the following:
- https://{HostName}/Ms-Login
Please make sure the API Permission within the app is 'User.Read' and 'openid'.
There are two versions of set up file that can be sent by FluentPro Team for downloading and installation of G.A. Suite on-premises:
1. FluentPro.PremiseGasSetup_<Version>. zip – this version includes only a setup file. App, Queuing and Web packages are stored on FluentPro side and will be downloaded in the process of installation.
2. FluentPro.PremiseGasSetup_Full_<Version>. zip – this version includes App, Queuing and Web packages.
As you select the required setup file and receive it from FluentPro Team, you can start the installation process.
Web Installation
The user who will be performing web installing should have local admin permissions for the environment. If you do not have the required permissions, please, contact your System Administrator.

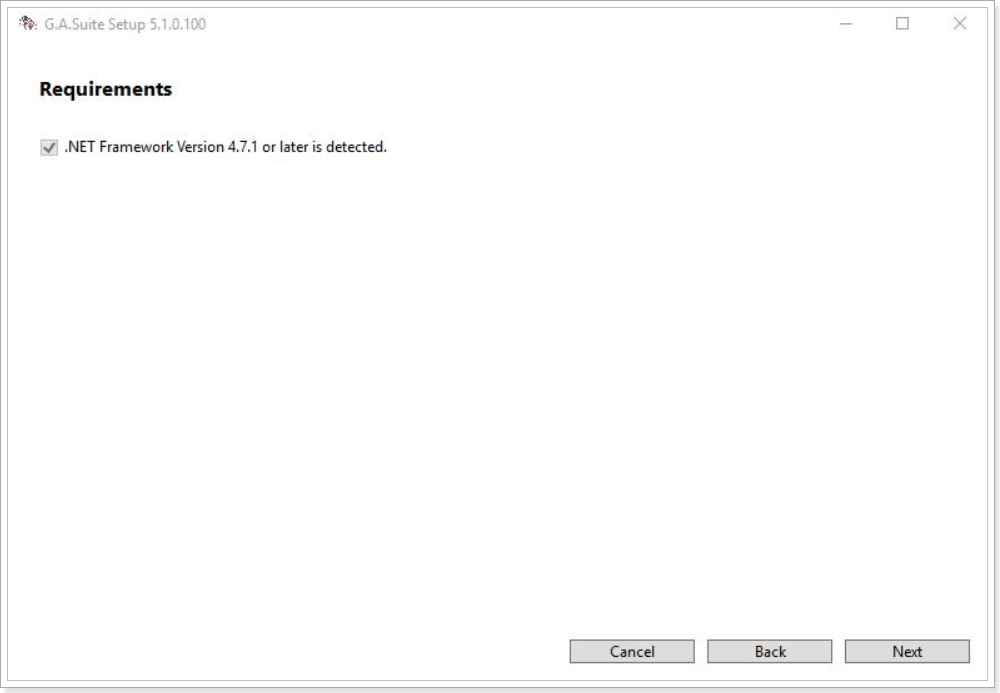
1. Run FluentPro.Fbo.Setup application.
If G.A. Suite is installed for the first time, you will get to the Requirements page. Make sure you have the required .NET Framework version installed (4.8) and click Next.
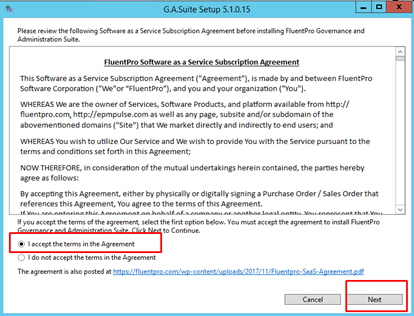
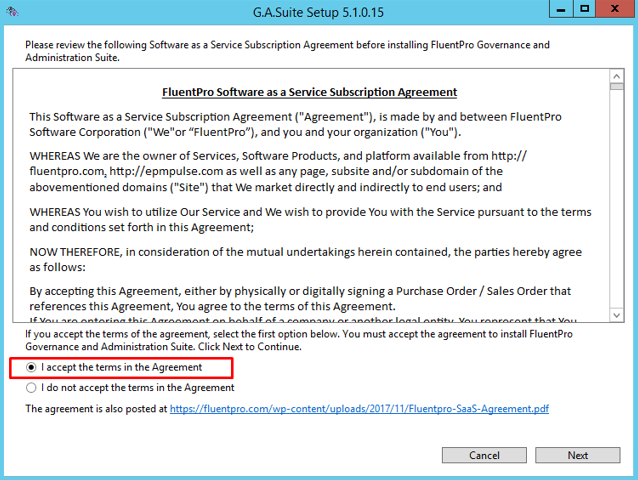
2. Accept the terms in the agreement and click Next button.

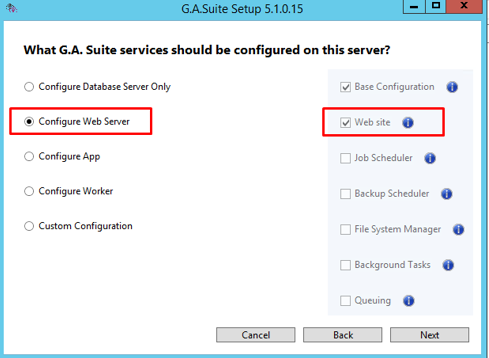
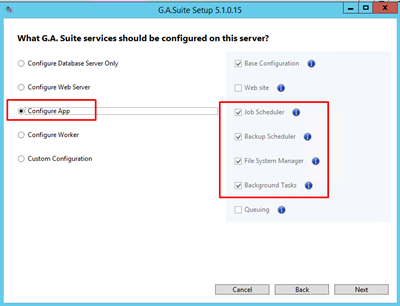
Please note: If you are installing G.A. Suite on-premises on one virtual machine, please select Custom Configuration and check all the check-boxes on the right.
All installation process, in this case, will not be divided into separate stages: app, worker, and web installation will be completed all together and the installation process will need to be launched once. However, the best practice is to install G.A. Suite on-premise on several separate virtual machines (four is the best scenario).
3. Select Configure Web Server. Click Next to proceed.
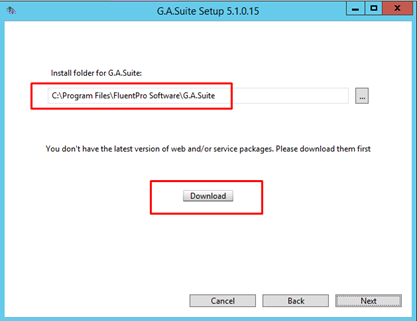
4. Click Download to download the required package.
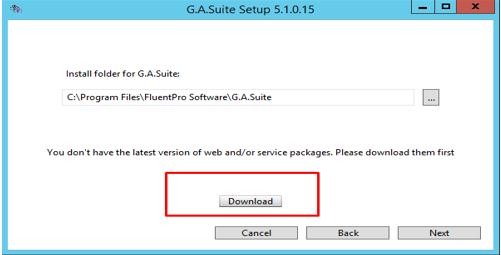
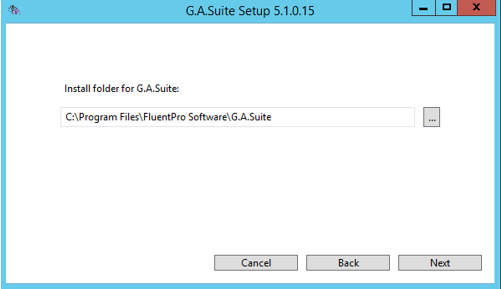
5. Select the installation path. Click Next to proceed.
6. During Web installation as you get to the Database step,
Database Configuration
There are two ways to configure a database:
1. Provide the SQL server name and credentials for Database Authentication and Provision Database account.
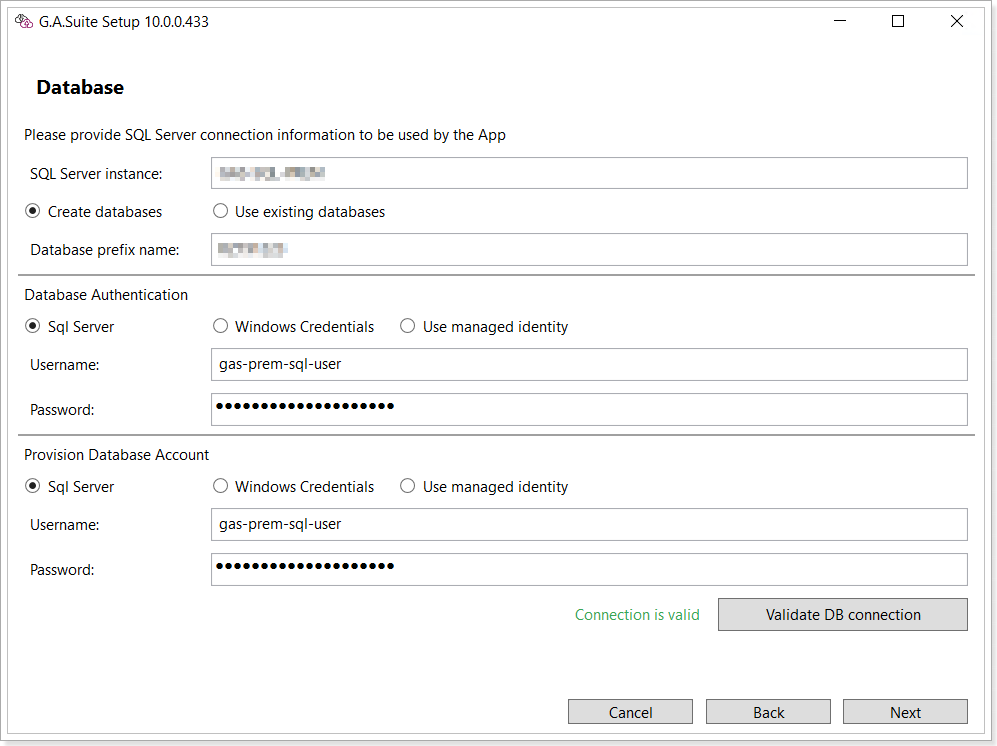
2. Use Existing Databases.
This option allows using an existing database. In this case, provide the following information:
- Main db name;
- DataCenter db;
- Customer db.
Press the Validate DB connection button.
.png)
Data encryption settings are also configured, just click Next to proceed.
Web site configuration
This page allows to set the following information:
- Host name
- Protocol (HTTPS)
Please note: To use HTTPS protocol it is required to have SSL certificate. Select a certificate from the drop-down list. If you do not have a certificate, select the 'Generate self-signed SSL certificate' checkbox. In this case, a self-signed certificate will be generated automatically during installation.
The 'Enable Windows Authentication' checkbox allows you to use your domain name to log in to G.A. Suite. When logging in to the G.A. Suite site, it will be possible to select Windows Authentication type.
'G.A.Suite Administrator Credentials': this account is used to log in to the G.A. Suite admin site as a global administrator.
Next, select the 'Use Microsoft Entra ID app authentication' if you need to log in to G.A. Suite using Microsoft authentication.
If you registered an app in Azure selecting the Multitenant option, select Multitenant in the Account types section. Use Client ID and Client Secret.
.png)
If you registered an app in Azure selecting the Single tenant option, select Single tenant in the Account types section. Provide Client ID and Client Secret, and the Domain or Tenant ID.
.png)
To find the Domain or Tenant ID open App registration -> Registered G.A. Suite app -> Overview: Tenant/Directory ID.
.png)
Alternatively, open Microsoft Entra ID (Azure Active Directory) -> Overview: Tenant ID or Primary domain.
.png)
Click Next to proceed.
It is possible to review all installation log files by scrolling down.
Please note: All Installation logs are saved in the Logs folder of the installation folder.
There is a summary about configuring and installing selected items.
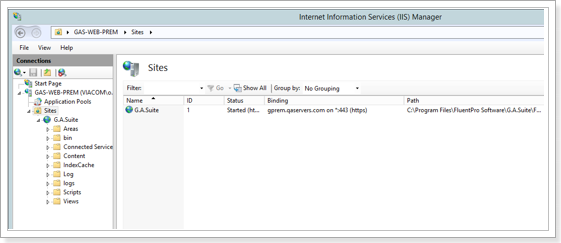
Now you can check your IIS Manager. The site is deployed and started.
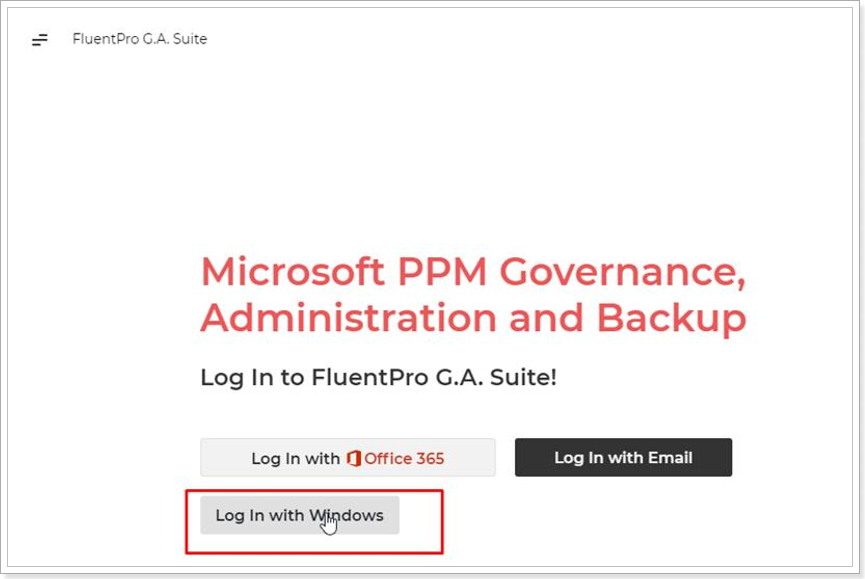
Open the browser and provide your hostname.

Log in to G.A. Suite using the Office 365 option.
Click Finish to complete the installation process.

App installation
If you are installing G.A. Suite on several virtual machines, the best practice is to copy the following file: install.info from gas-web-prem and paste it into the same folder on the virtual machine where App will be installed. This file includes information that you have already provided while configuring databases during Web installation. If you use this file during App installation, it will reduce time for installation and skip several steps (e.g. database configuration).
1. Paste FluentPro.PremiseGasSetup.zip to Local Disk C:\Temp folder as an example and extract all files from it.
2. Select FluentPro.Fbo.Setup.exe file and run it.

3. If G.A. Suite was already installed on the machine, the following window will appear. Select Install/Update option and click Next.
Install/Update - option is used to install a new instance of G.A.Suite or Update it to the newest version.
Uninstall apps – option is used to delete G.A. Suite instance from the environment.
4. Accept the terms in the Agreement and click Next.
5. Select Configure App radio button. Job Scheduler, Backup Scheduler, File System Manager and Background Tasks will be selected for installation. Click Next to proceed.
6. On the next screen it is possible to select or edit the installation path. Click the download button to download the necessary packages.
Please note: Download button will not be displayed when FluentPro.PremiseGasSetup_Full set up file version is used for installation.
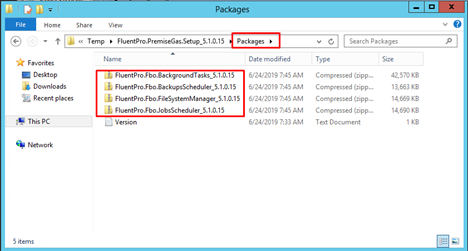
7. Packages are downloaded and stored in the Packages folder.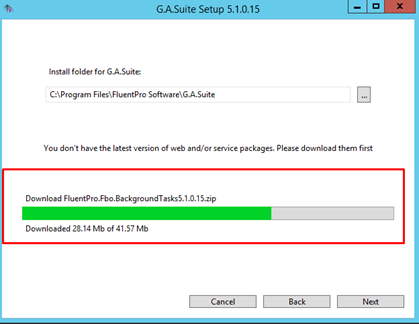
8. Click Next to proceed.
During App installation as you get to the Database step, it is required to provide the databases that were created while installing the Web. Check the 'Use existing database' check-box and provide the required information. Click Next to proceed.
.png)
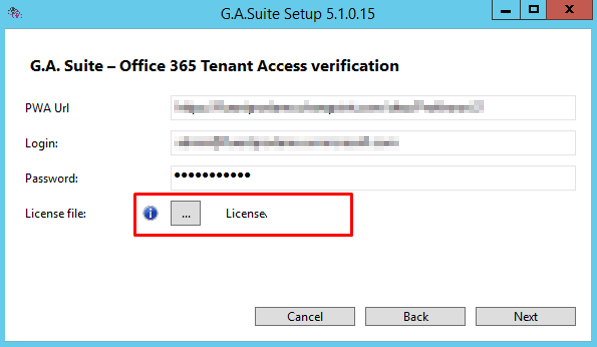
PWA registration in the setup wizard
On the next step provide your PWA URL, Login, and Password.
Make sure that the account has administrator rights on the PWA. The account used should be a member of the PWA Administrators group and Site Collection Administrator.
License file may be added to this step. Use the “…” button to upload the license file if you need to use offline licensing.
Click Next to proceed.
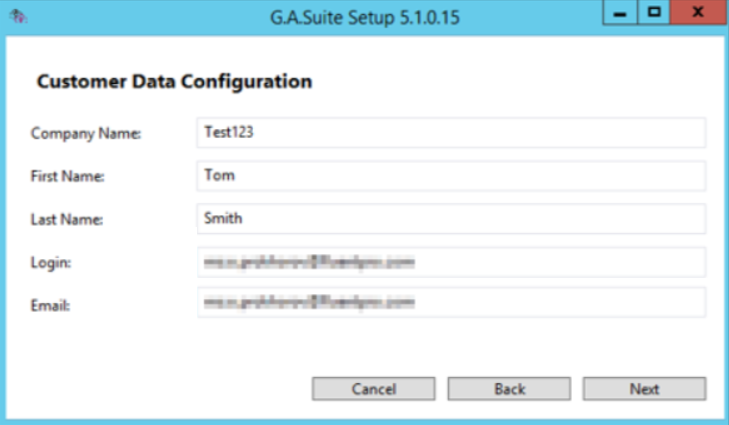
Customer Data Configuration
On this step provide the following information:
- Company Name;
- First Name;
- Last Name;
- In the Login field provide the login to G.A.Suite On-Premises (Microsoft authentication or Windows authentication)
- Email: provide your corporate email.
Click Next to proceed.
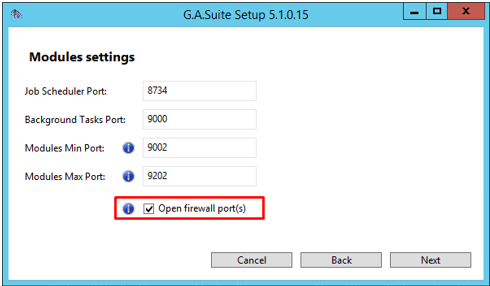
Modules settings
In this section, the information about ports that are used for communications between modules and workers is provided.
All Ports are preinstalled by setup wizards. The “Open firewall ports” checkbox creates inbound rules for these ports on the virtual machine.
Click Next to proceed.
Storage configuration
Three storage types are available for setup storage:
- Amazon S3 bucket;
- Windows Storage;
- Azure Storage.
This storage will be used for backups, logs, etc.
To find more information about the 'Use an IAM role granted access' option, please refer to this article.
To find more information about the 'Use AES256 Server Side Encryption' option, please refer to this article.
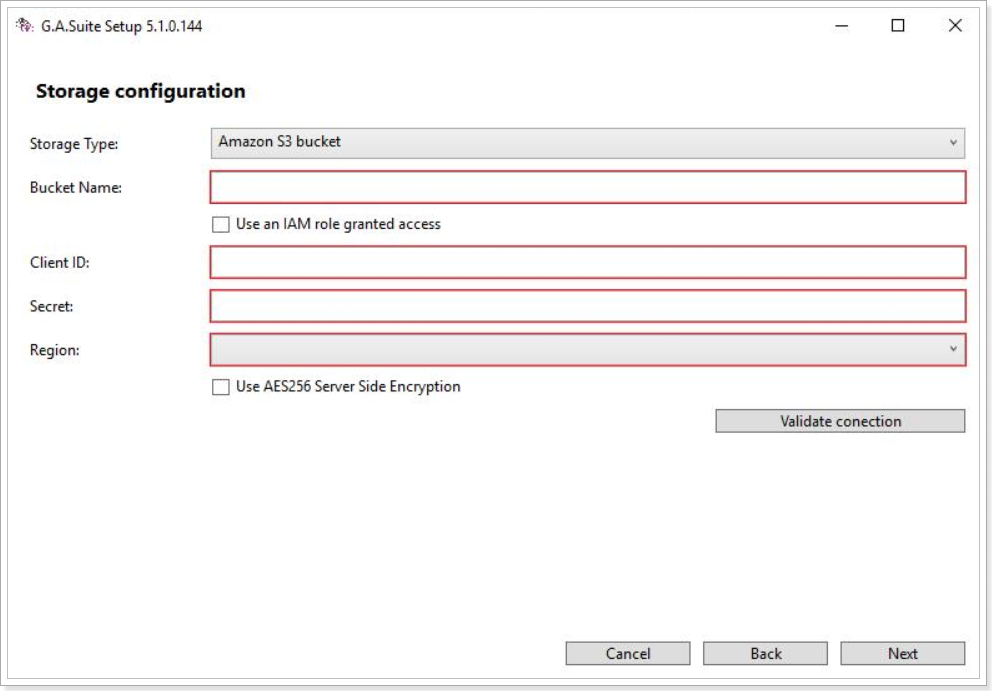
This setting will be shown in the Storage Settings of the G.A. Suite application.

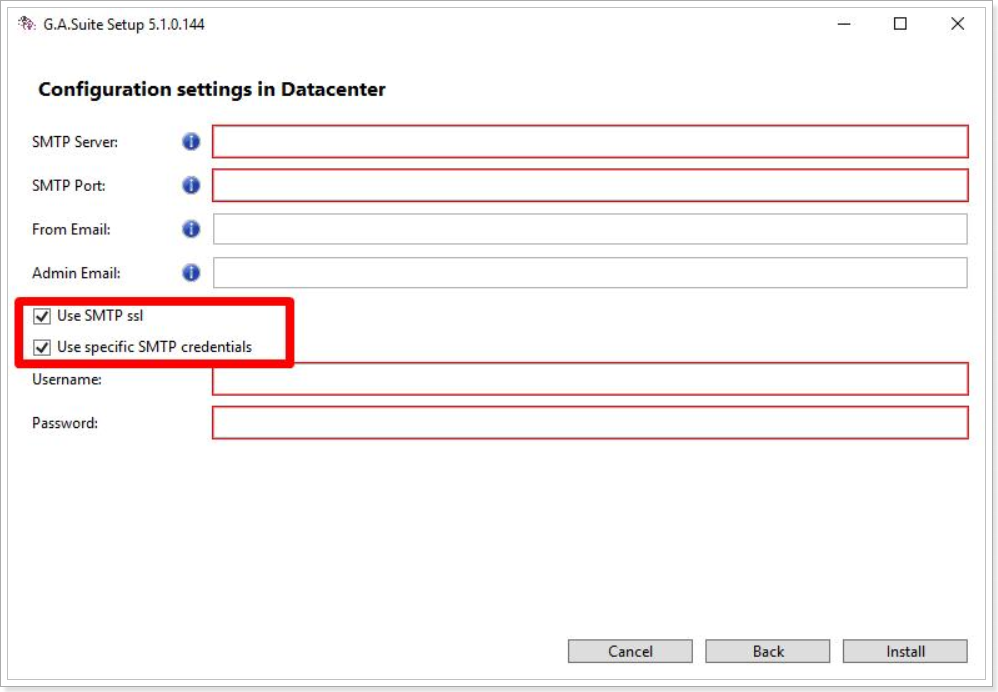
Configuration settings in Datacenter
This setting is responsible for email notifications. It sends email notifications about successful/not successful backups, restores, copies, etc.
If SMTP credentials differ from the ones you are using to install G.A. Suite, check the 'Use specific SMTP credentials' checkbox and provide the required credentials.
Please note: All fields are required on this step. Fill in the information for all the fields here and then click Install to proceed.
Installation
Allow the wizard some time for the installation process to be completed.
It is possible to review all installation log files by scrolling down.
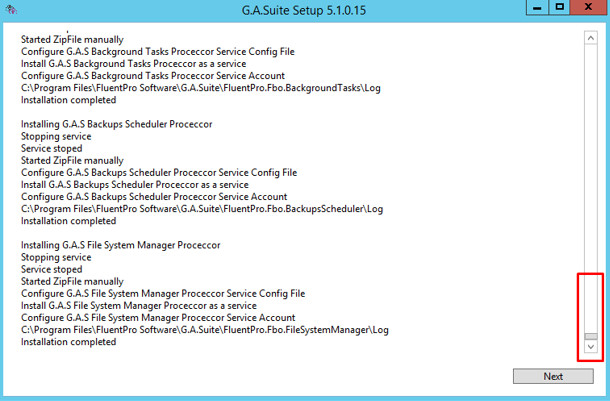
Please note: All Installation logs are stored in the Logs folder of the installation folder.
Click Next to proceed.
As the installation process is completed, a summary for the configuration and installation of the selected items will be displayed.
Click Finish to complete.
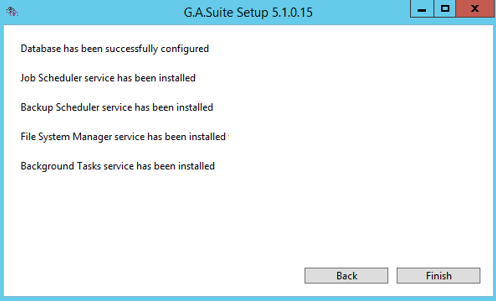
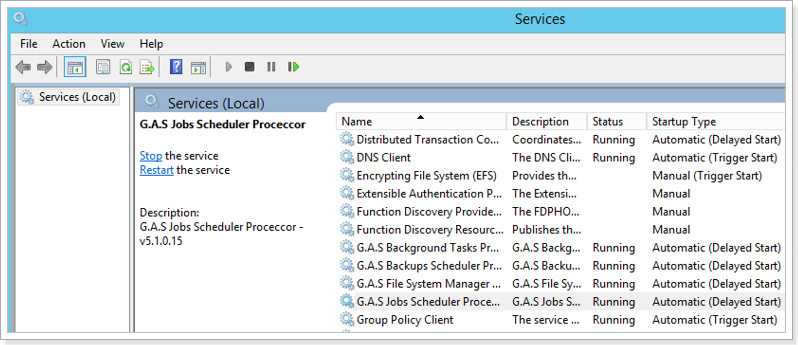
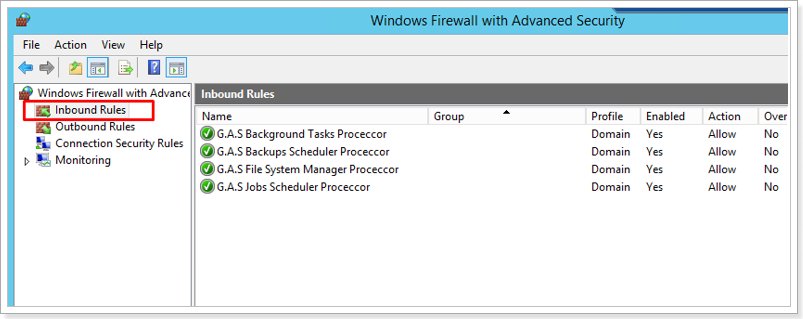
G.A. Suite on-premises application is installed.
As a result, the services will be running and inbound rules will be created.
Worker Installation
The user who will be installing workers should have local admin permissions for the environment. If you do not have the required permissions, please, contact your System Administrator.
If you are installing G.A. Suite on several virtual machines, the best practice is to copy the following file: install.info from gas-web-prem and paste it into the same folder on the virtual machine where Worker will be installed. This file includes information that you have already provided while configuring databases during Web installation. If you use this file during Worker installation, it will reduce time for installation and skip several steps (e.g. database configuration).
1. Run FluentPro.Fbo.Setup application.
Accept the terms in the agreement and click the Next button.
2. Select configure Worker option.
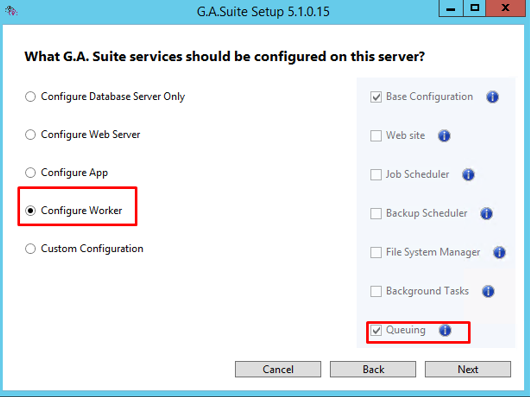
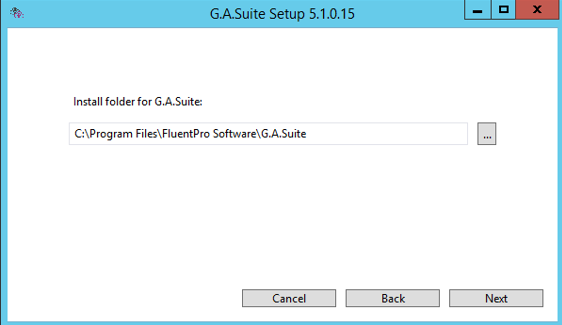
3. Click Next and provide the path for the installation folder. Click Next to proceed.
4. During Worker installation as you get to the Database step, it is required to provide the databases that were created while installing the Web. Check the 'Use existing database' check-box and provide the required information. Click Next to proceed.
.png)
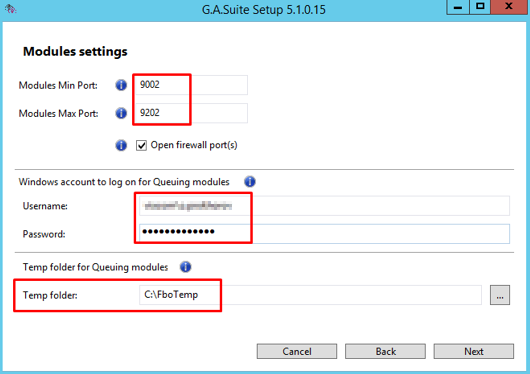
Modules settings
Modules Min\Max Port values are pre-installed. These values should be the same as App ports.
If the 'Open firewall ports' checkbox is checked inbound rules will be added to the firewall for the specified ports.
Provide a Windows account to log on for Queueing modules. It should be in the following format: domain\username.
Please note: If you plan to use G.A. Suite on-premises to work with Project Server 2016/2019 versions, then the Windows account used to log on for modules should have access to the PWA, and the same account should be used to start Project Professional.
It is possible to change the Temp folder for Queuing modules if needed.
Click Next.
Configuration settings in Datacenter are the same as for app installation and do not need to be changed.
Click Install.

Allow the wizard some time for the installation process.
It is possible to review all installation log files by scrolling down.
Please note: All Installation logs are stored in the Logs folder of the installation folder.
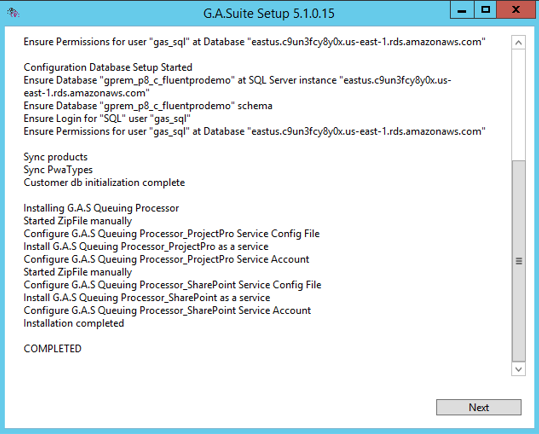
Click Next and review the summary.
Click the Finish button.
Two shortcuts will appear on the desktop.
Firewall contains inbound rules for Queuing Processor_ProjectPro and Queuing Processor_SharePoint.

Task Scheduler contains an item that runs queuing using Power Shell script.
The script is created automatically and is located in C:\Program Files\FluentPro Software\G.A.Suite\Sctipts Start-Modules.ps1.

Congratulations! G.A. Suite is deployed and launched successfully!
If you have any questions or any difficulties during the installation process, you are always welcome to contact our support team at support@fluentpro.com, providing them with the log files that are stored in the Logs folder of the installation folder.