
In this article, we will review how to find the Environment URL for Planner Premium (formerly Project for the web) using an administrator or a regular user account, and how to generate a token.
Please note: Before you start, review the Connection account requirements article to make sure your Planner Premium account has the required set of permissions.
How to find Environment URL
To find your Environment URL, please perform the following:
With an admin account:
1) Open the Microsoft Power Platform Admin Center by the link https://admin.powerplatform.microsoft.com. Log in to the Admin Center with an admin account.
2) Select Manage -> Environments and select the Environment where the Planner Premium is deployed.

3) In the Environment Details section, find the Environment URL and copy it as a link or as a text.

4) The Environment URL can now be pasted into Project Migrator 'Step 1 Connect to Source and Target System' in the following format: https://org111a22a1.crm.dynamics.com or org111a22a1.crm.dynamics.com.
With a user account:
Please note: A user should have a license assigned that allows accessing Power Apps.
1) Log in to Office365 with your account.
2) Open the App Launcher by clicking on its icon in the top left corner. Select to explore ‘All apps’.

3) Search for Power Apps in the apps list.

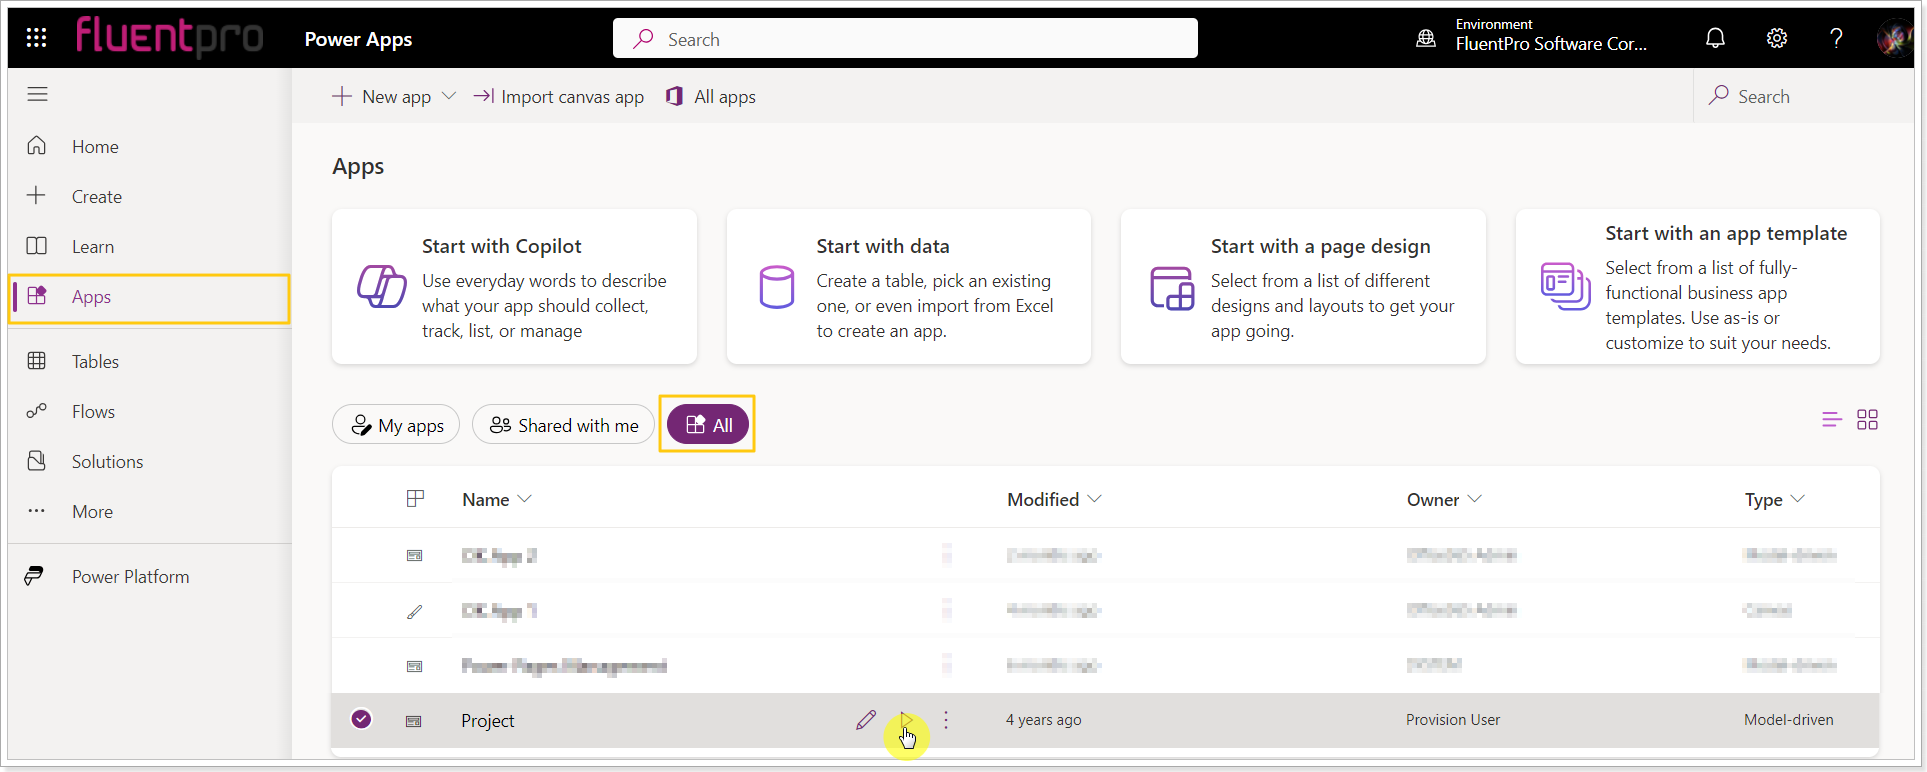
4) On the Power Apps page, click on the Apps tab => All apps and click Play next to the Project app to open it from the list.
5) Once the Project Power App is opened, copy the main part of its URL in the address bar, e.g. https://org111a22a1.crm.dynamics.com.

6) The Environment URL can now be pasted into Project Migrator 'Step 1 Connect to Source and Target System' in the following format: https://org111a22a1.crm.dynamics.com or org111a22a1.crm.dynamics.com.
If you need to count the total number of projects you have in Planner Premium, please refer to the "How to count the number of Projects in Planner Premium" article.
Generating a Token
Project Migrator allows creating task custom fields in Planner Premium when migrating data from Project Online to Planner Premium. To use this functionality, it is required to generate a token when connecting to your Planner Premium environment (in this article, the Project Online->Planner Premium scenario is selected as an example, for other scenarios the steps to generate the token are the same).
To generate a token, perform the following:
1. Open the Project Migrator home page and select the Project Online => Planner Premium scenario.

2. Connect to your Project Online environment by clicking Connect and providing your PWA URL and credentials.
3. Next, proceed to the Planner Premium connection.
Provide your environment URL, then click the Connect button to connect to your Planner Premium environment.

Log in to Planner Premium using a Microsoft 365 account that meets the connection requirements.
4. Click on the "I would like to migrate Task Custom Fields" checkbox.

5. Next, click on the "Planner (premium plans) Token Generator" to download the file.

6. Once downloaded, open the file and click Connect. Log in to your Planner Premium account with the same credentials you used to create a connection in Project Migrator.

7. Copy the generated token.

8. Paste the token into the Project Migrator "Task Custom Fields Token" field and click Proceed.

Please refer to the 'How to create task custom fields' article for more details.