
In this article we will review Integration Hub app as an Azure DevOps Extension.
If you plan to synchronize data between Project Online and Azure DevOps, we recommend installing Integration Hub as an Azure DevOps Extension. In this case, after Project Online <> Azure DevOps scenario is configured within Integration Hub, you may launch data synchronization from Azure DevOps directly, without switching to Integration Hub app.
Also, in this case, it is possible to launch data synchronization for one project only (for each project from Azure DevOps or Project Online separately) or for all projects at one go.
To install Integration Hub as an Azure DevOps extension, please refer to the How to install Integration Hub article.
Integration Hub adds several tabs and menu items inside Azure DevOps.
Azure DevOps Extension Overview
When Integration Hub application is installed, several tabs and menu items will be added inside Azure DevOps.
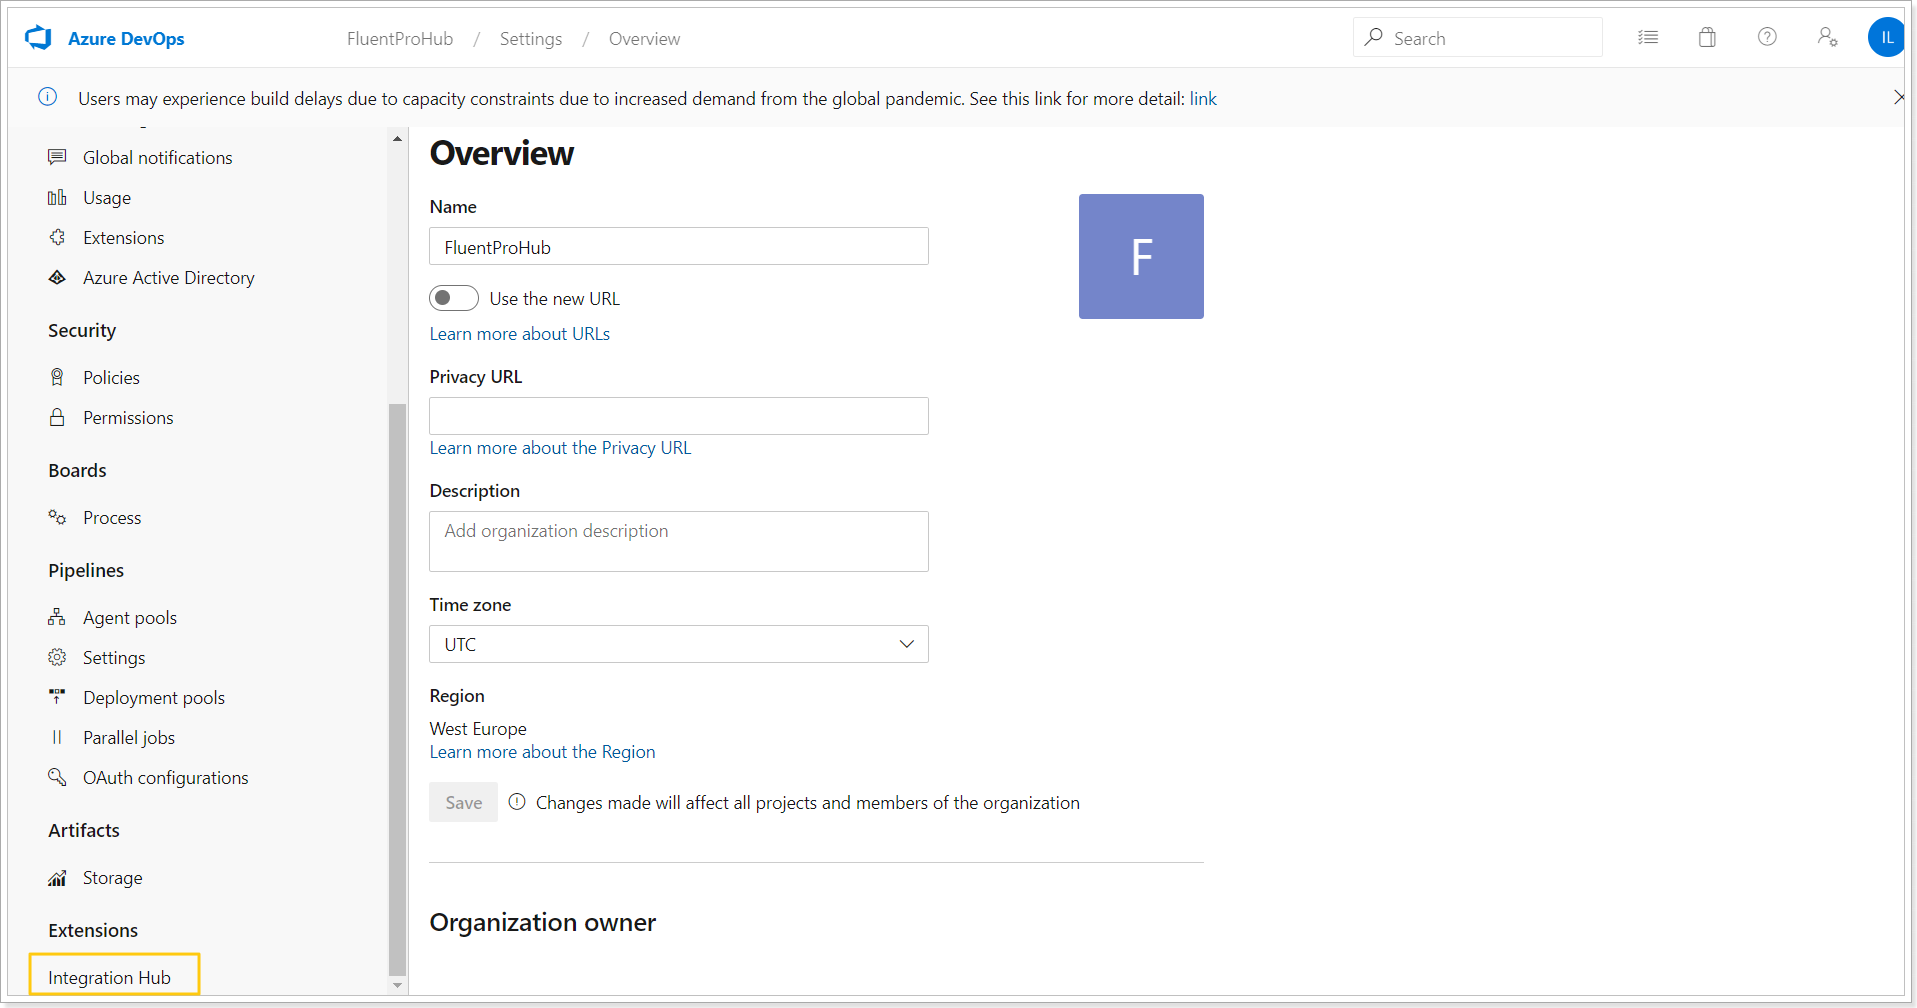
To open Integration Hub from Azure DevOps, open the Azure DevOps Organization settings.
Integration Hub app will be available under the Extensions section. Click on the Integration Hub to open the application.
Integration Hub page will be opened in the context of your Azure DevOps environment and the following tiles will be available:
Please note: The ‘Connected Apps’ and Data ‘Synchronization’ tiles will be disabled on the first run. To start using them, it is needed to set up the integration scenario.

Please review the available action on Integration Hub page:
 |
Use the ‘Launch Integration Hub’ link to navigate to the Integration Hub app and configure the required scenario. |
 |
This link will open the connected Project Web App instance in a new tab. Please note: This tile will be disabled until you configure at least one connection in Integration Hub. |
 |
Push to Project link will launch a synchronization of Azure DevOps work items to Project Online for all projects configured for integration in your Azure DevOps. Pull from Project link will start synchronization of Project Online tasks to Azure DevOps work items for all projects configured for integration in your Project Online PWA. Please note: This tile will be disabled until you configure at least one connection in Integration Hub. |
 |
The Launch Integration Hub User Guide will open the help-site. Learn more about Integration Hub link redirects to the Integration Hub info page in the www.fluentpro.com site. |
Menus Inside Project
It is also possible to open Integration Hub app in the context of any specific project.
For this purpose open the required project => Project Settings => Extensions => Integration Hub.
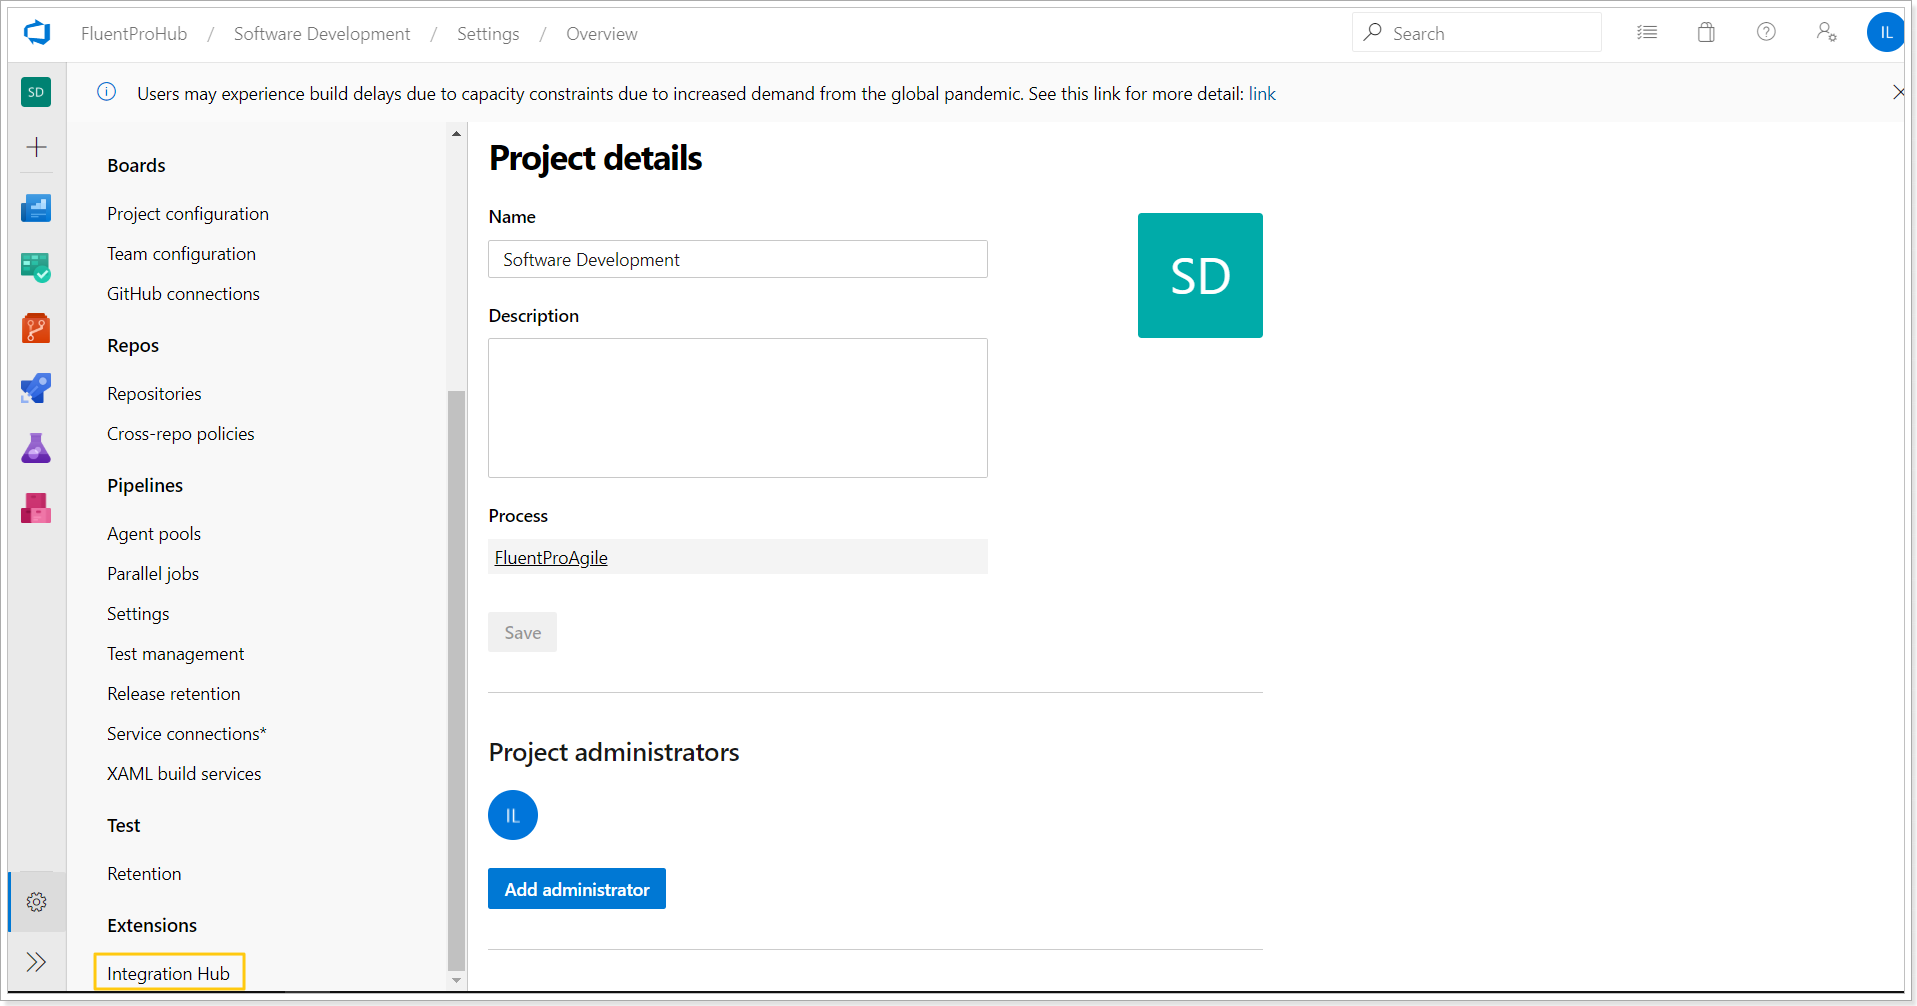
The following options are available:
1. Launch the integration process for one specific project
When you open the Integration Hub app in the context of your project, Integration Hub page will be opened and the following actions will be available on this page:
Launch Project Web App - this link will open the connected Project Online instance in the new tab.
Push to Project - use this link to start synchronization of Azure DevOps work items to Project Online tasks for the currently opened project only.
Pull from Project - use this link to start synchronization of tasks from the connected Project Online PWA to the work items for the currently opened project only.

Please note: These tiles will be disabled until you configure at least one connection in Integration Hub.
2. Review the changes performed by Integration Hub (Integration Hub history)
Open the specific project in Azure DevOps and navigate to the list of work items. Click on any work item to open its details. Here you will see the Integration Hub tab.
Click on this tab to review the changes performed by Integration Hub:

In the History it is possible to find the details about the values that were created/updated during integration

