
In this article we will review how to setup row-level security (RLS) for FluentPro Power BI Pack for Office 365 Planner.
Before you start the setup, you would need to decide what entities exactly you want to show and hide in the report. We recommend creating a list of these entities.
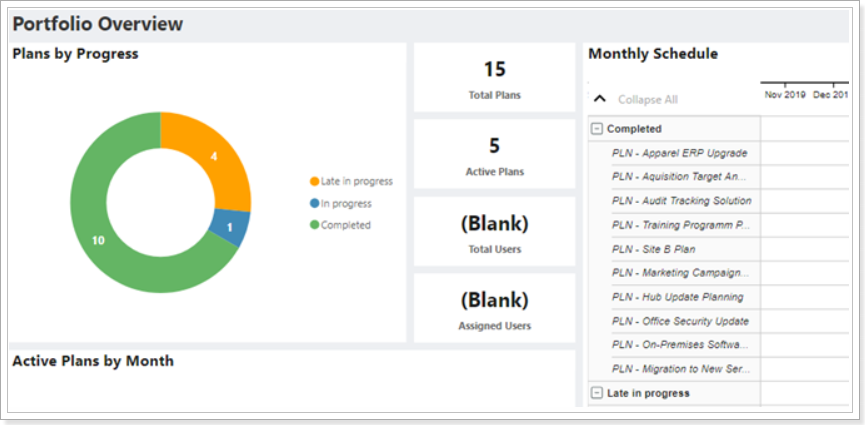
For example, the requirement is to setup security for Planner plans and show/hide existing plans and their entities (tasks, assignments etc.).
After you decided on the entities you would like to show/hide, the next step is to decide what access categories or roles you have, as well as permissions for each role.
For example:
- Supervisor – has full access;
- Head of Department – can see only the plans created by the users from the same department (by members of the department in question).
Please note: The user with the 'Head of Department' role will see all plans within the department that this user belongs to, even if this user did not create any plans.
The department is set in the 'Job Info' section of the user profile;
- Manager – can see only the plans they are managing (plans owner);
- User – can see only the plans they are included to and only the tasks they are assigned to.
After the roles are defined, they can be created in the report.
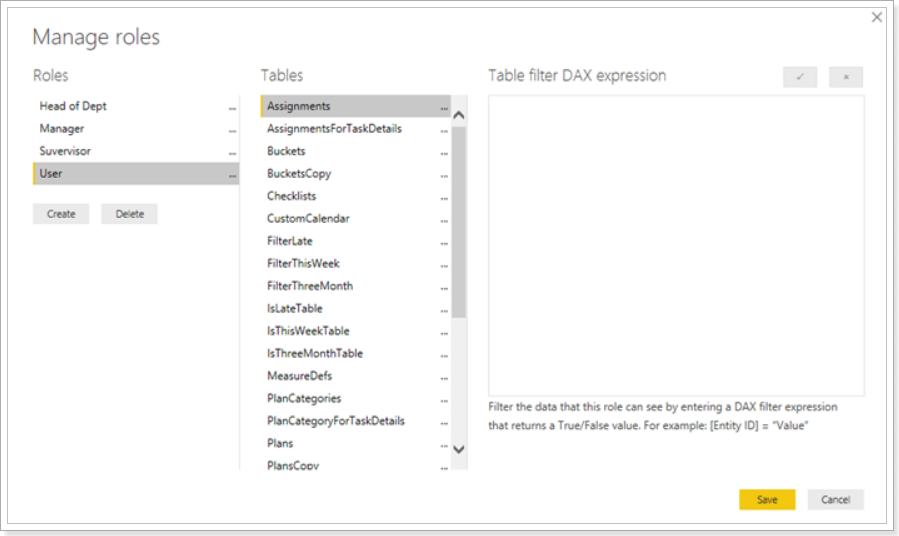
Once the roles are created in the report, the next step is to describe how each role filters out the entities that are being secured.
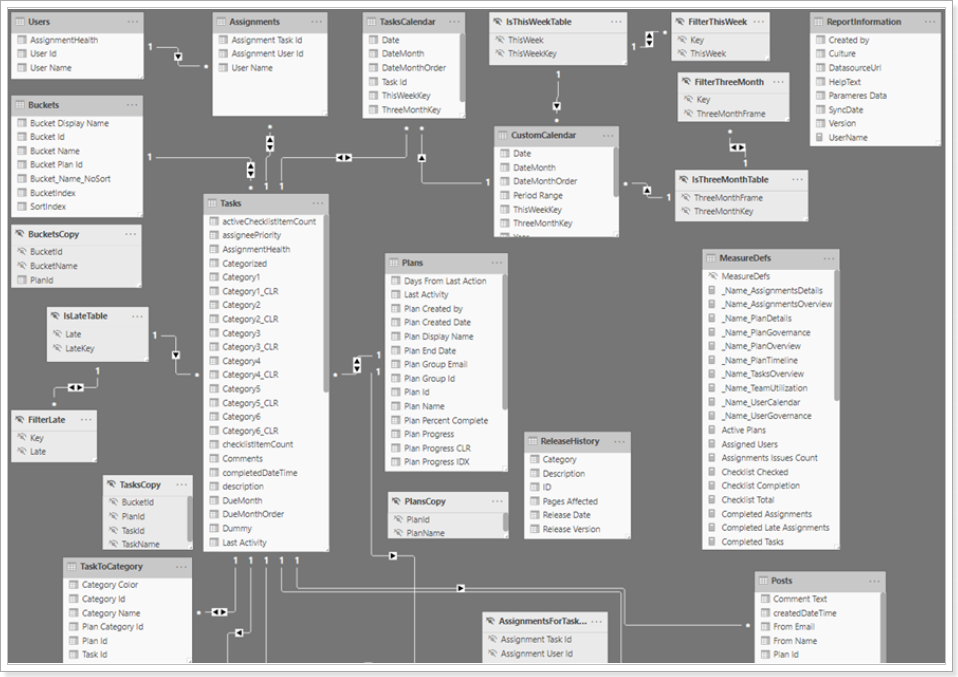
In order to do this, we need to understand relationships between the entities in the data model, analyze the model and create DAX-filters for each role.
DAX-filters will be created based on userprincipalname() function, as this is the only function that returns the login of the current user.
User role setup
Filter will need to be applied to the following tables for the User role:
- Users – in order to hide all users except for the current one.
- Assignments – in order to hide all assignments except for the ones that are assigned to the current user.
- Plans – in order to filter out Tasks and Plans tables via two-way relationship.
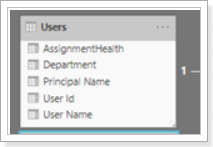
Currently the tables are missing several fields that we need for filtering: user’s Principal Name and user’s Department. EPM Pulse/DataMart has this information in the Users table, so we can retrieve these fields from EPM Pulse/DataMart and add them to the data model.
Let’s filter out the users applying the following filter in the settings of the User role:
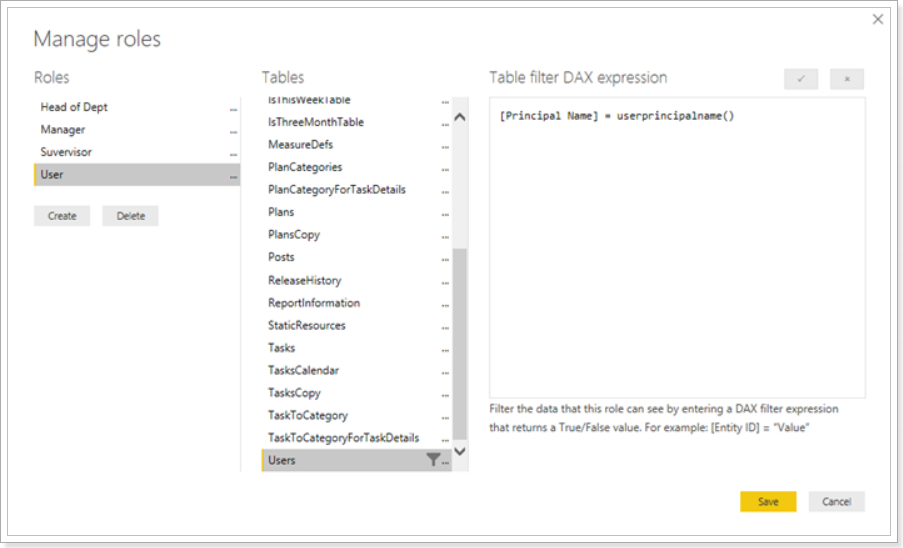
The list of users will be updated once the filter is applied – since the current user (programmer) is not in the list, the table will become empty after User role is applied.
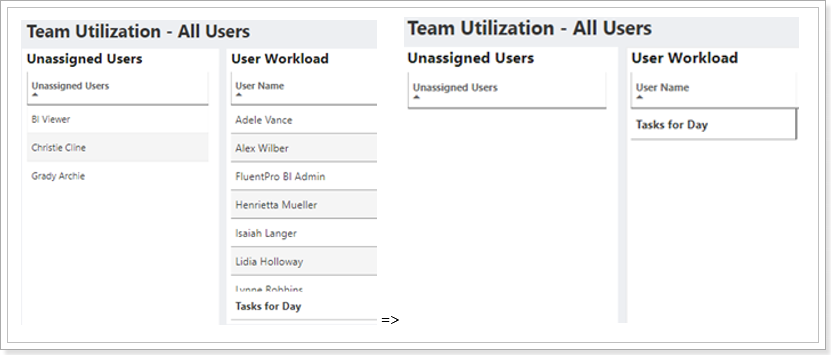
Assignments table will be empty as well, as there is a connection between users and assignments which affects visibility of the assignments in the table.
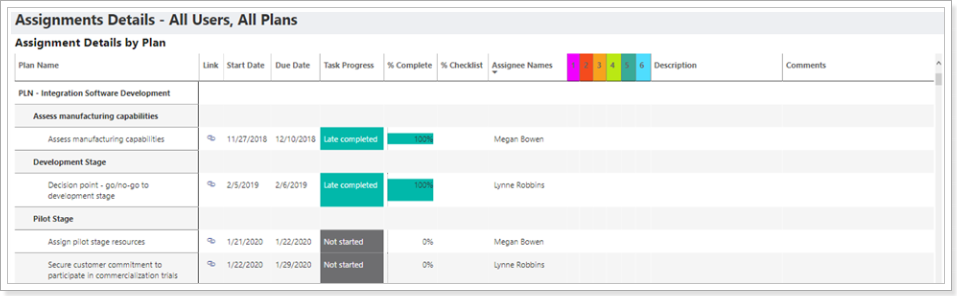
However, if we open Assignments Details, we will still see the Plans and their Tasks. We would need to perform additional steps to secure this information.
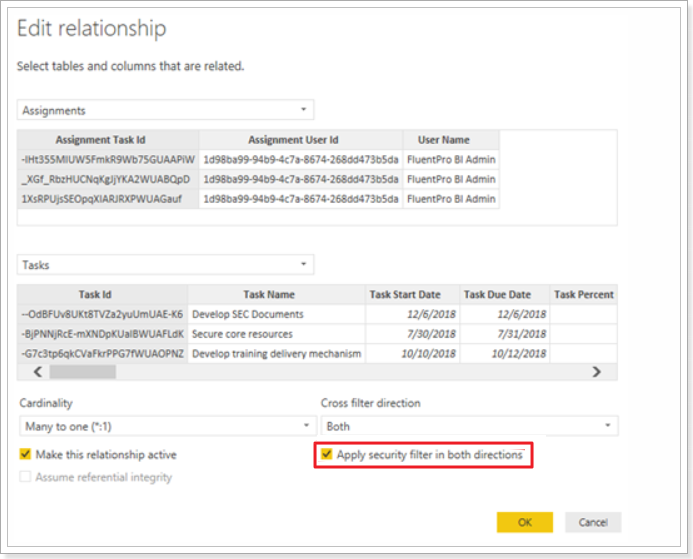
We would need to change Assignments-Tasks relationship properties in order to apply a cascade filter by the user Principal Name to the tables.
Open Edit Relationship for Assignments – Tasks, check ‘Apply Security filters in both directions’ check-box and save the changes.
As a result, Assignment Details table will no longer display Plans and Tasks because there is no data in the Assignments table.

Plans table still displays the data, so we would need to apply security filter to Tasks – Plans relationship as well.
Open Edit Relationship for Tasks – Plans, check the ‘Apply Security filters in both directions’ check-box and save the changes.
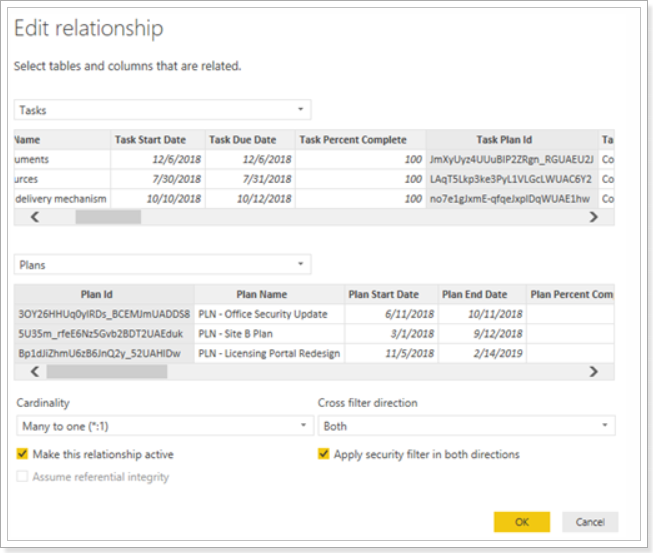
As a result, Plans table no longer displays the data because there is no data in the Tasks table.

To summarize the above, all entities that need to be included into RLS filtering must either be filtered out directly one by one or must have ‘Apply security filter in both directions’ option enabled for cascade filtering based on data model relationships.
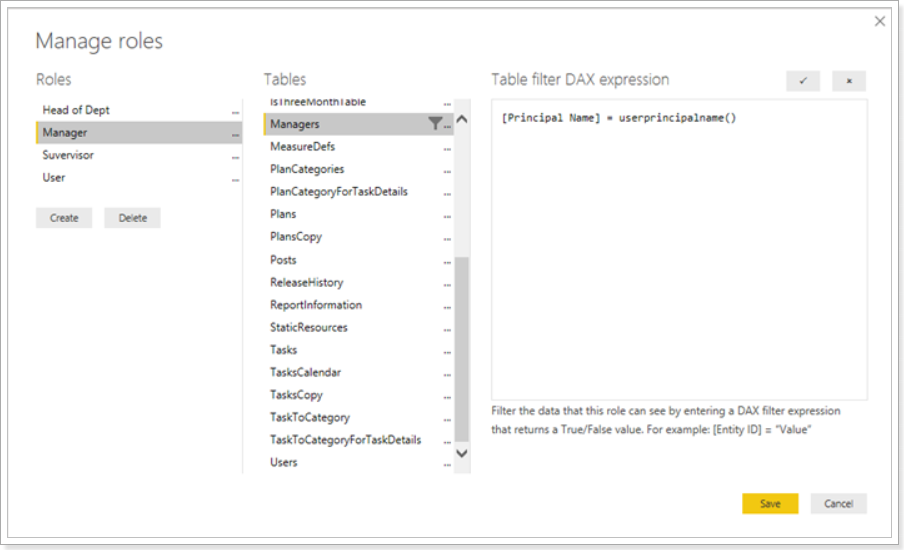
Manager role setup
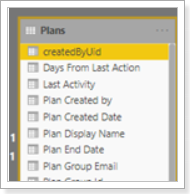
Manager role requires creation of additional column called ‘Created by Principal Name’ for each Plan.
Each Plan has information about UID of the user who created this Plan, based on this UID user’s Principal Name can be retrieved from the Users table.
However, Plans table already has a two-way relationship controlled by “Apply security filter in both directions” option. Due to Power BI limitation it will not be possible to apply filter to the Plans table directly.
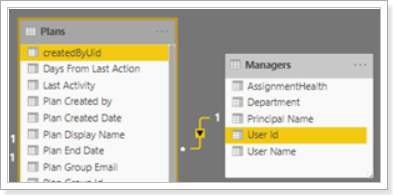
As a workaround, we would need to create a copy of the Users table, name it ‘Managers’, connect this table to the Plans table and set filters for the newly created table.
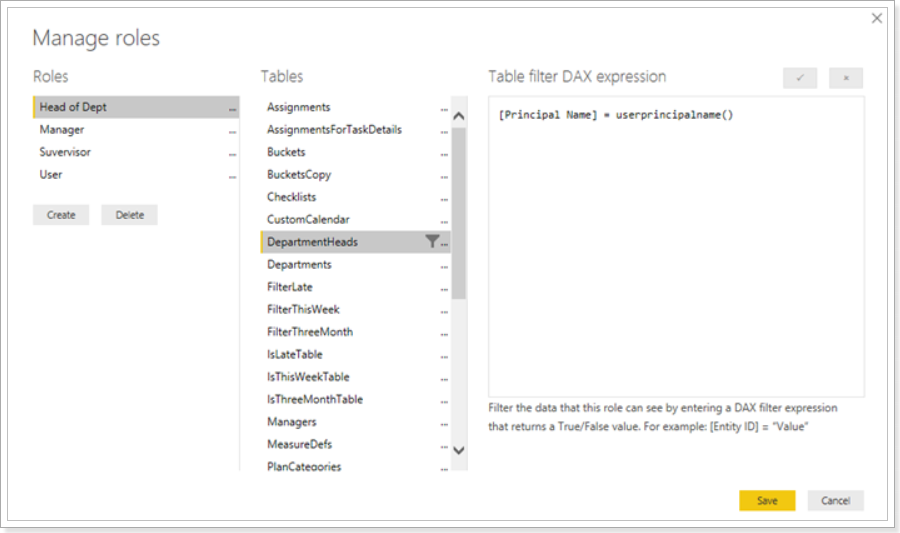
Head of Department role setup
Head of Department role requires two additional tables:
- Departments - containing the list of departments;
- DepartmentHeads – containing the list of the heads of departments as a filter-table.

Setup role filter as following:
Supervisor role setup
Supervisor role does not need to have any security filters, as users with this role applied have access to all the data.
Sharing the report with security roles assigned
The final step is to upload the report into the workspace on app.powerbi.com, assign corresponding roles to all users who need to see the report and share the report with these users.
Please note if you share the report with users who do not have any role assigned, such users will not see any data.
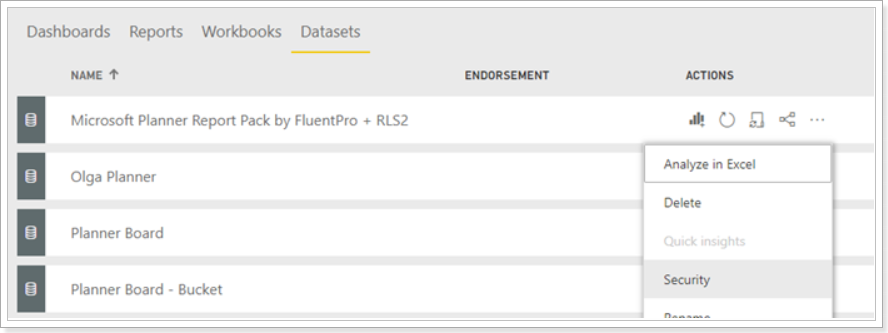
1. Upload the report and open Dataset’s settings:
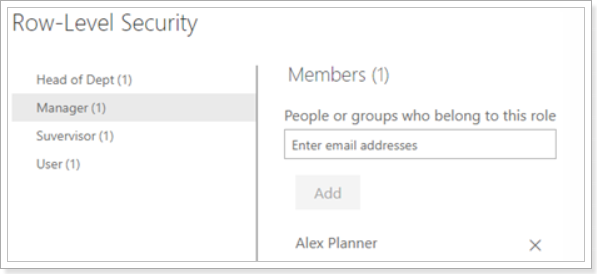
2. Assign users to one or several roles.
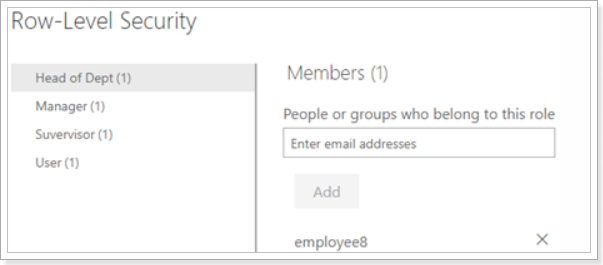
3. Share the report with the users as necessary.

4. Review the report as a user with each of the roles to verify that RLS setup is performed correctly.