In this article, we will review how to configure Power BI Planner Premium (formerly Project for the web) Report Pack.
Before you proceed to the steps below, make sure you have the following:
- Computer with an Internet connection.
- Planner Premium (Project for Web) report pack that you can request from our Sales Team at sales@fluentpro.com.
- Power BI Desktop installed and Signed In to.
The process is divided into 3 main steps:
I. Create a Power BI Workspace.
II. Create a report using the Power BI report pack for Planner Premium in Power BI Desktop.
III. Publish Power BI report pack for Planner Premium to the Power BI App Workspace.
Create Power BI Workspace.
1. Navigate to the Power BI service and click on Workspaces.
Then select Create a workspace:
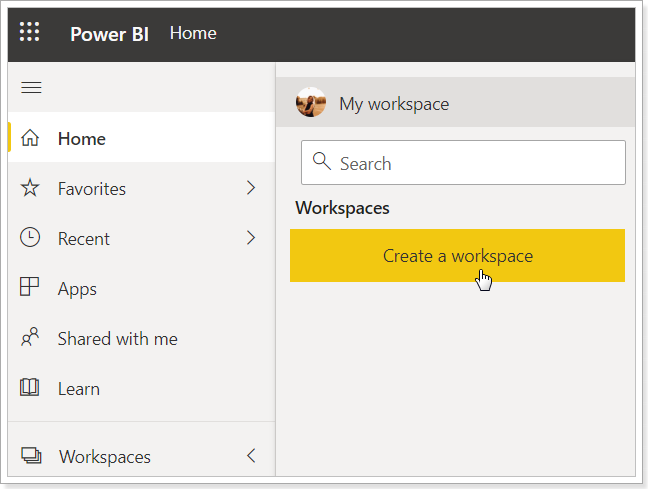
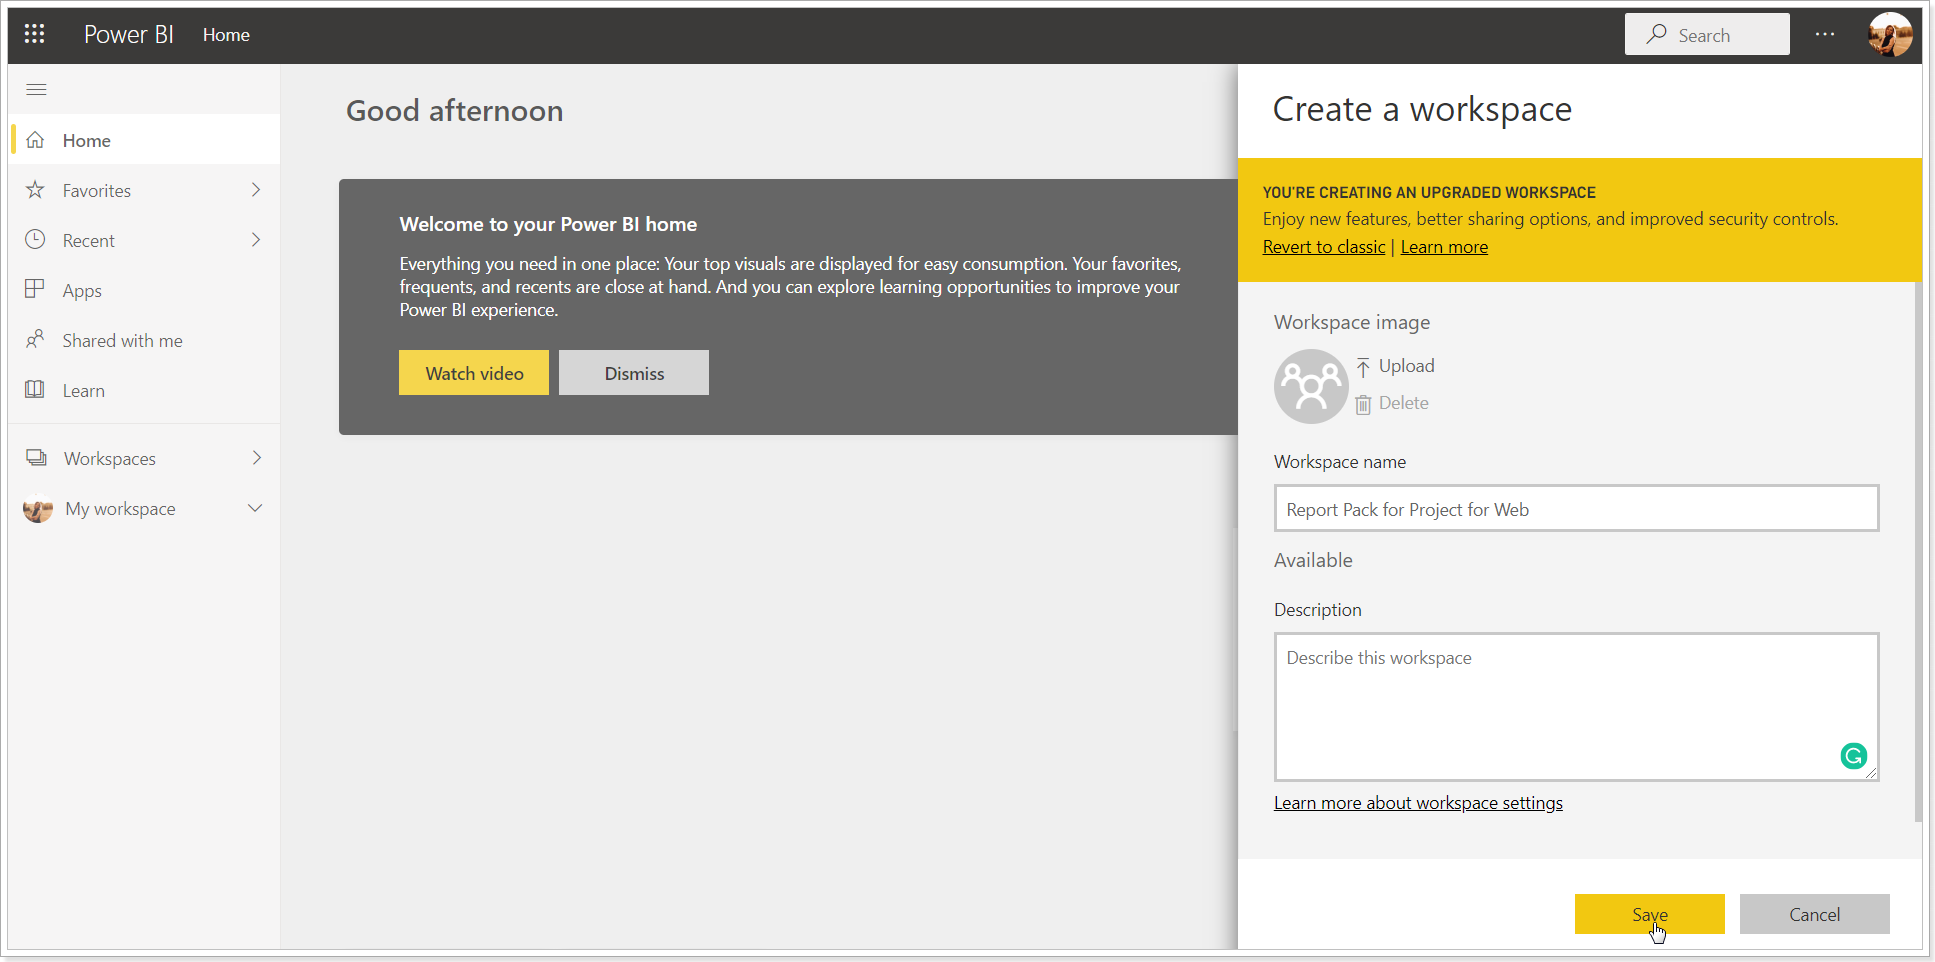
2. Create a new workspace, providing all required by Power BI information.
- Upload an image that will be used as a workspace cover.
- Type in the workspace name.
- Populate optional description.
- Click Save once you are done.
3. A newly created Workspace is ready. You can now proceed to the next step.
Create a report using Power BI report pack for Planner Premium in Power BI Desktop.
1. Launch Microsoft Power BI Desktop. Sign in to it with the same account you created a Workspace in Power BI service in the previous step.
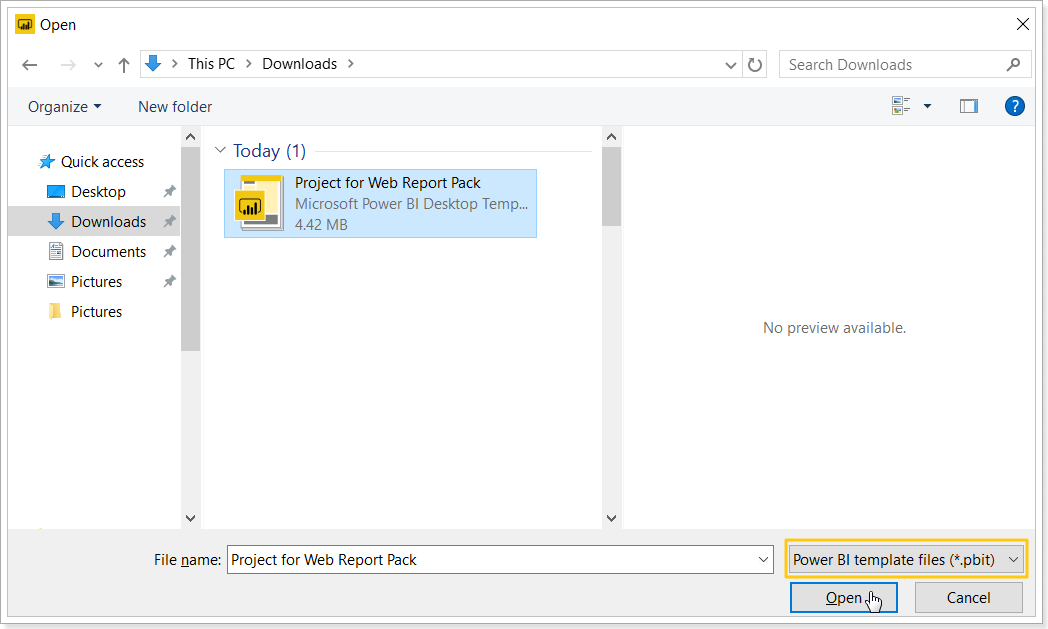
2. Click File >> Open >> Browse report. Navigate to the folder to which the "Planner Premium Report Pack" file was downloaded.
Select the file extension drop-down in the bottom right corner of the window and choose 'Power BI template files (*.pbit)' file type.
Open the "Planner Premium (Project for Web) Report Pack.pbit" file.
3. Power BI Desktop will prompt you to provide the Data URL for Planner Premium report pack.
Planner Premium data is stored in the Dynamics 365 Common Data Service (CDS). You need to enter the URL of your default CDS instance that you are using.
To get this URL perform the following:
- Open the site: https://make.powerapps.com/.
- Login using your Office 365 account.
- On the PowerApps page click on the gear button and select Advanced Setting option.

- Click on the Settings tab and select Customizations option.

- Select the Developers Resources option.

- Copy the Service Root URL.
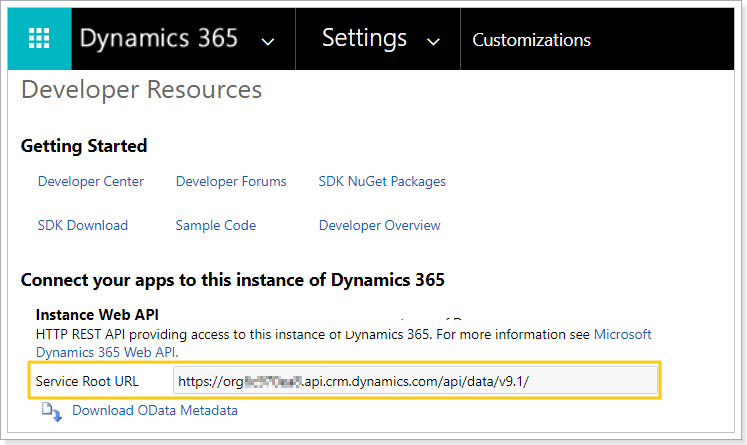
Paste the URL to the Power BI Desktop window. Click Load to proceed.

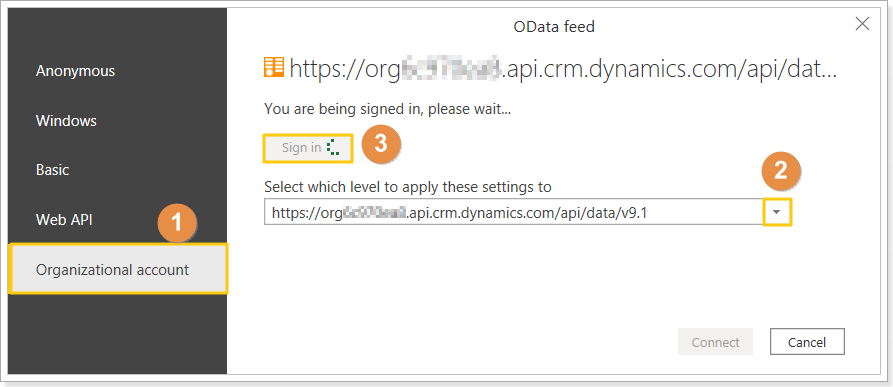
4. Power BI Desktop will show a window to provide authentication, perform the following:
- Choose Organizational account type (1).
- Select which level to apply these settings to (2).
- Click the Sign in button and provide your user name and password to sign in to Planner Premium (3).
- When you are signed in, click Connect to proceed.
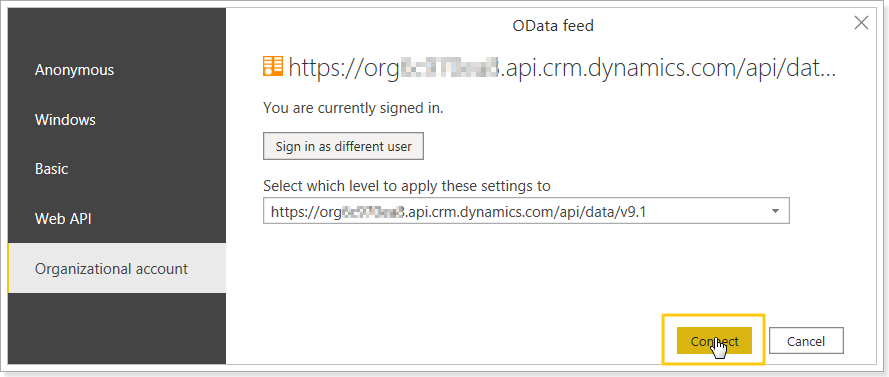
5. Power BI Desktop will connect to Planner Premium with the credentials you provided and will load the data to the report.
As the process finishes you will see data appeared in the report. You can click through the report tabs to review it.
6. Save the generated report to your machine by clicking File >> Save As.
Publish Planner Premium Report Pack to Power BI App Workspace.
After the report was generated in Power BI Desktop and saved, you can publish it to the workspace in the Power BI service.
1. In Power BI Desktop click Publish.
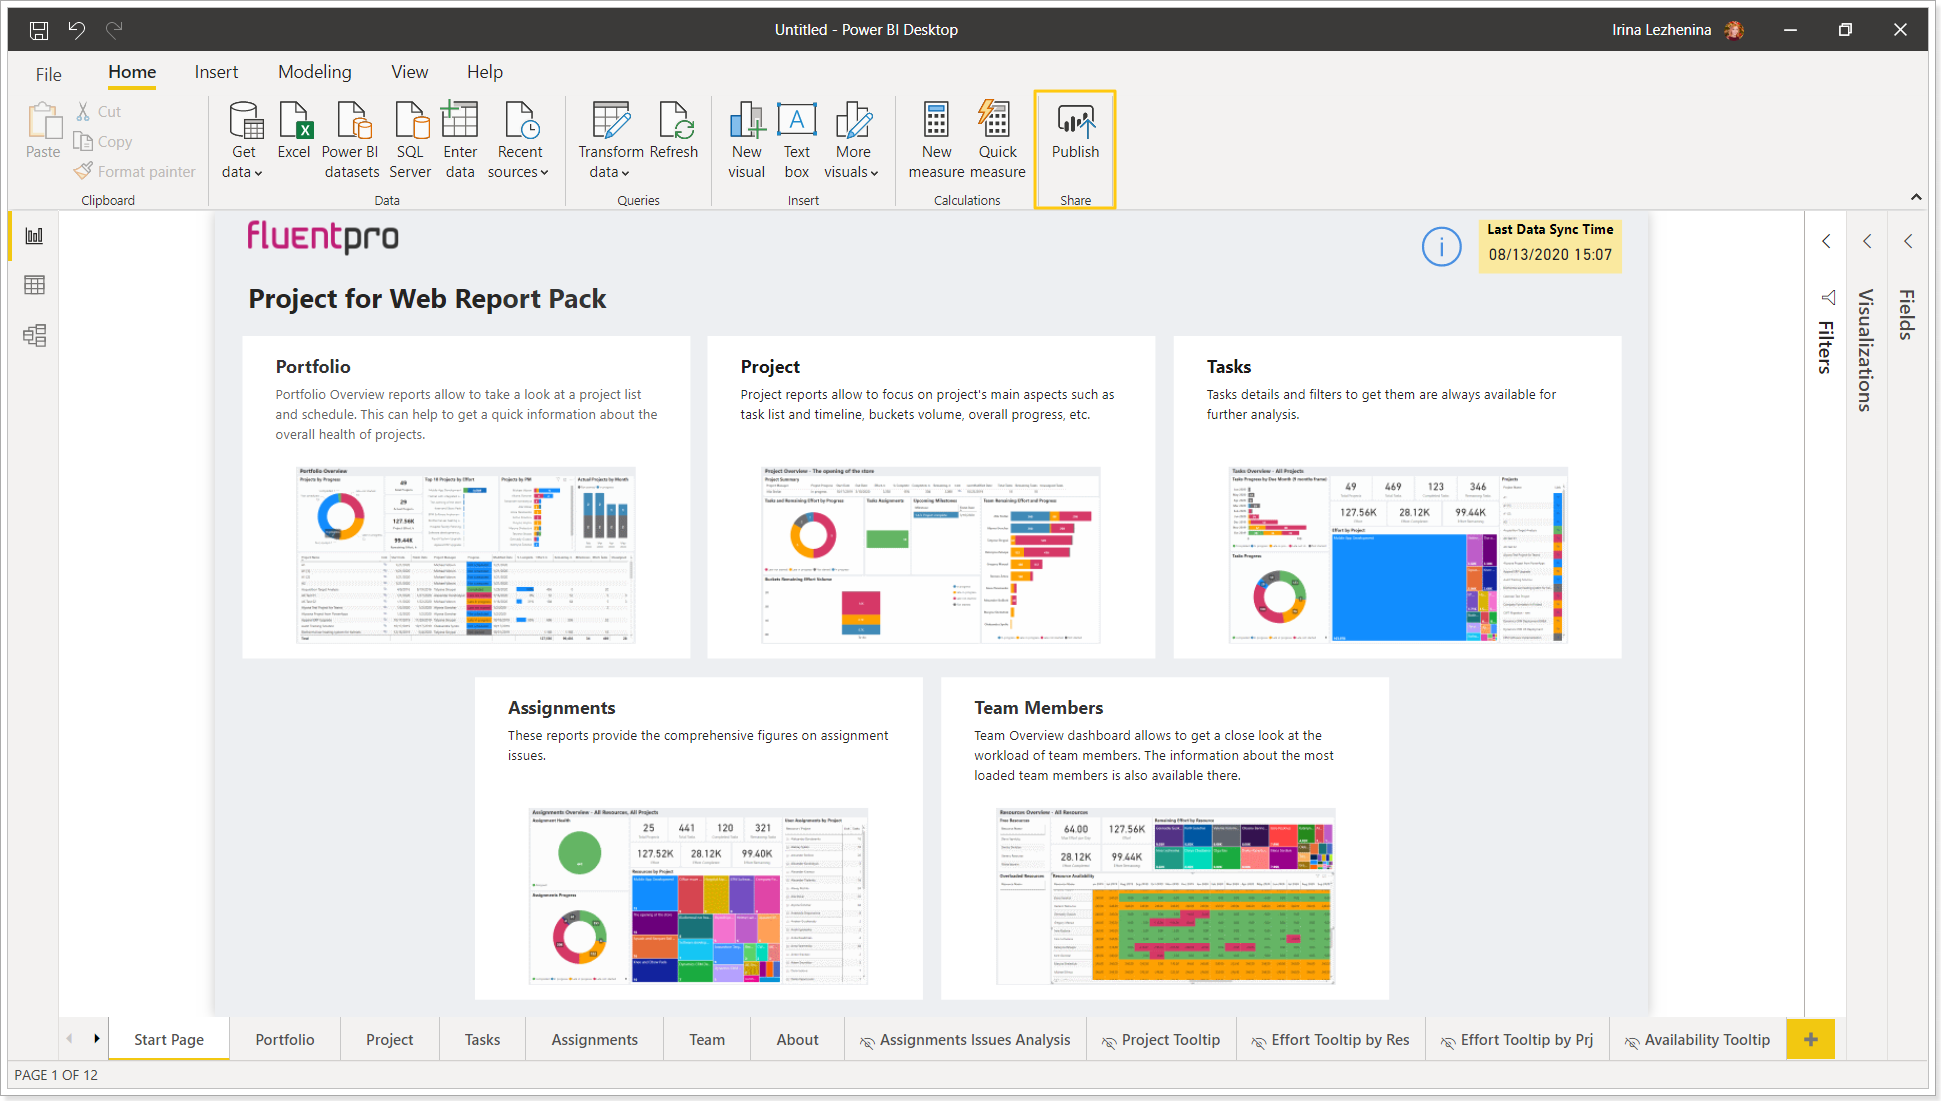
2. The dialogue window will appear, which allows choosing the Workspace to which you can publish this report.
Choose the workspace name, which was created in the first step in this article.
Then click Select.
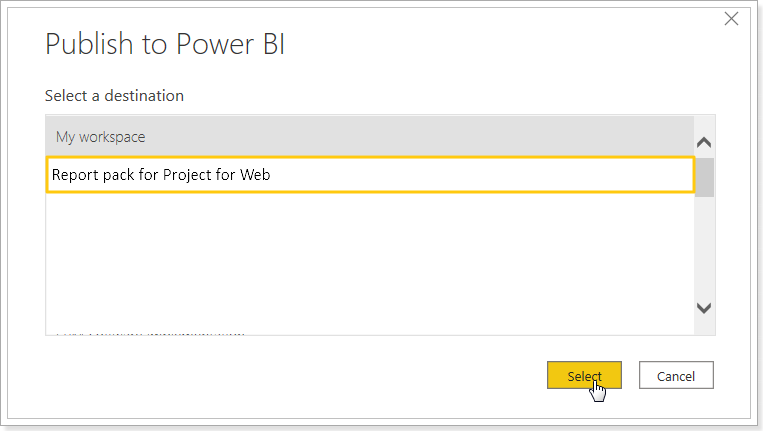
3. As the publishing process finishes, go back to Power BI service, open the workspace to which you published the report.
Congratulations! You can now share the report with your organization and configure it as required.
Please note: Make sure to set up the refresh schedule for your report, so that the data in the report is up to date.
