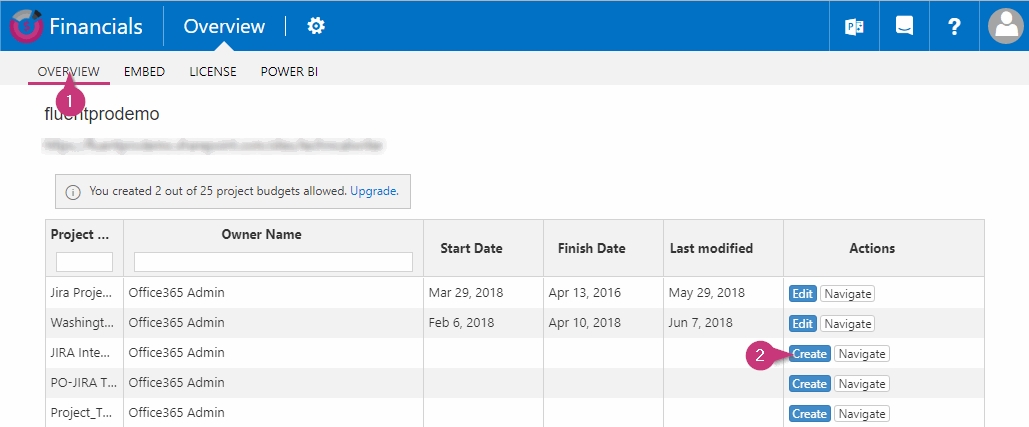
1. Navigate to Financials start page (Overview > Overview tab). This page shows the list of the projects available.
2. Find the project in question in the list and click on the Create button in the Actions column.

3. Navigate to Settings (gear icon) > Project details tab and find the Project level cost mapping section.

Click on the Ensure button next to each custom field name to make sure that all of them exist in your PWA. If any of these fields are missing, they will be created automatically.
Please note: Total Budget field is 'IN' type, meaning that it is set on the PWA and the values set there are automatically added to Financials.
Other fields are 'OUT' type, they can be set in Financials and the values will be automatically updated on your PWA.
4. Return to Financials start page (Overview > Overview tab). Find your project in the list and click on the Edit button in the Actions column. The project budget page will be opened.
5. To edit your budget, click on the Check Out button (may be unavailable if the project is already checked out to you).
6. Add the necessary changes to the budget.
Type the required numbers into your budget, they will be saved automatically. Use 'Add Subcategory', 'Move up', 'Move down', 'Remove' buttons in the Actions section to manage budget categories.
7. Click on Check In button.

8. Navigate to your PWA, open your project, and find the Project details page.
9. Click on Edit, find the Total Budget custom field, and fill it. After that, press Save. As you save the changes performed to the Total Budget field, it will be updated on the Financials Budget page as well. The field in Financials is called Totals.
As a result, all the necessary budget data will be added to Financials. Project Cost Accrual, Project Cost Actual, Project Cost Baseline, Project Cost Forecast custom fields will be automatically filled in by Financials.
