In this article, we will review how to restore data from the created backup.
There are two pages where you can launch the restore process: Operation Details and Data Protection.
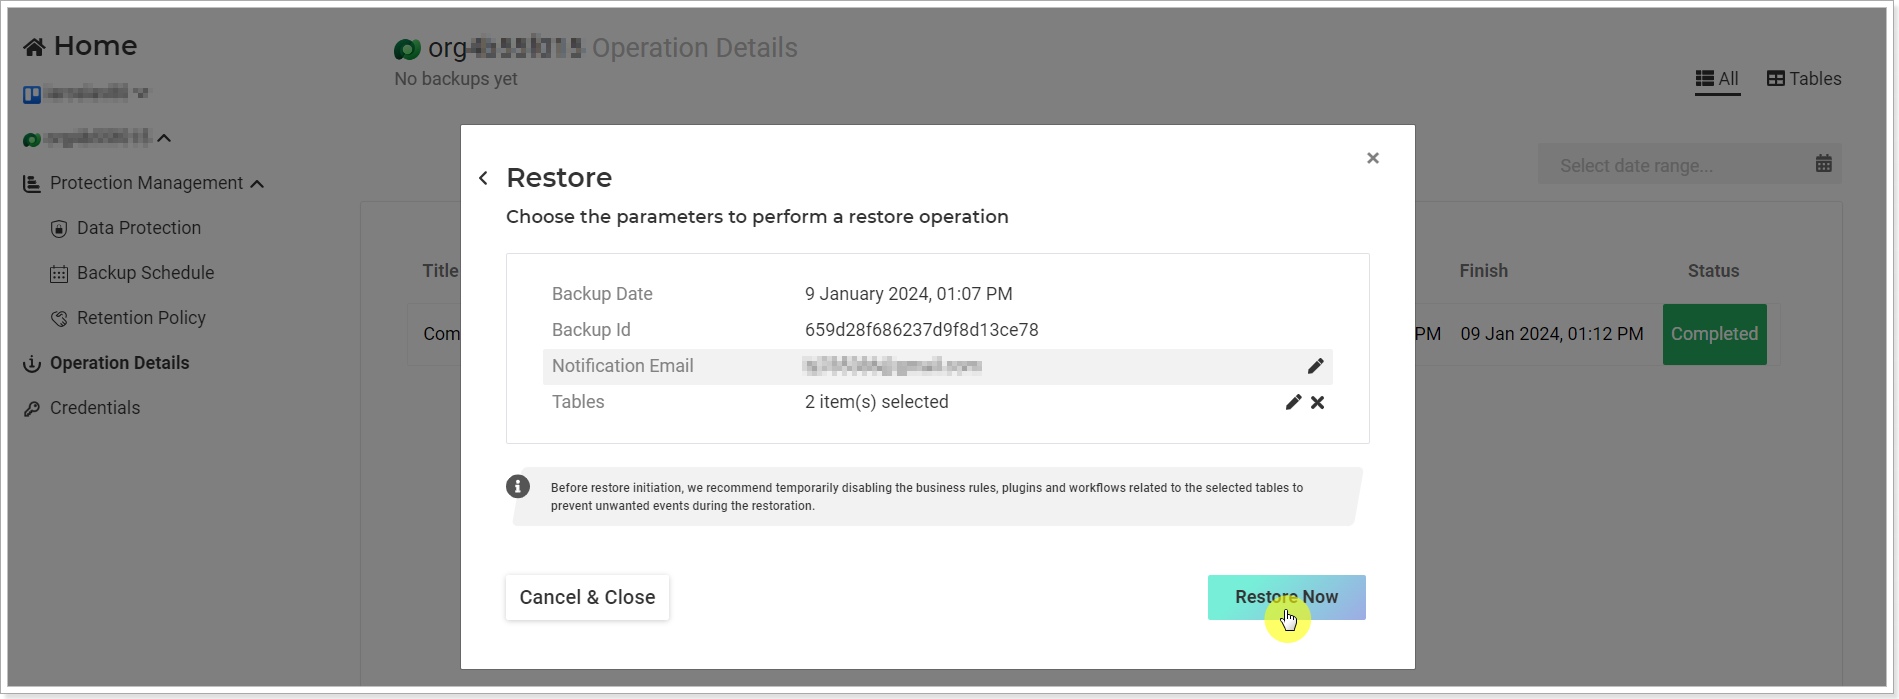
Please note: We recommend temporarily disabling business rules, plugins, and workflows that are related to the selected tables before starting the restore job. This will prevent unwanted events upon restoring records. For example, to avoid multiple emails during the restore process that are configured to be sent by the workflow rules, etc.
Full data restore
To launch the restore of a single table, perform the following:
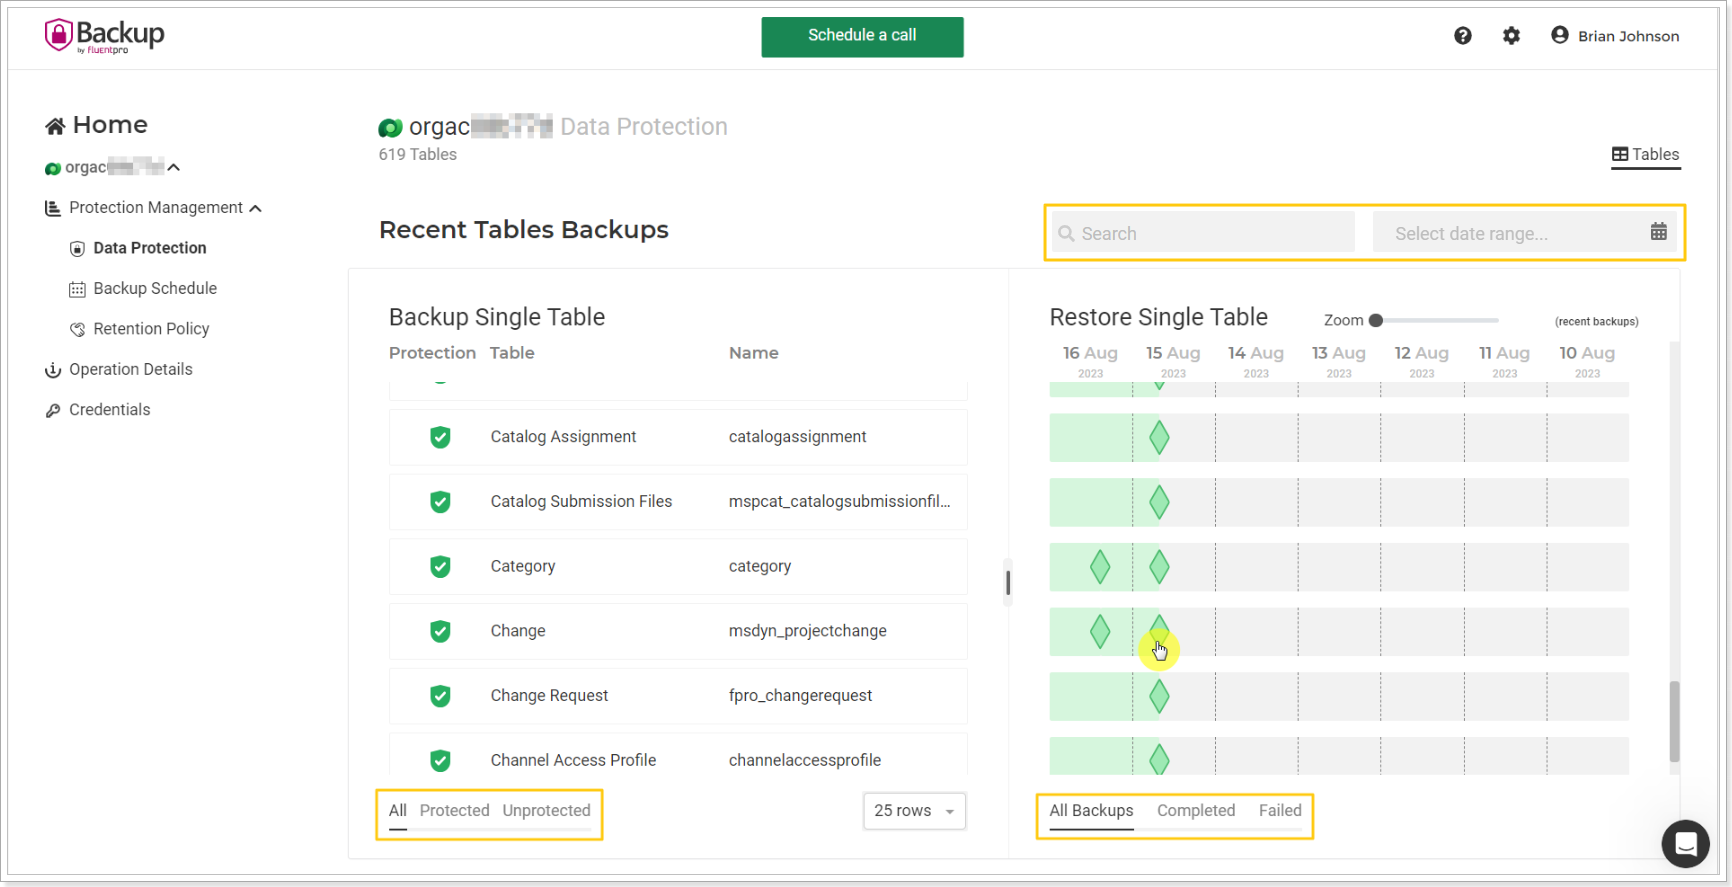
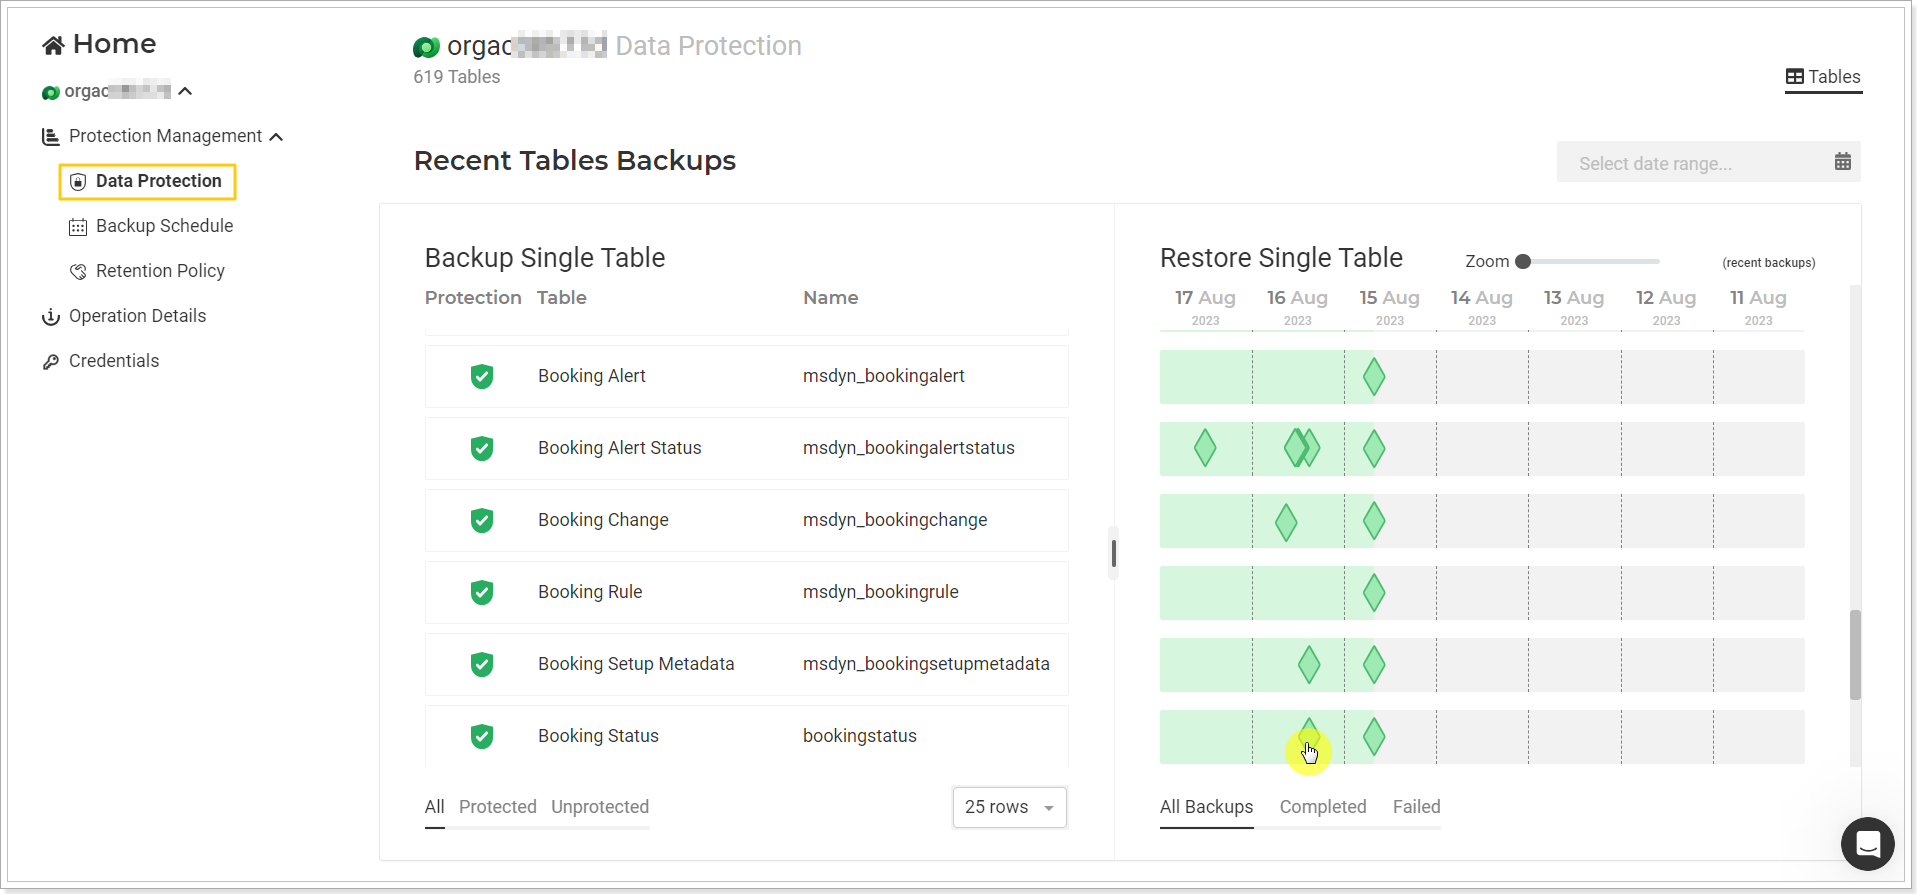
1. Open the Data Protection page and select the table you need to restore right now.
You can select to review all backups of the tables on the page or select to review only Completed or Failed backups using the buttons at the bottom of this section.
Use the date range option to select the required date to the state in which you need to restore the table. Use the Search option to find the needed Table by name.
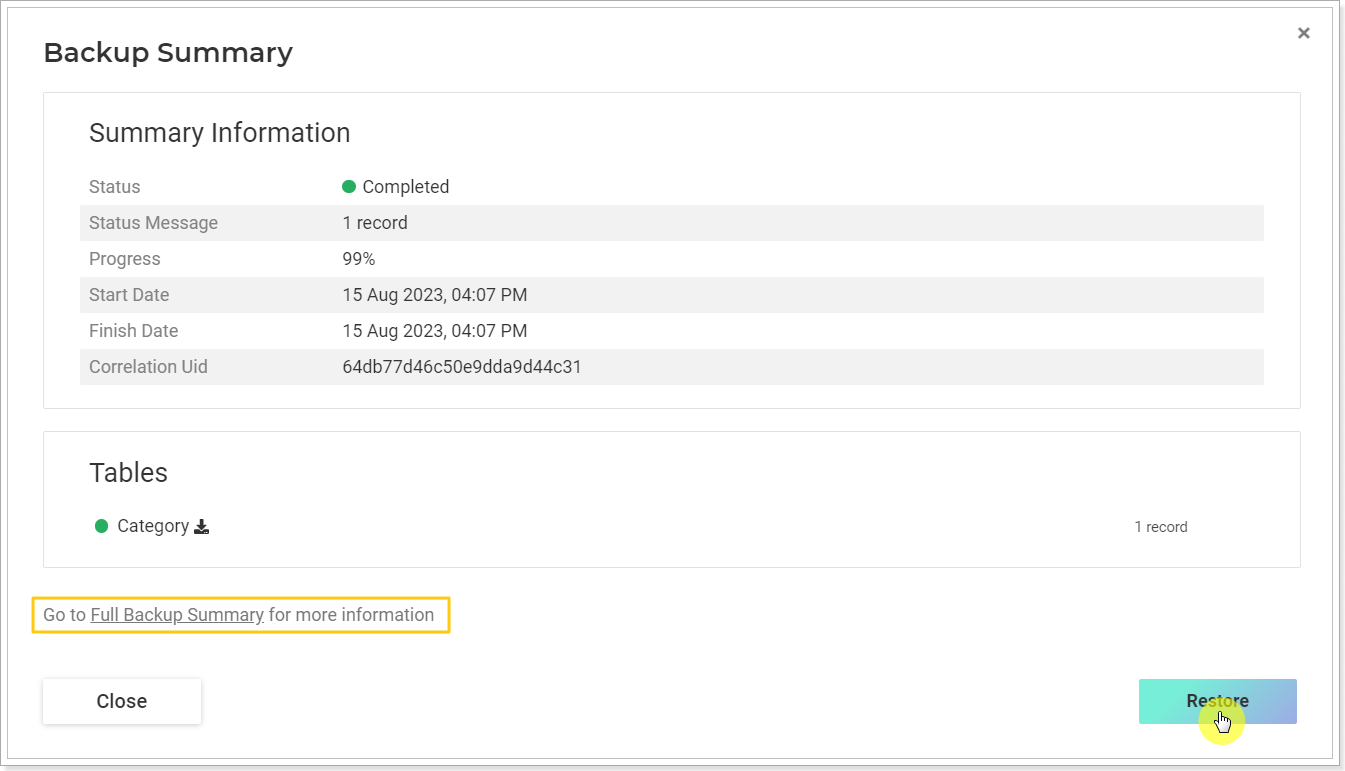
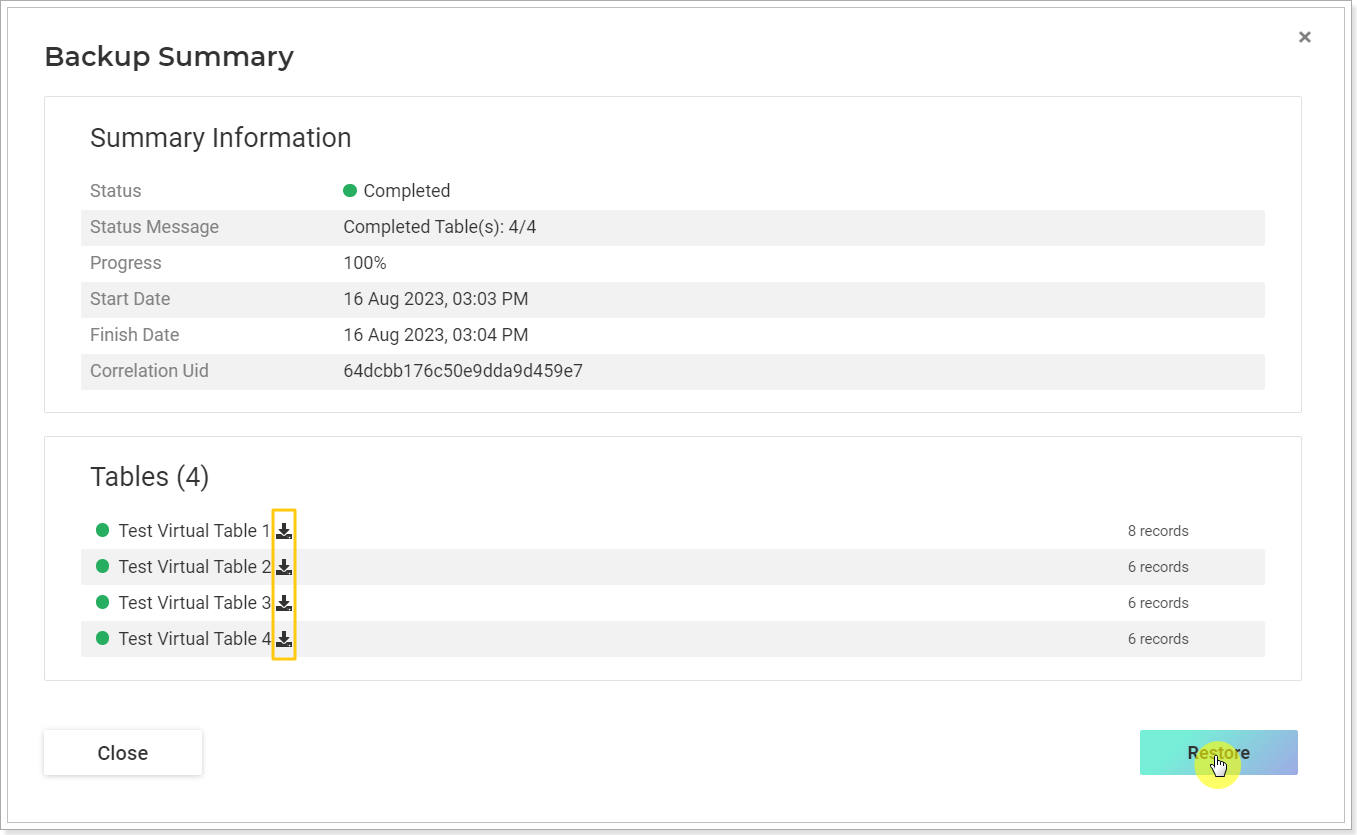
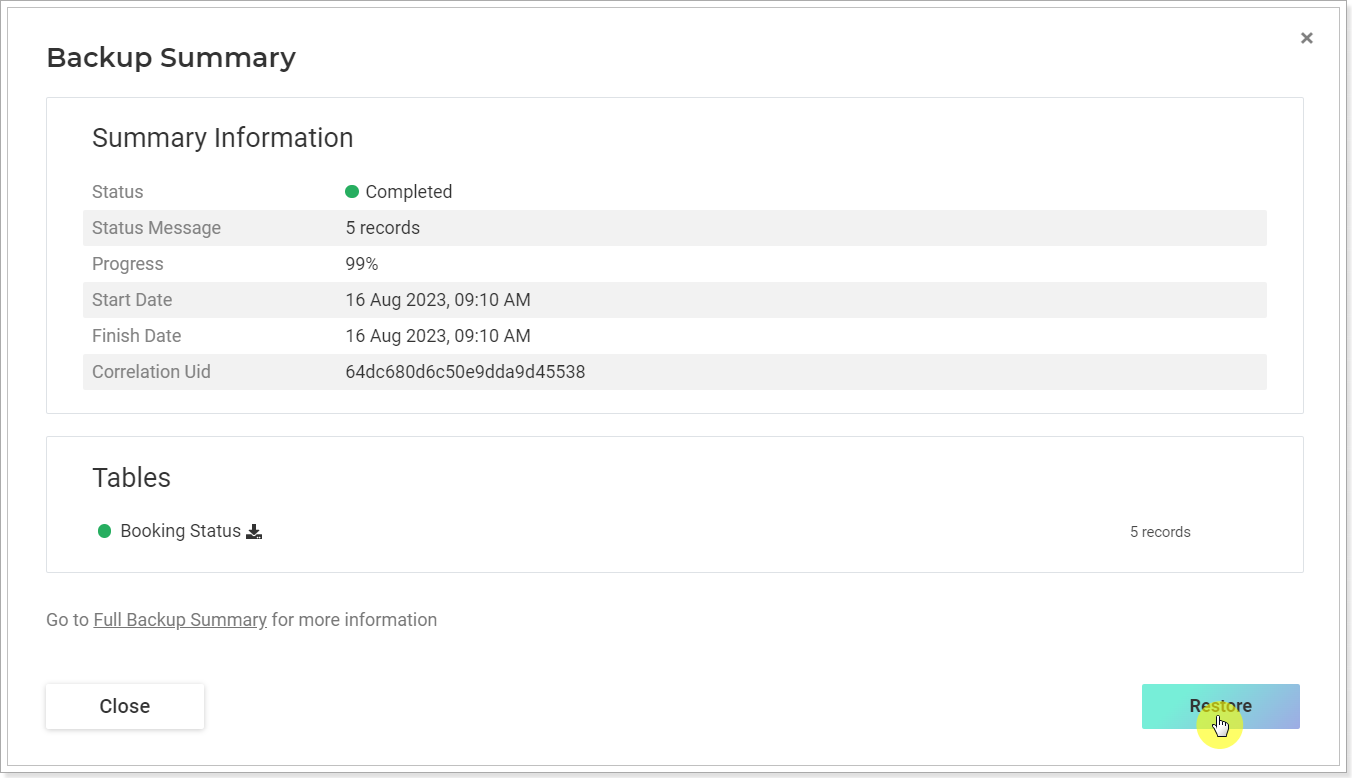
2. Click on the completed backup of the required table, and the Backup Summary page will be opened.
3. You can review the summary information for the selected backup of a single table and restore it at once by clicking the Restore button.
To select more data for restore click the Full Backup Summary option.
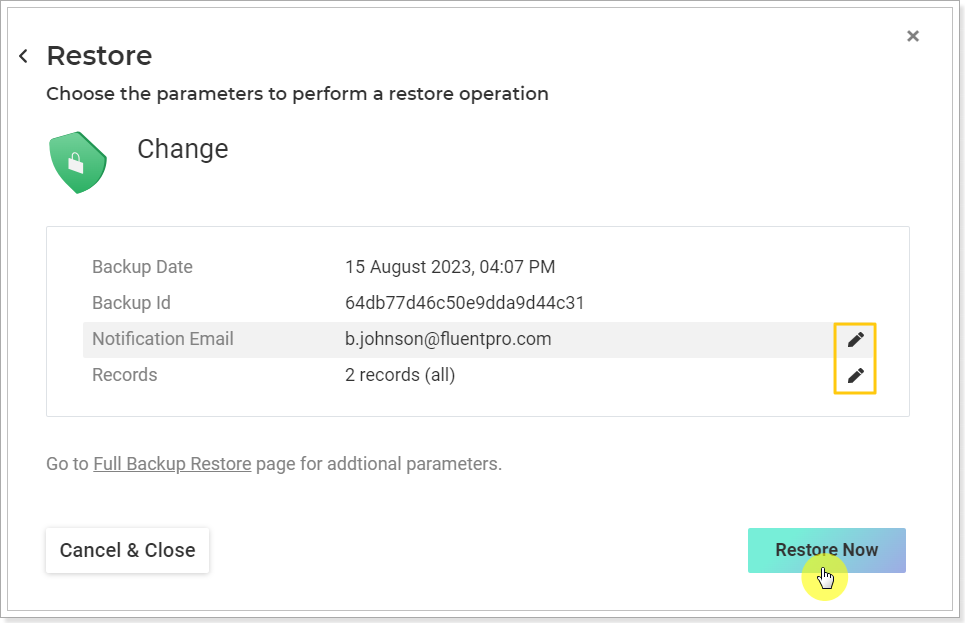
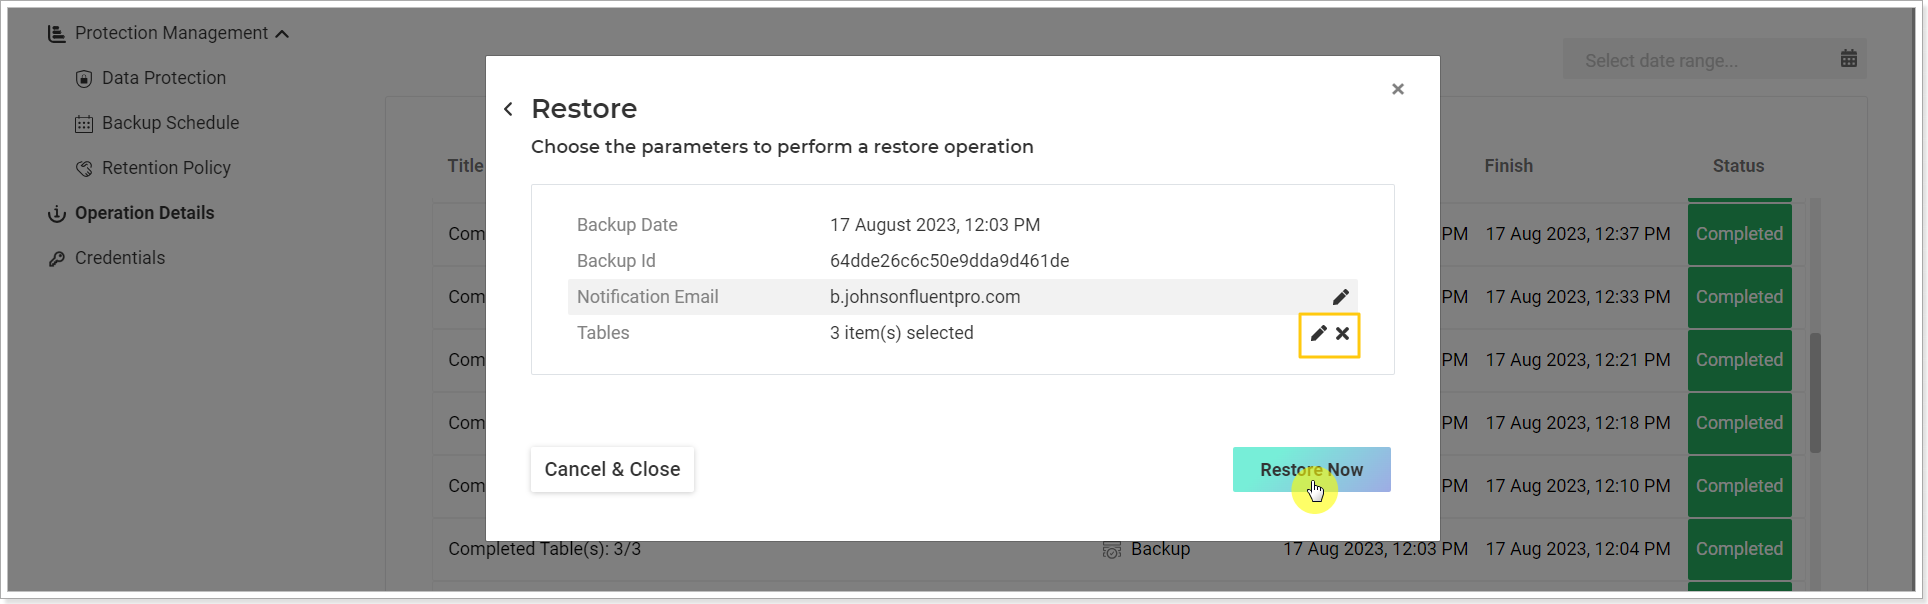
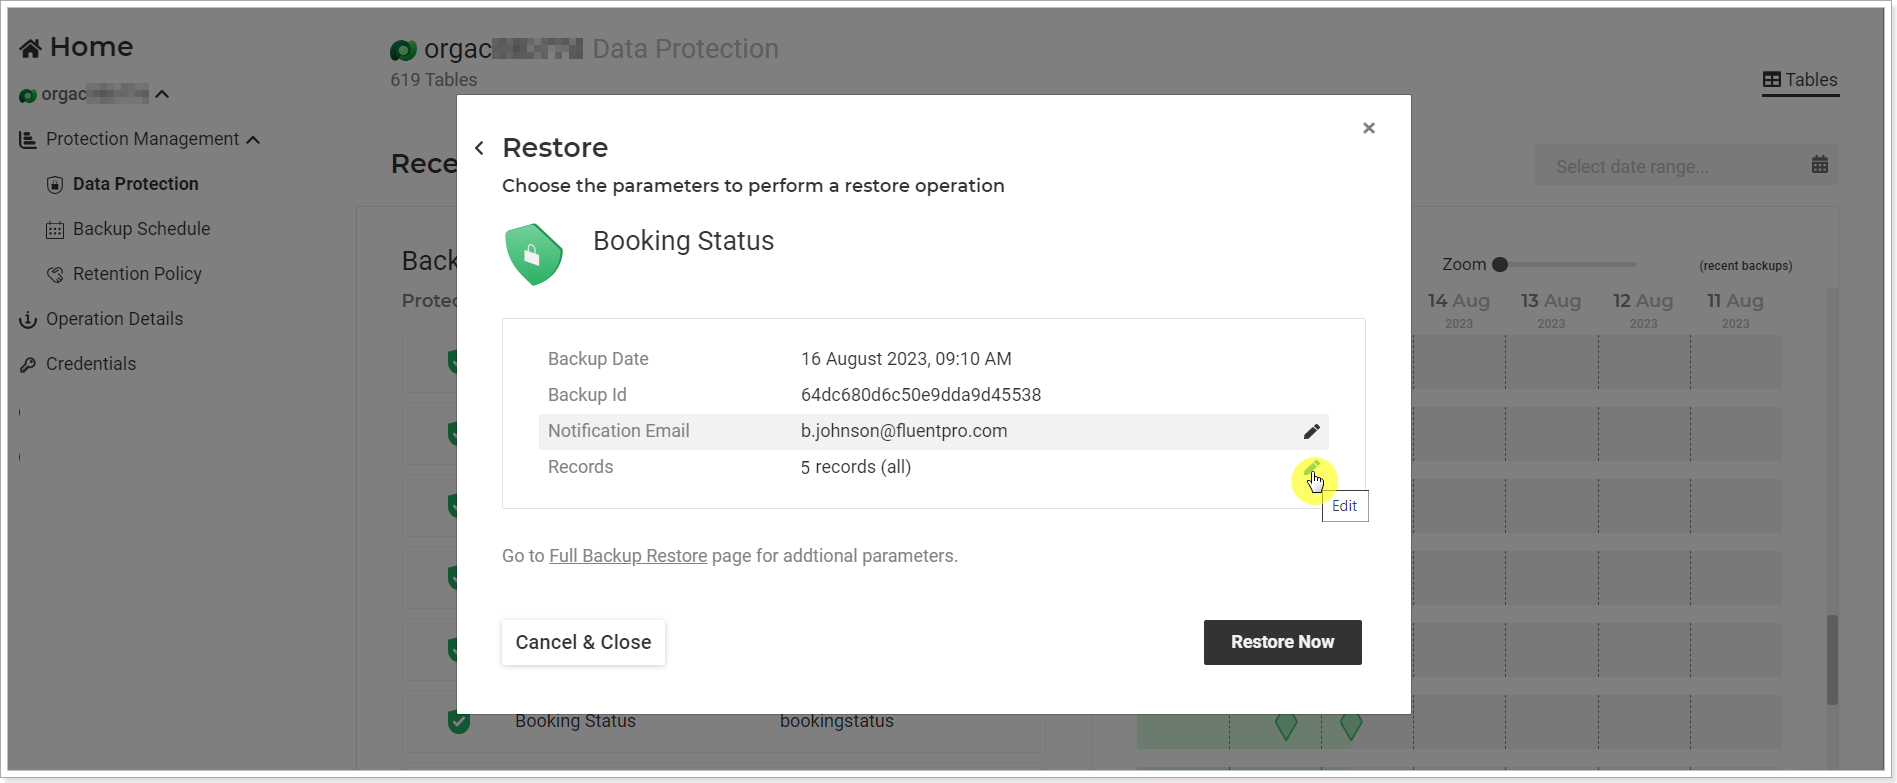
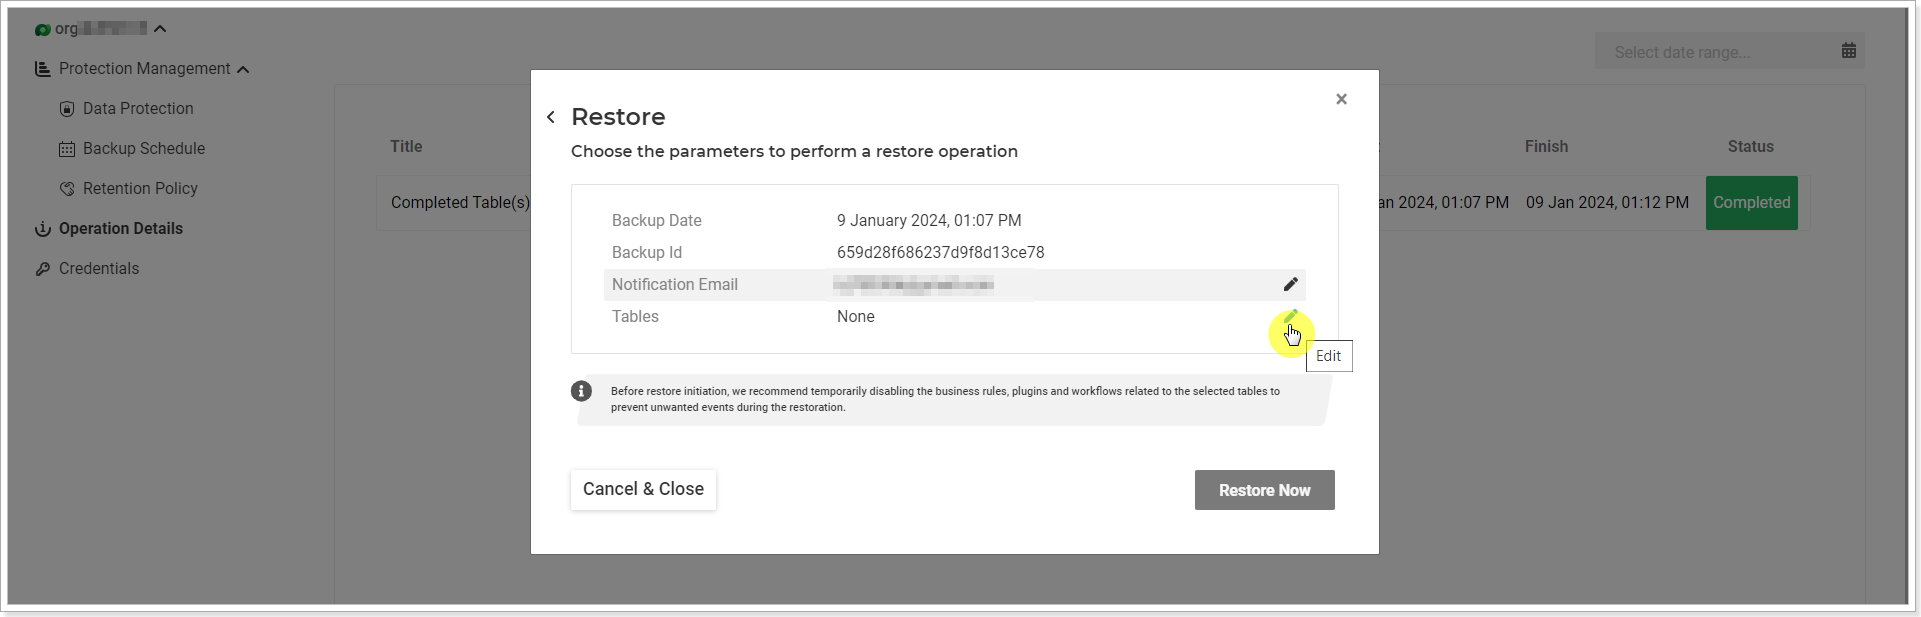
4. The Restore page will be opened where you can select what data you need to restore from this backup.
Click on the pencil-like button next to the Records option to select data for restore. You can either select everything at once or select only specific elements.
5. When the data is selected, click the Restore Now button.
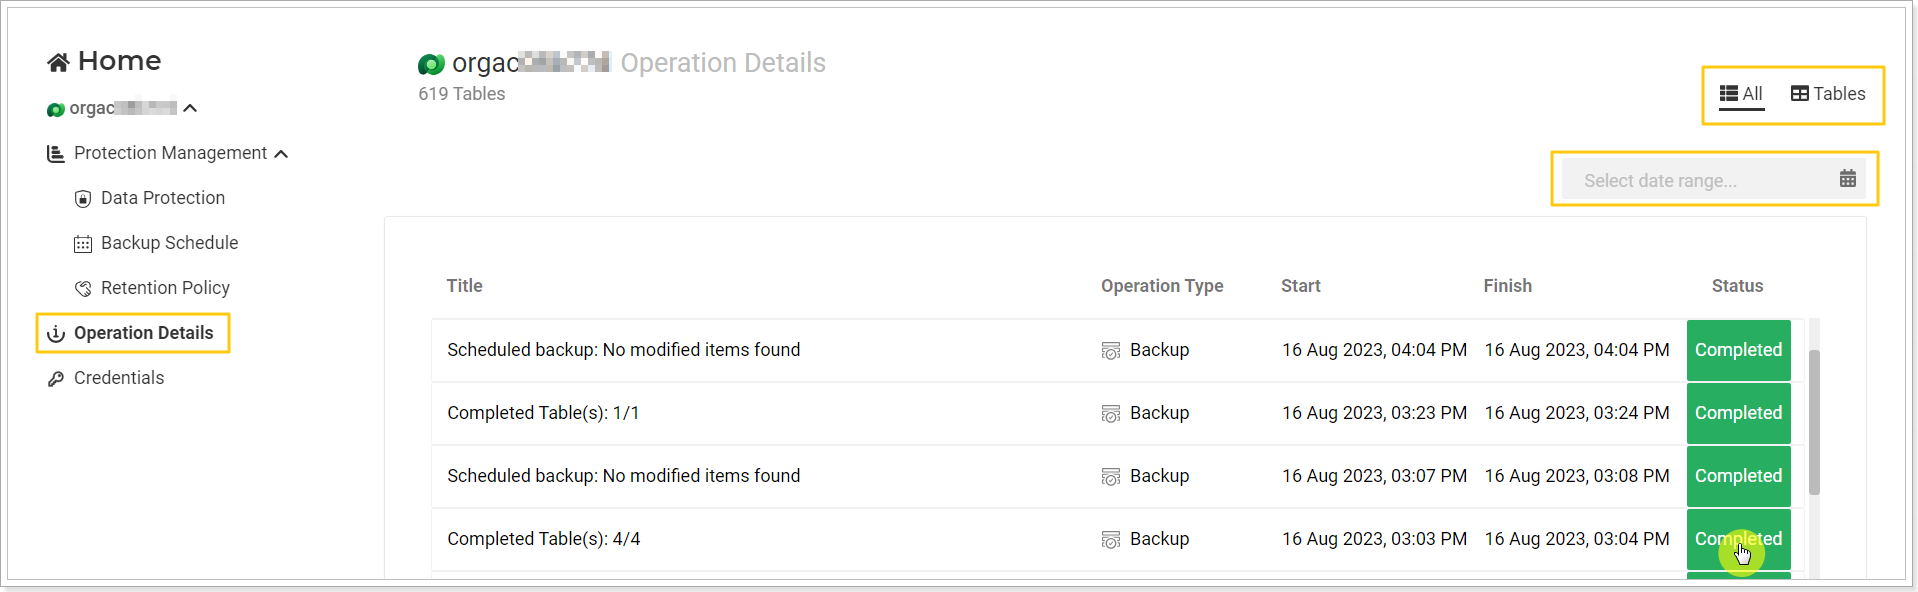
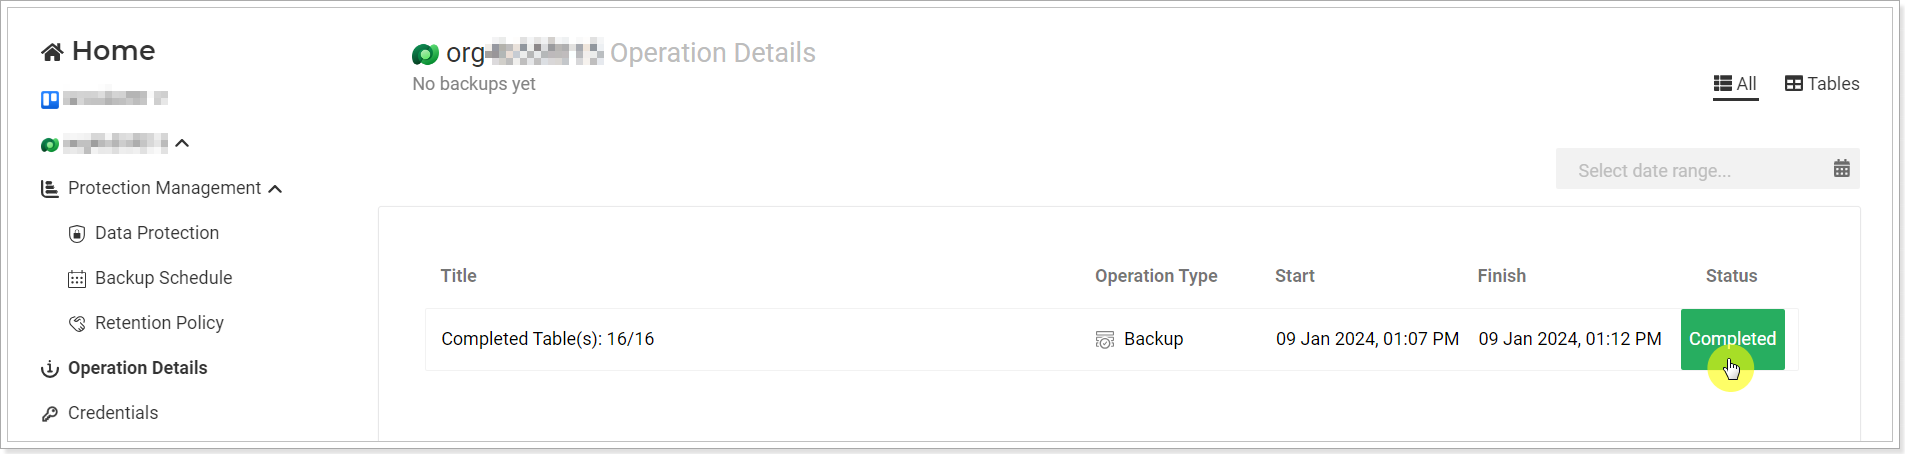
The Operation Details page allows you to open the full backup summary at once and select the required data for restore. Use filters on the page to quickly find the required backup operation.
1. Click on the completed backup operation to open its summary.
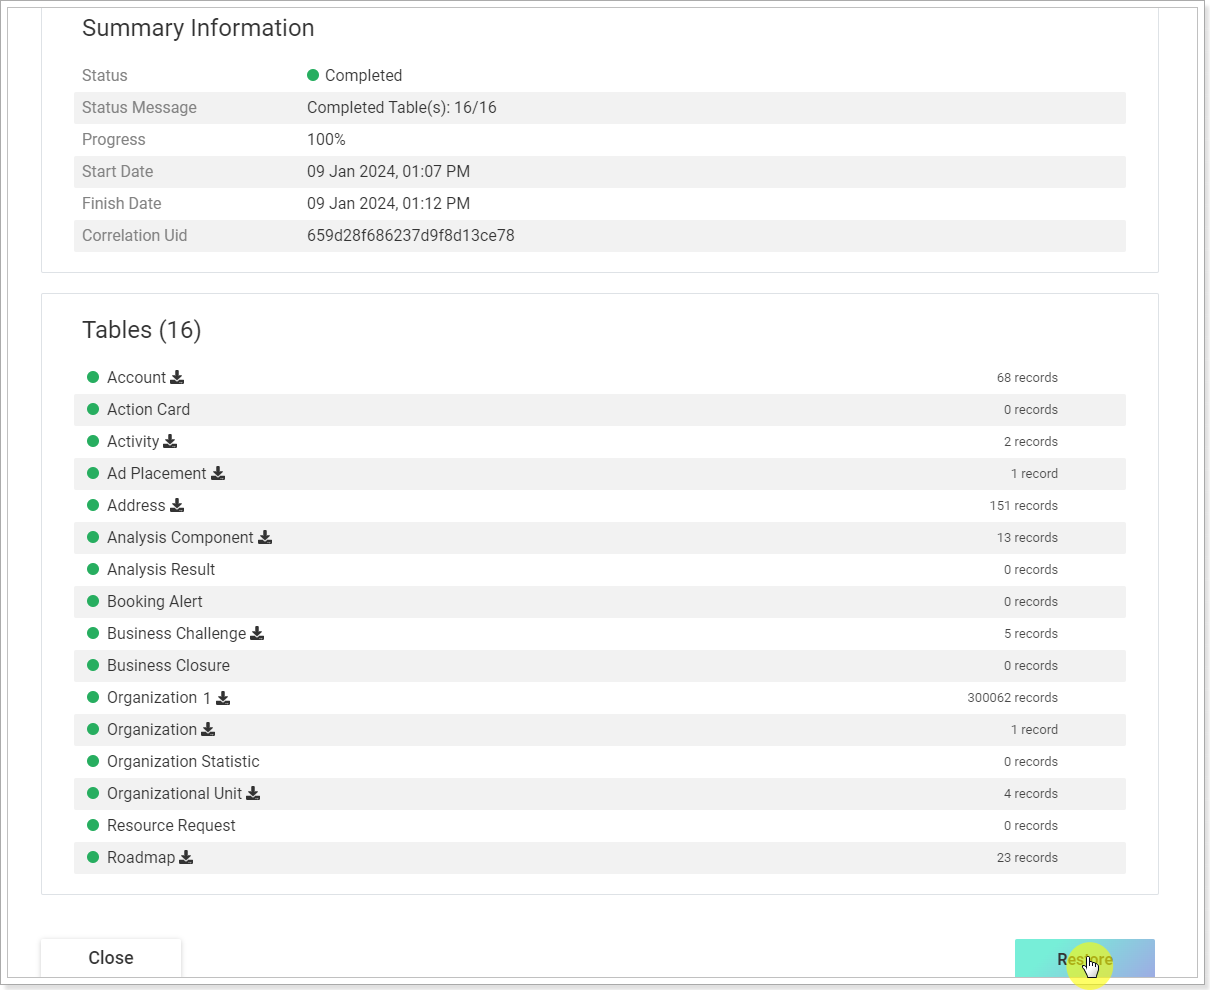
2. Review the Backup Summary. Data can be exported to Excel by clicking the Export button next to the item(s).
3. Click on the pencil-like button next to the tables to select the required ones for restore.
4. Click the Restore Now button.
The restore operation will be launched at once and will appear on the Operation Details page where you can check its status and progress.
Please note: FluentPro Backup backs up and restores only table data. For example, if the table records were edited inappropriately or deleted they can be restored. If a table or table column was changed or deleted it will not be restored.
Granular Restore
FluentPro Backup provides the ability to restore the table records granularly. If you need to restore only some of the records from a certain table, there is no need to restore the whole table and spend additional time for all data to be restored.
There are two pages where you can launch the restoration process: Data Protection and Operation Details, the process of data selection is the same.
1. To granularly restore data from the Data Protection page, select a table that you want to restore on this page and click on the completed backup button.
2. On the Backup Summary page click the Restore button.
3. Click on the pencil-like button to select items (please review the detailed steps on how to granularly select data below, step 4).
To restore data from the Operation Details page perform the following:
1. Open the Operation Details page, select the necessary backup file, and click on the Completed button.
2. Review the summary information and click Restore.
3. Click on the pencil-like button next to the Tables option to select the tables you want to restore.
Next, the process is the same for the Data Protection and the Operation Details pages restore:
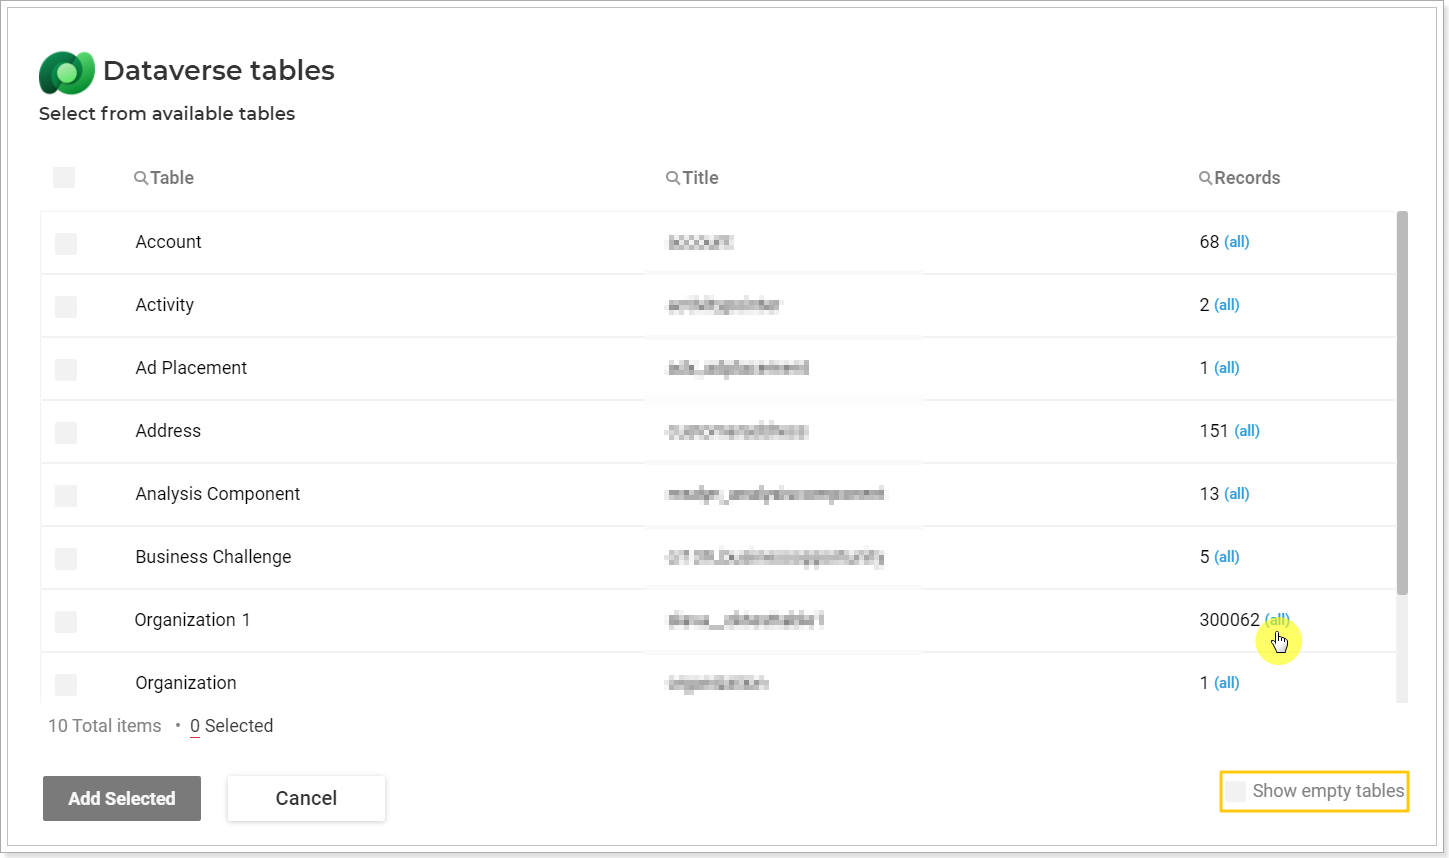
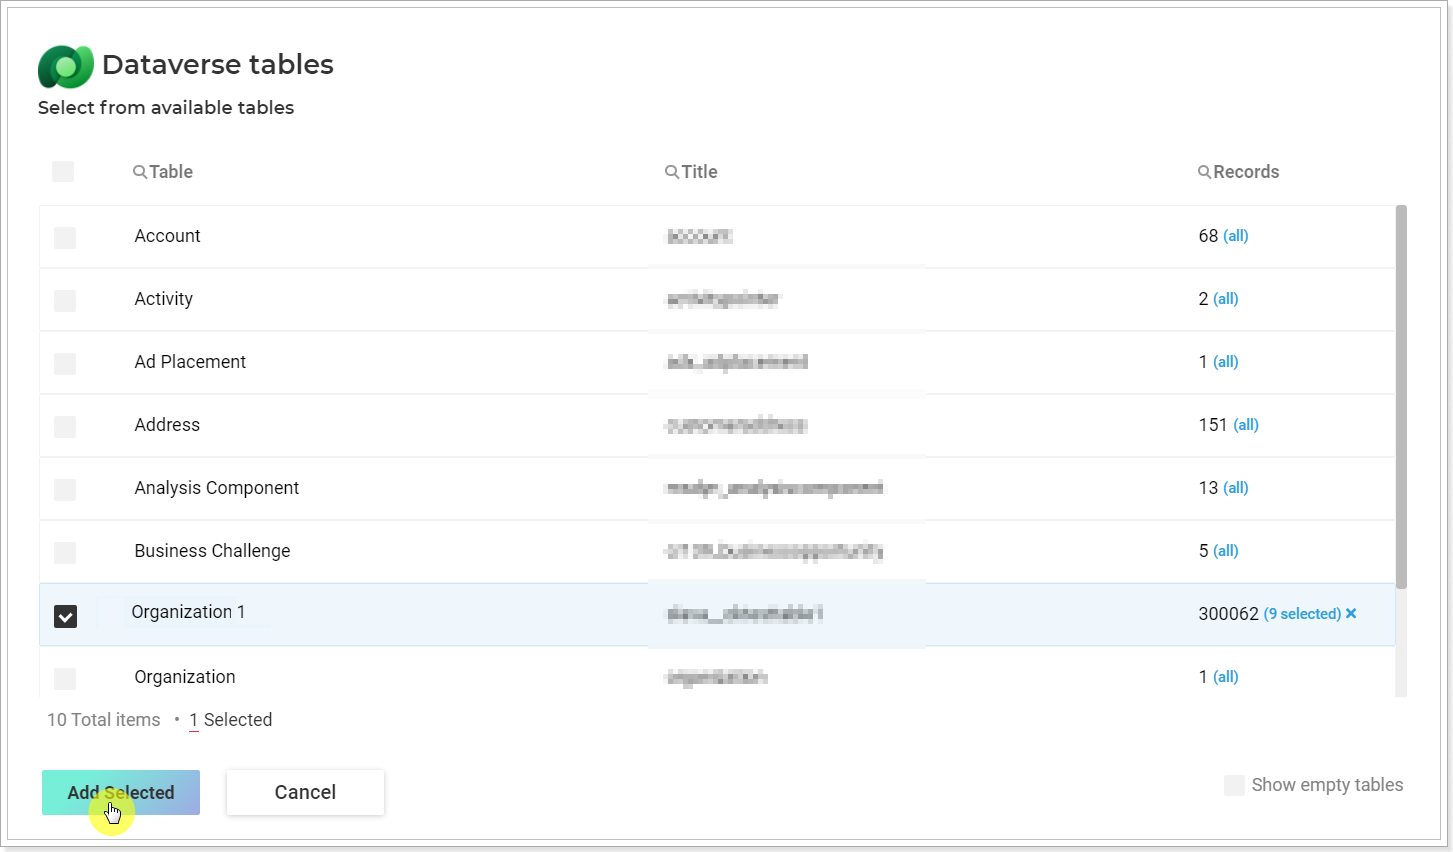
4. Click on the 'All' button to select the data you need specifically. The 'Show empty tables' checkbox allows you to show/hide empty tables. The 'Show not restorable tables' checkbox allows you to show/hide the tables that cannot be restored, if any.
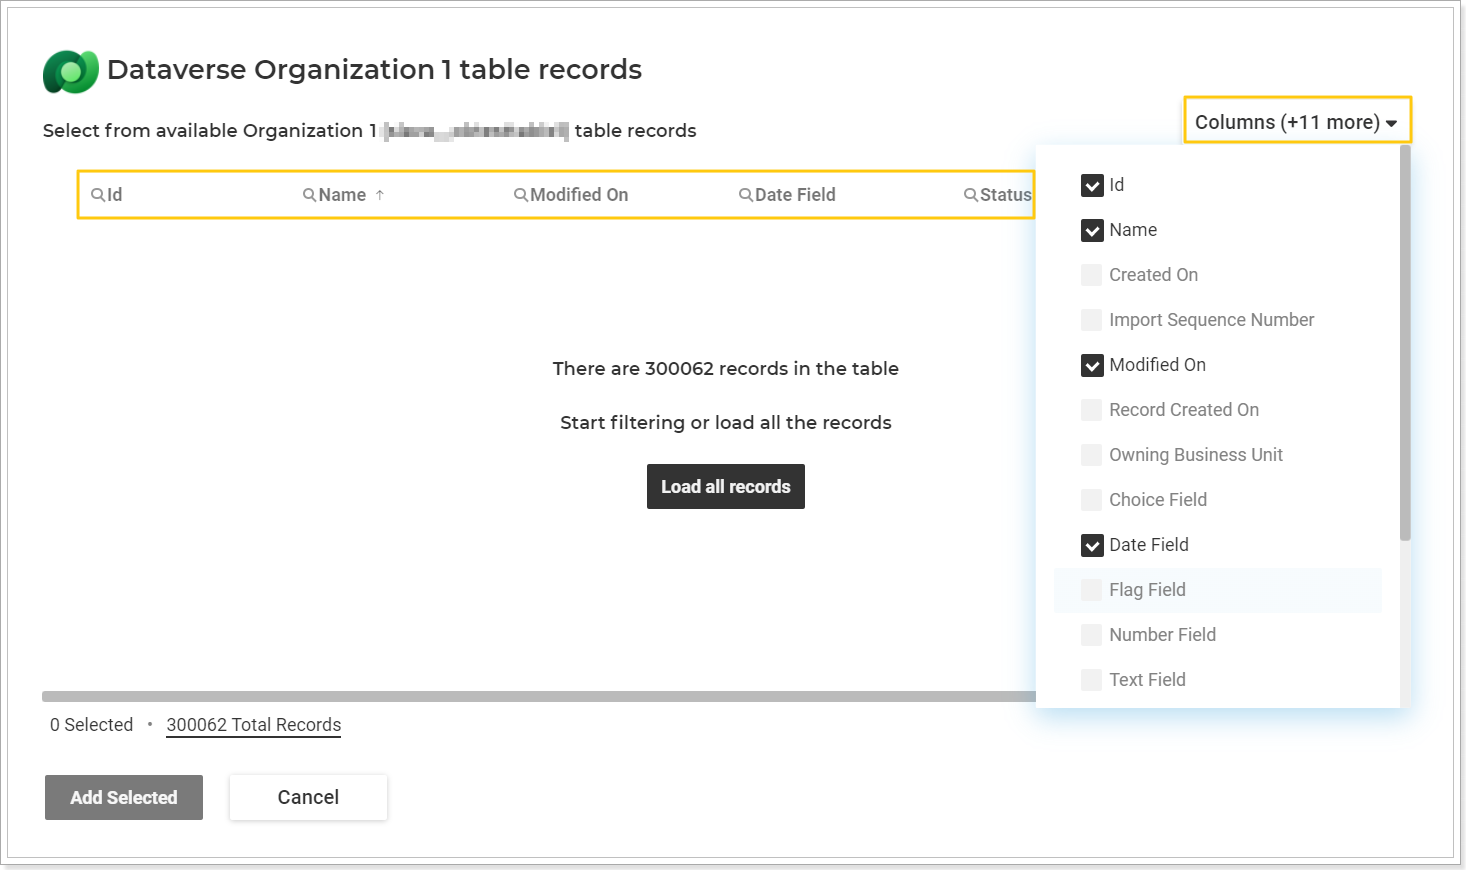
 5. Click the Load All Records button to load all records for selection (if you have thousands of records, it will take time).
To make the process faster and find the required records quickly, use the Columns option to add more columns for filtering items on this page.
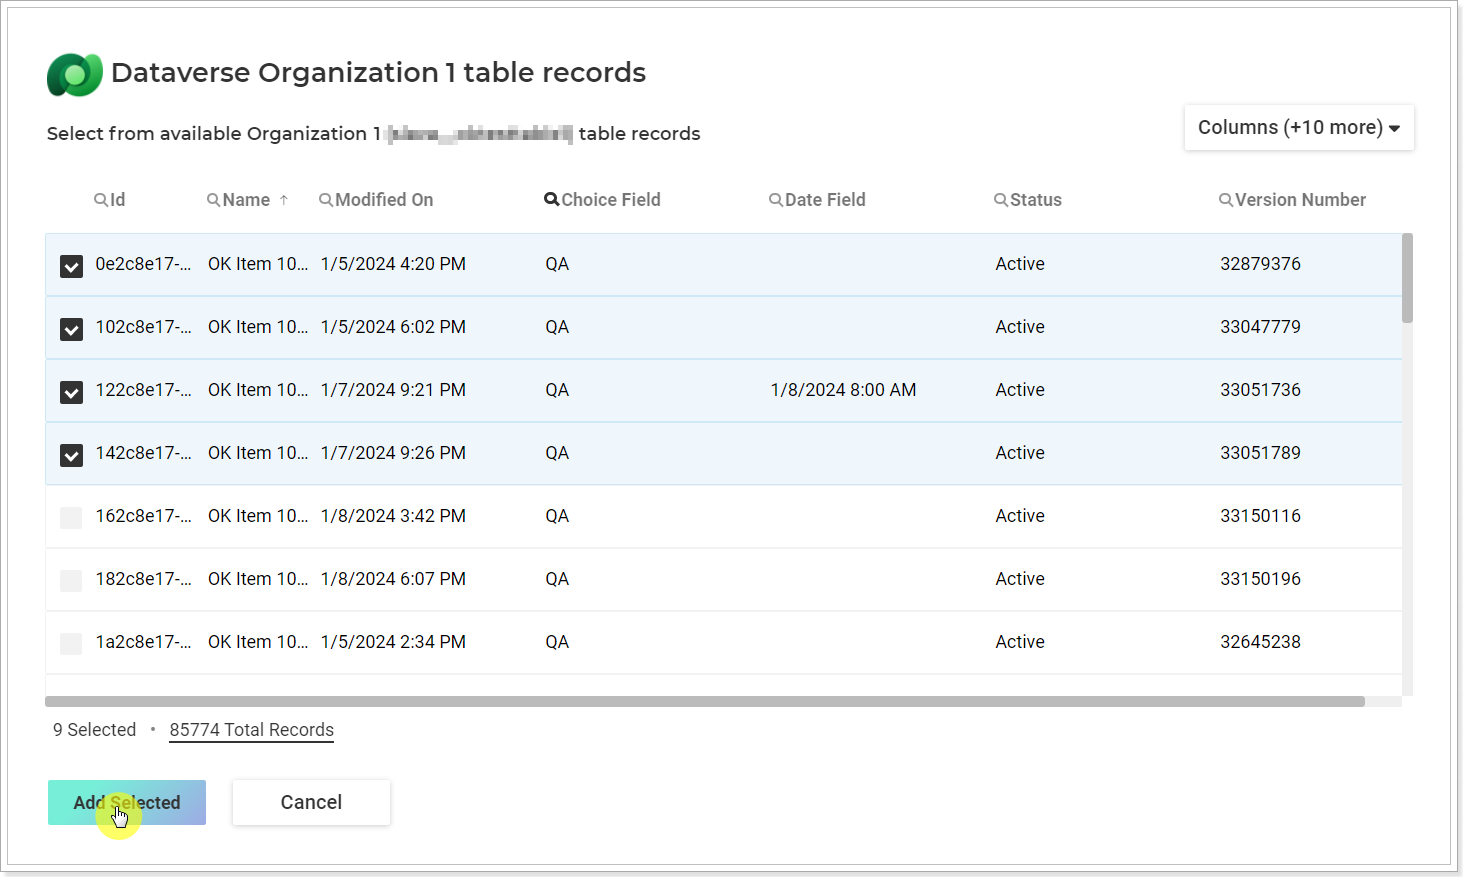
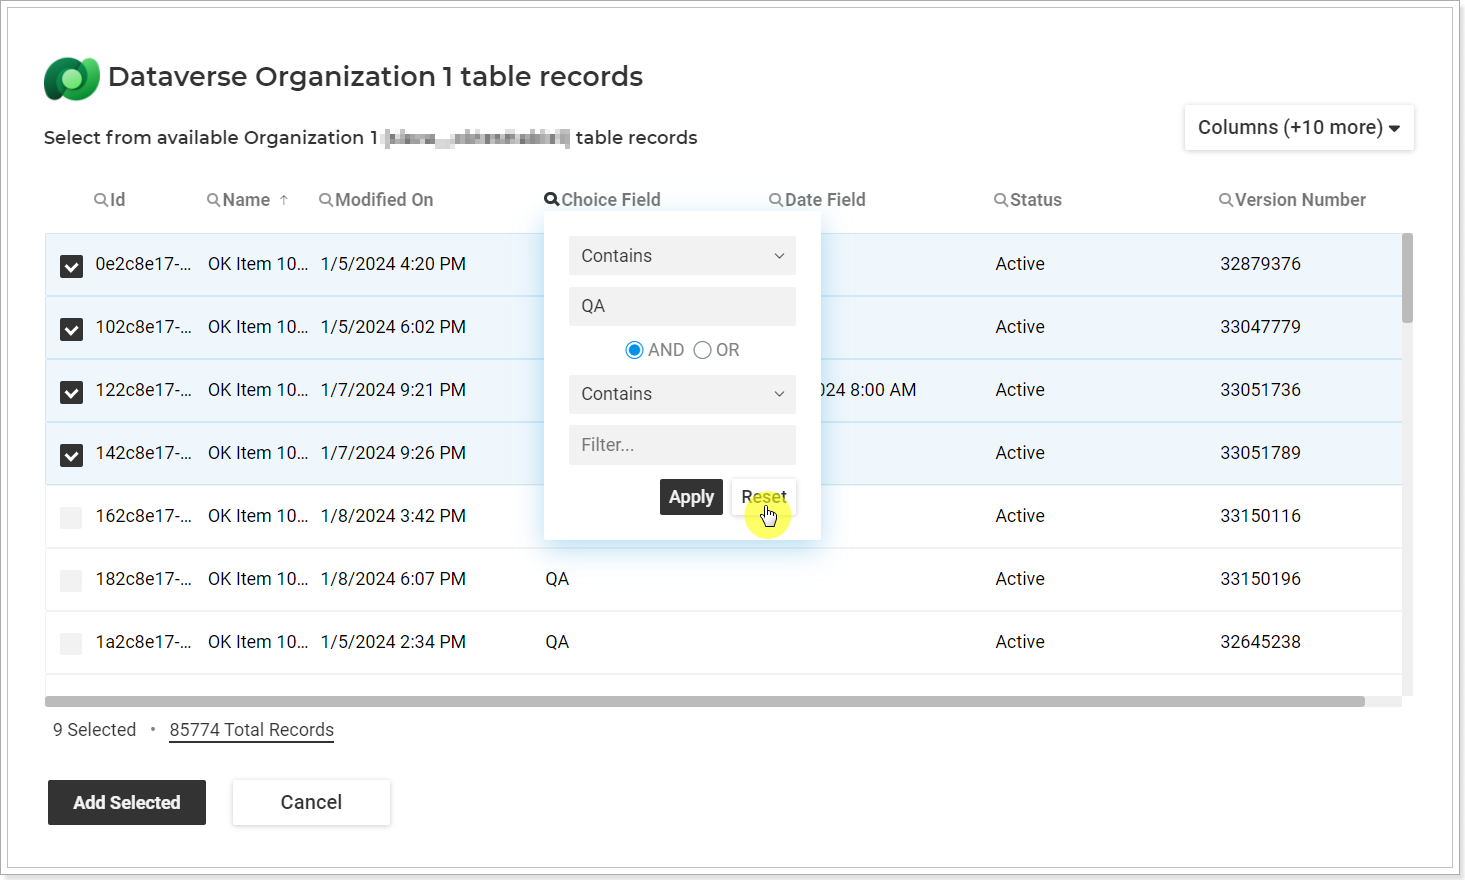
6. As soon as the Columns are added, use them to filter the records and load only the ones you need to restore right now. You can apply filters for all the selected Columns to narrow the search.
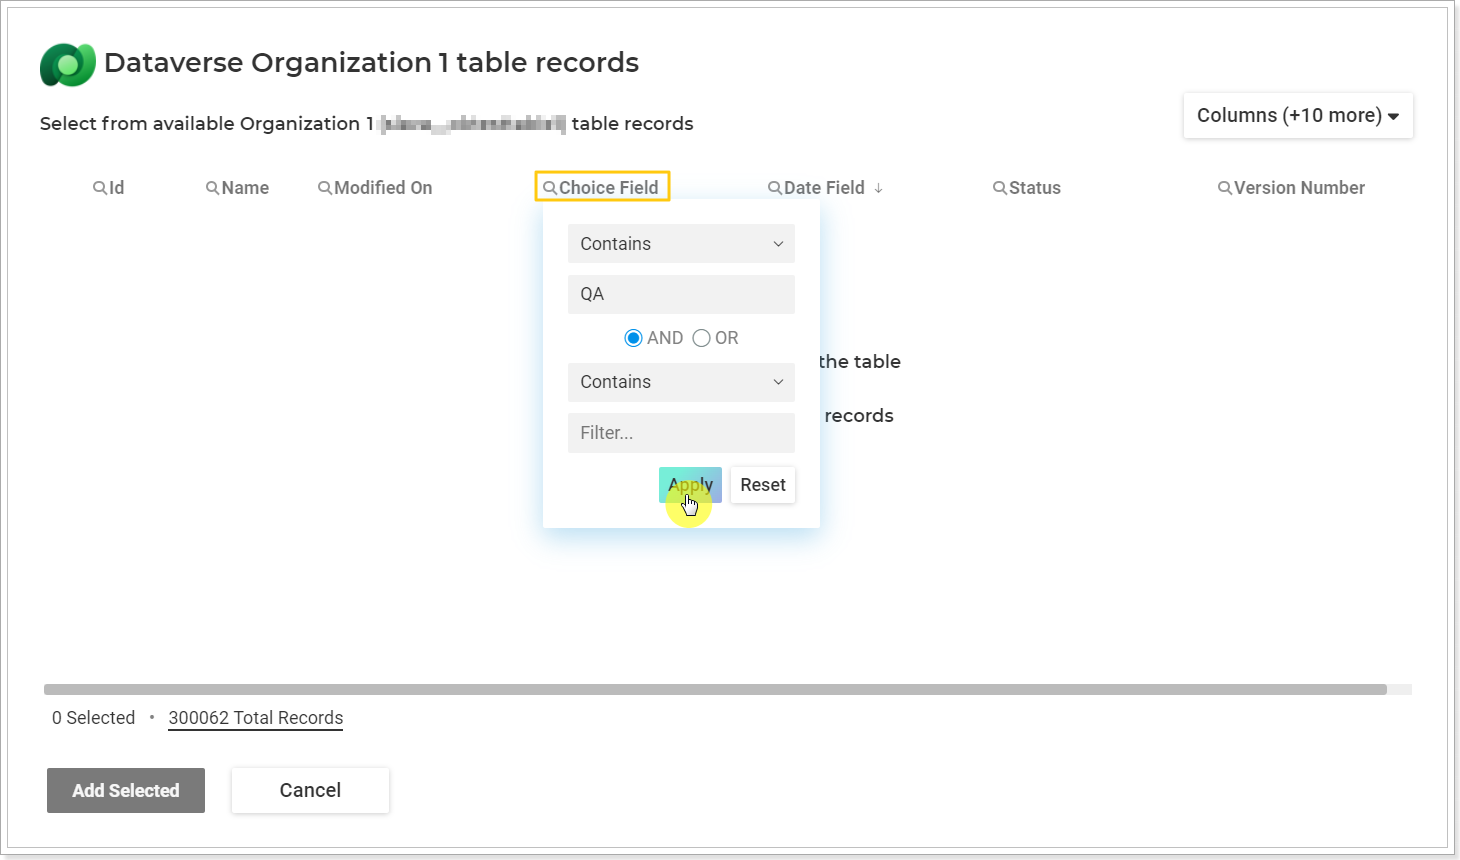
7. Select the records and click Add Selected.
To delete the filtering rules use the Reset button for the required column.
8. Click Add Selected for the tables.
9. Click Restore now.