In this article, we will review how to restore data from the created backup of Planner (premium plans) (former Project for the web) environment.
There are two pages where you can launch the restore process: Operation Details and Data Protection.
The Data Protection page allows for quick restoration of the required project/resource/group. It is also possible to open the full backup summary and select more data to restore.
To launch the restoration of a single project, perform the following:
1. Open the Data Protection page and select the project you need to restore right now (the project restore is taken as an example, but you can restore a single resource/group following the same steps, selecting a resource or a group).
You can select to review all backups of the projects/groups/resources on the page or select to review only Completed or Failed backups using the buttons at the bottom of this section.
Use the date range option to select the required date for the state in which you need to restore the project. Use the Search option to find the needed Project/Resource/Group by name. Also, you can sort the columns by Project title or Group.
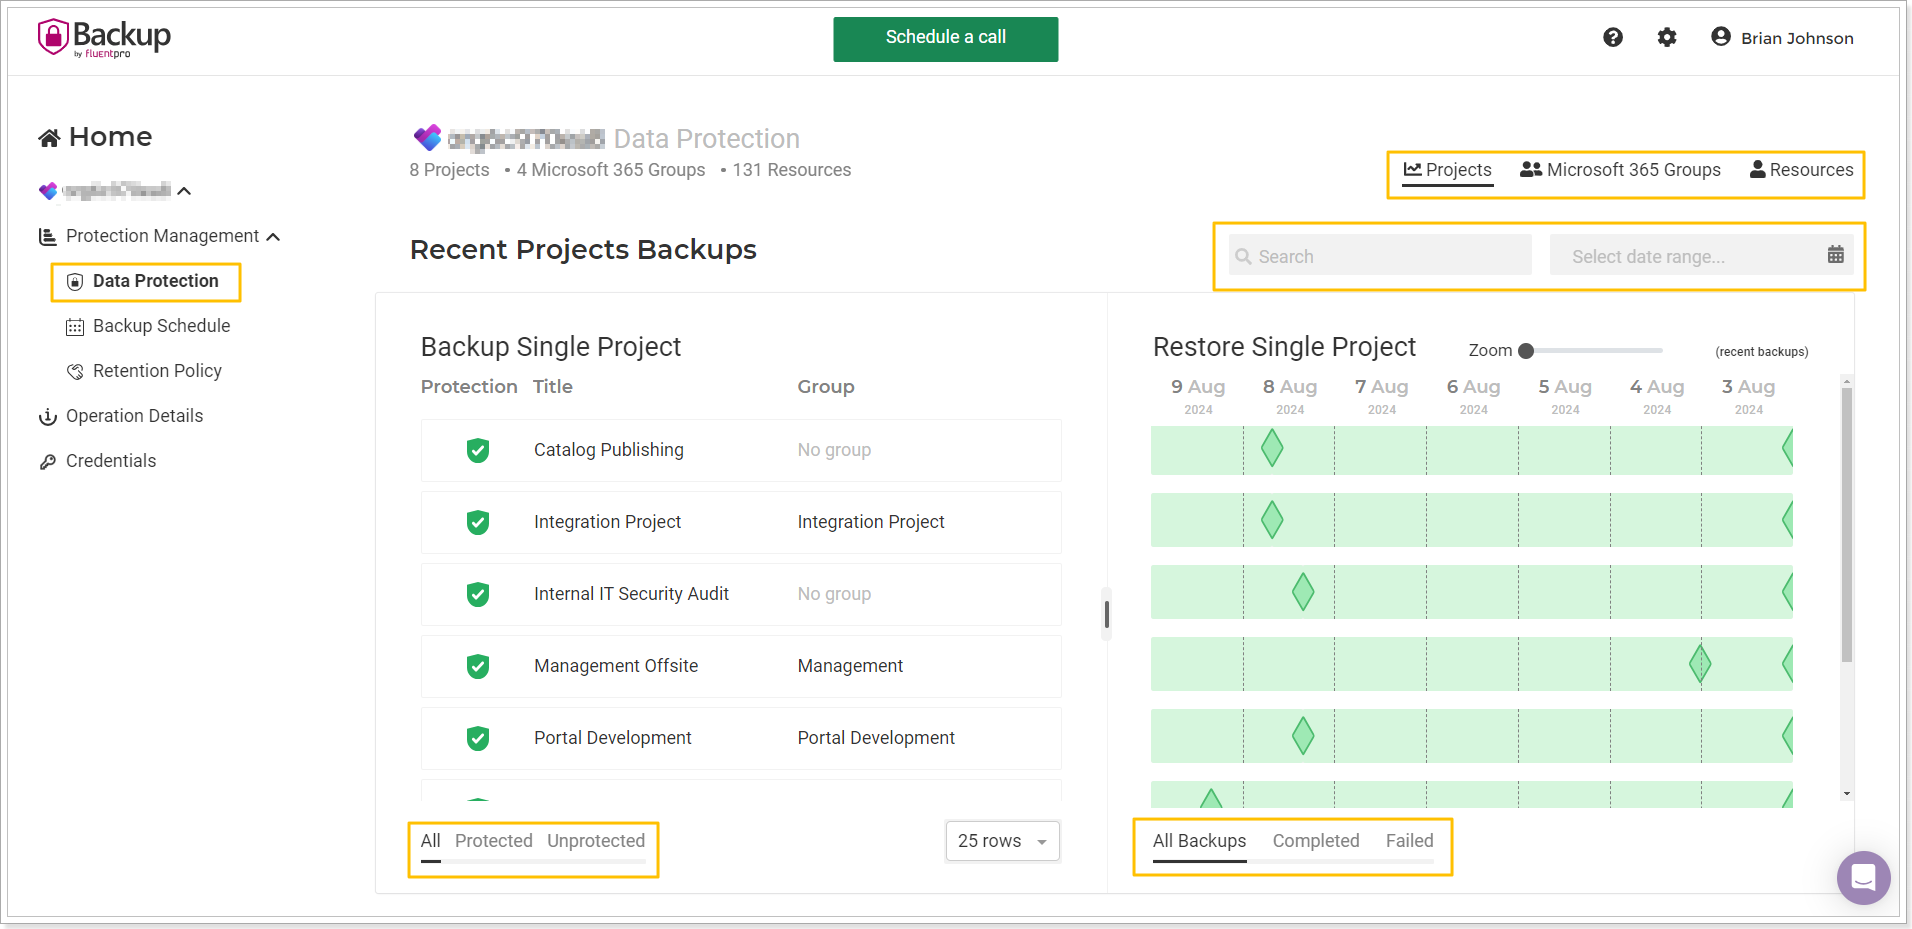
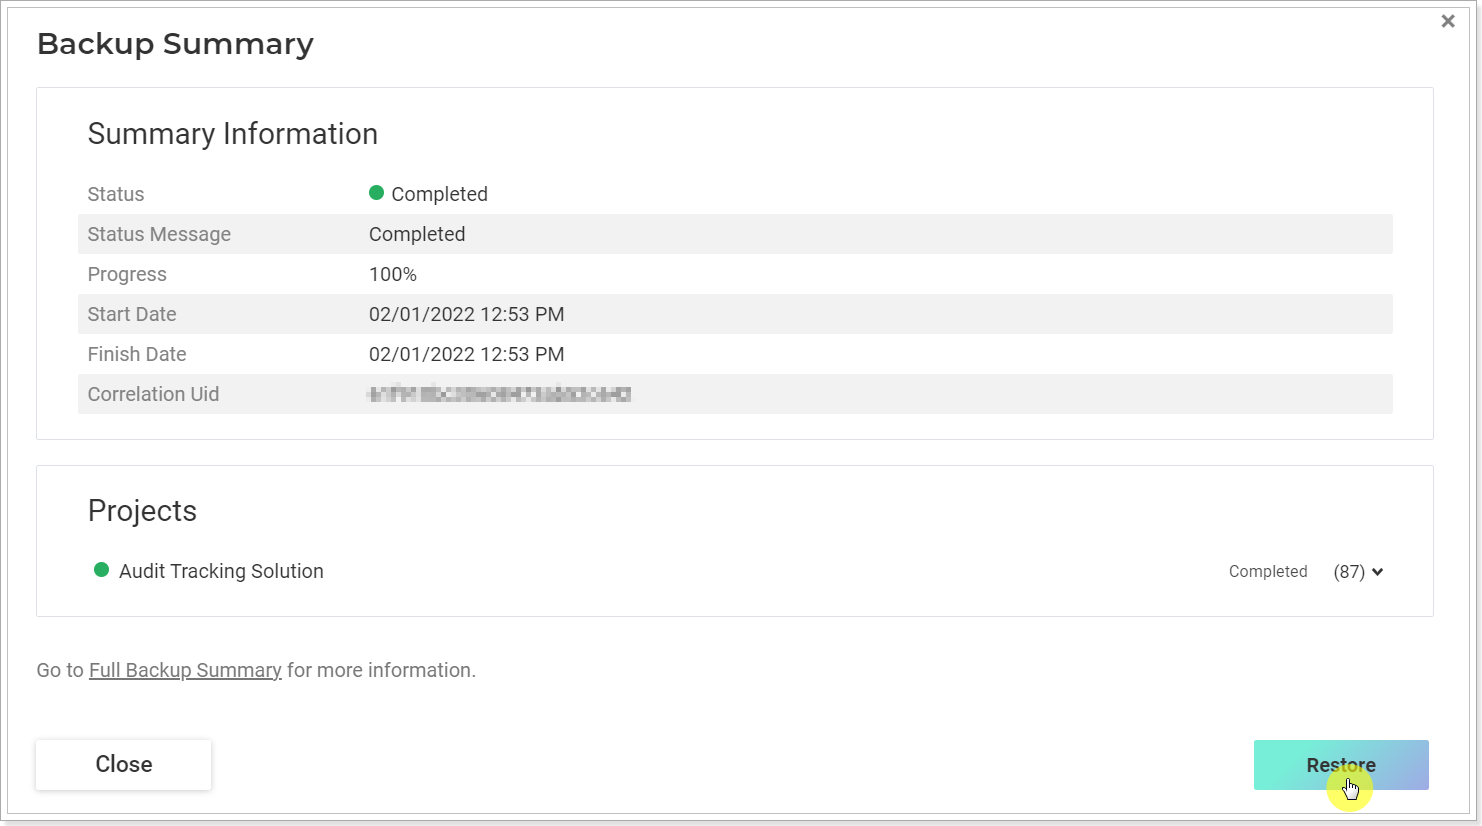
Click on the completed backup status of the required project, the Backup Summary page will be opened. You can review the information for the selected backup of a single project and resource it at once by clicking the Restore button.
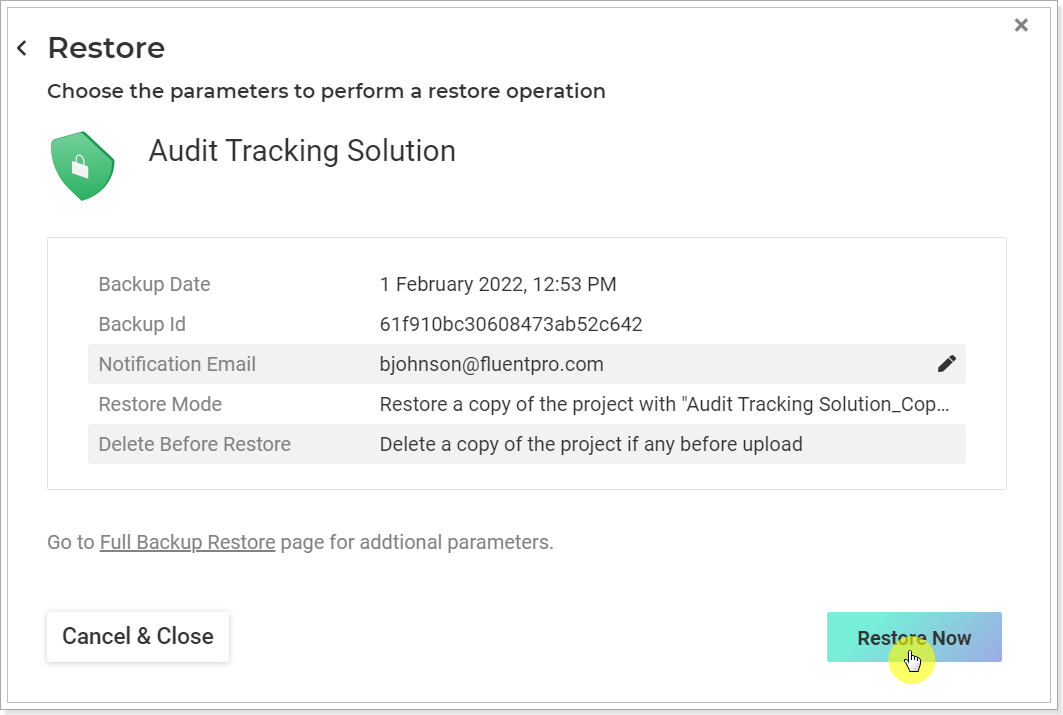
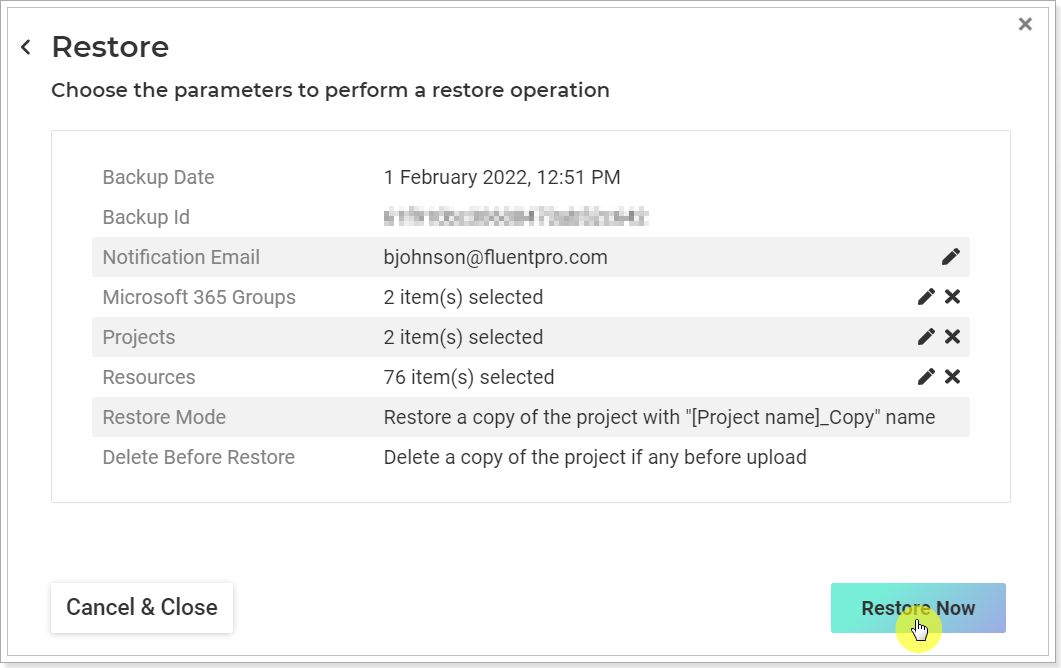
Choose the restore parameters and click the Restore Now button.
To select more data for restore click the Full Backup Summary option.
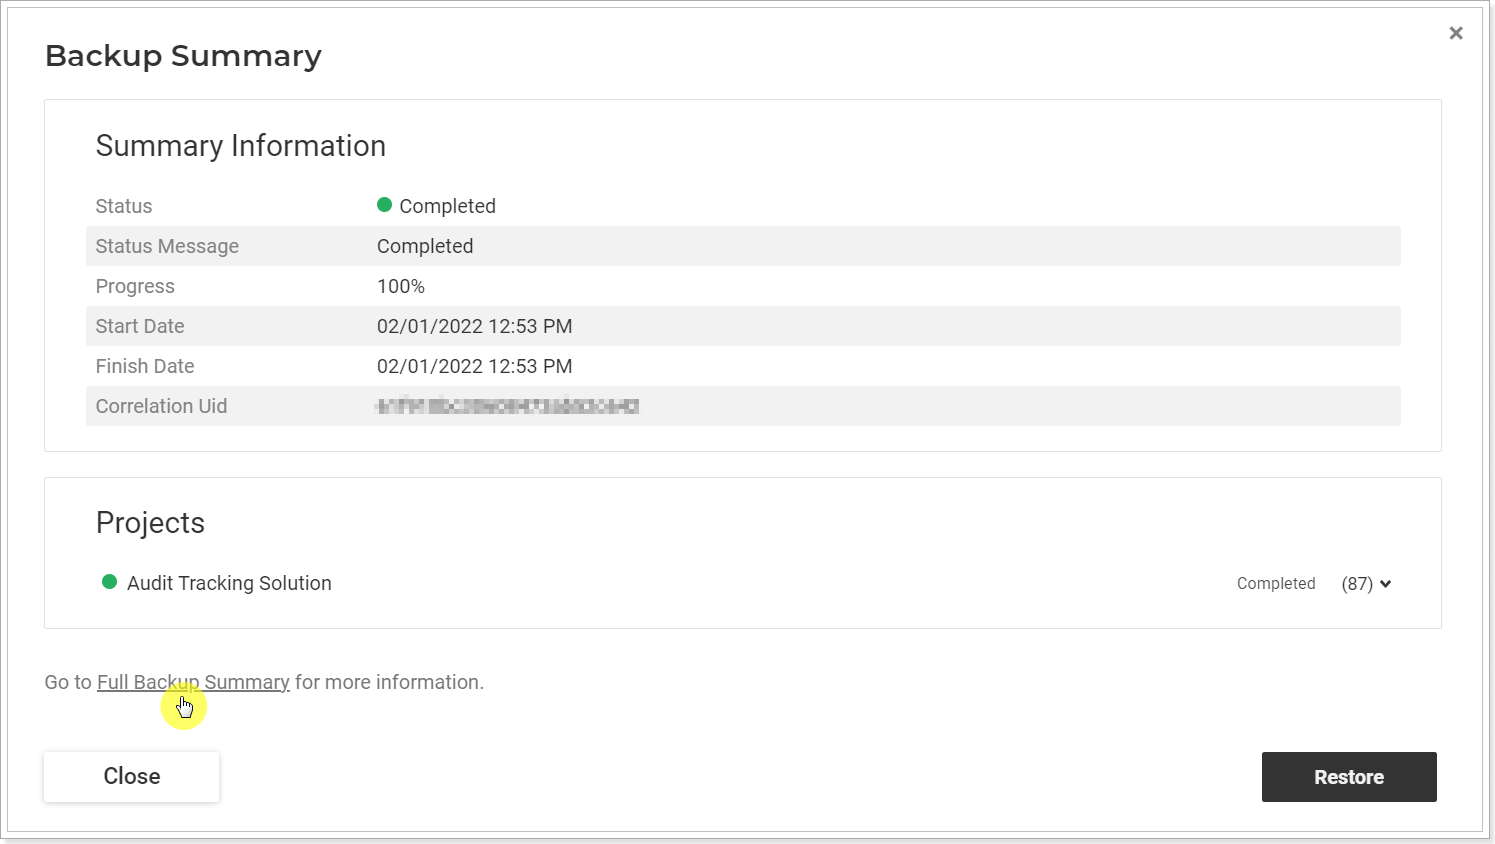
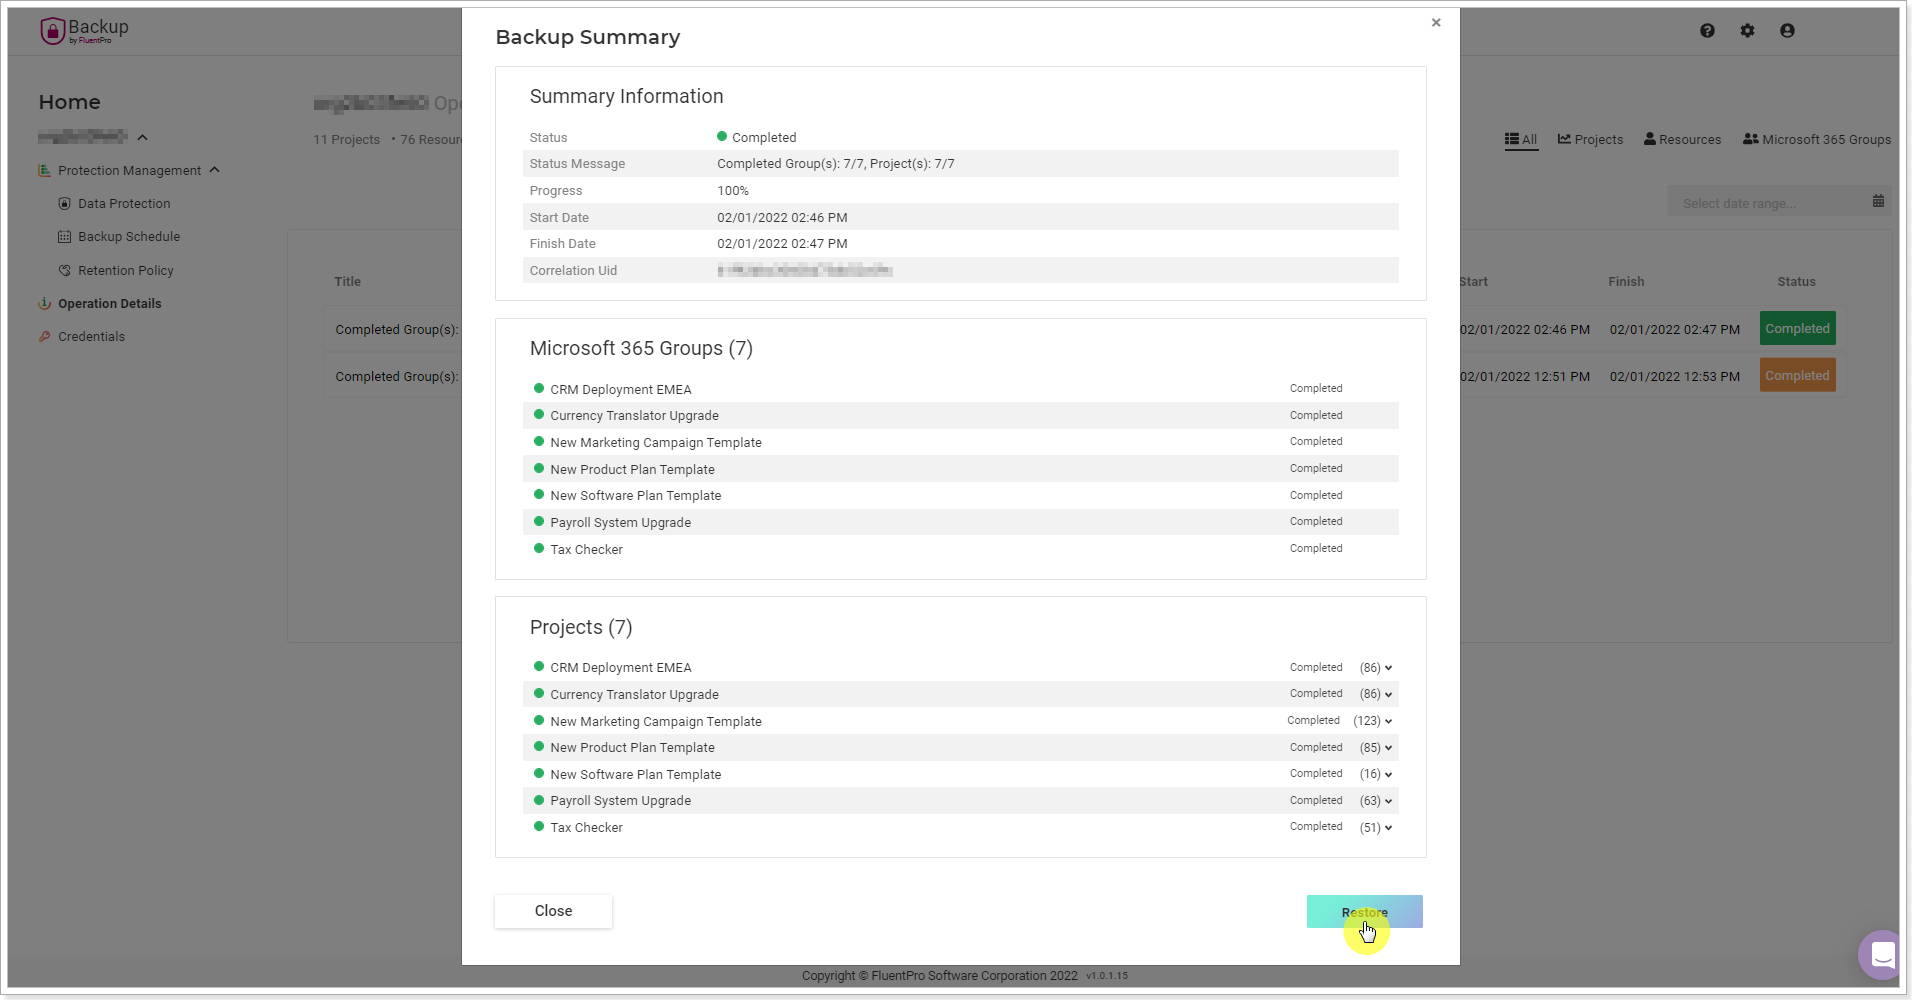
Review the summary for the backup and click the Restore button at the bottom.
The Restore page will be opened where you can select what data you need to restore from this backup: Microsoft 365 groups, projects, and resources.
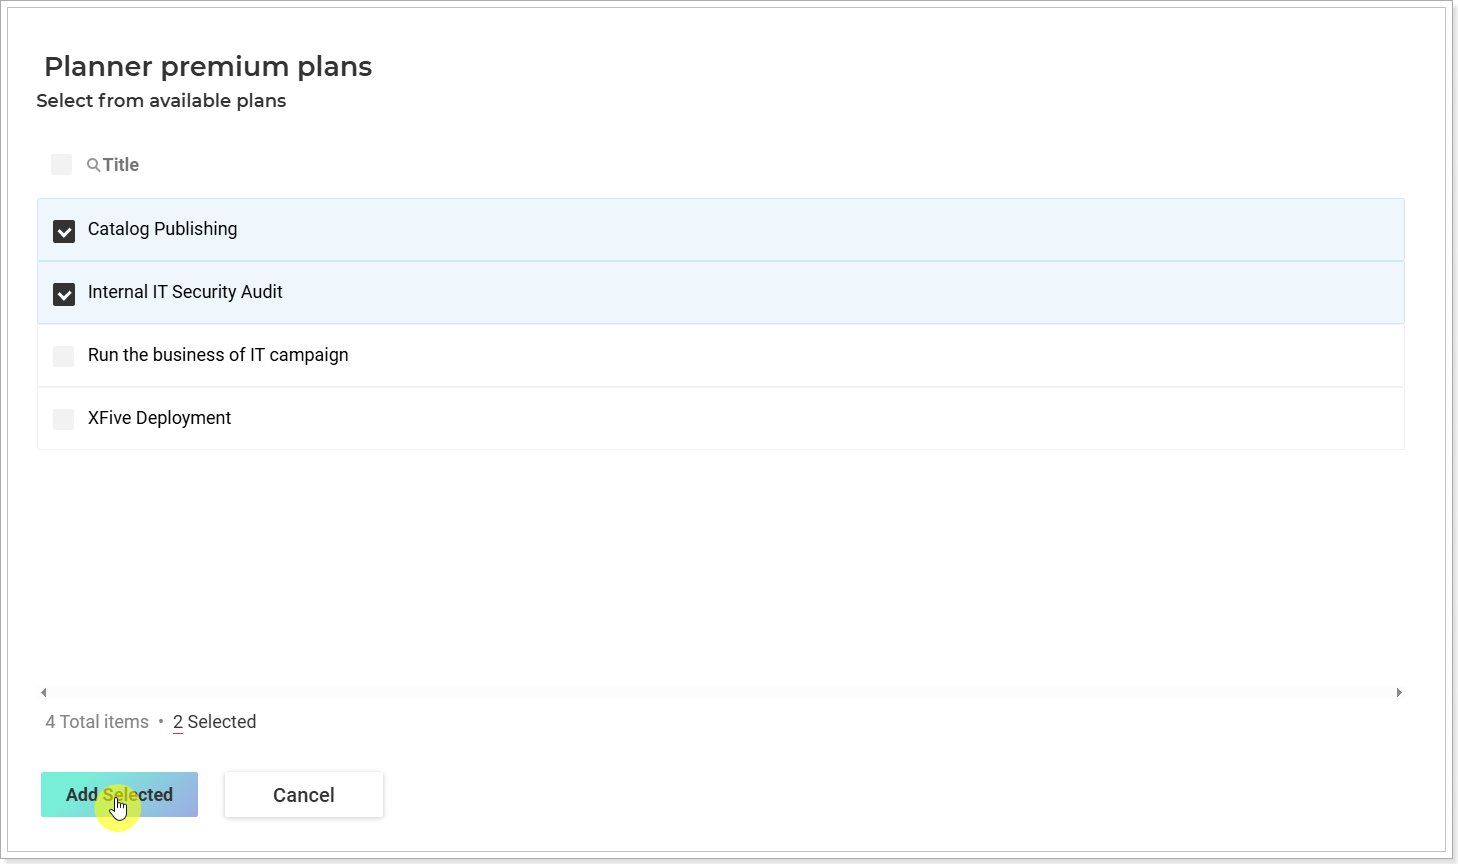
Click on the pencil-like button next to each element to select data.
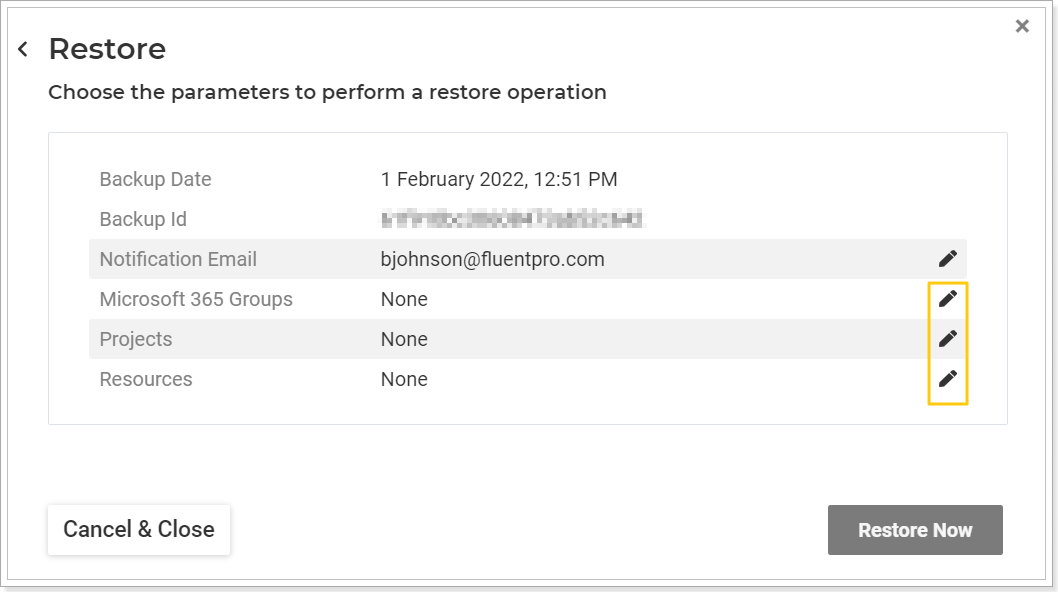
You can either select everything at once or select only specific elements to restore.
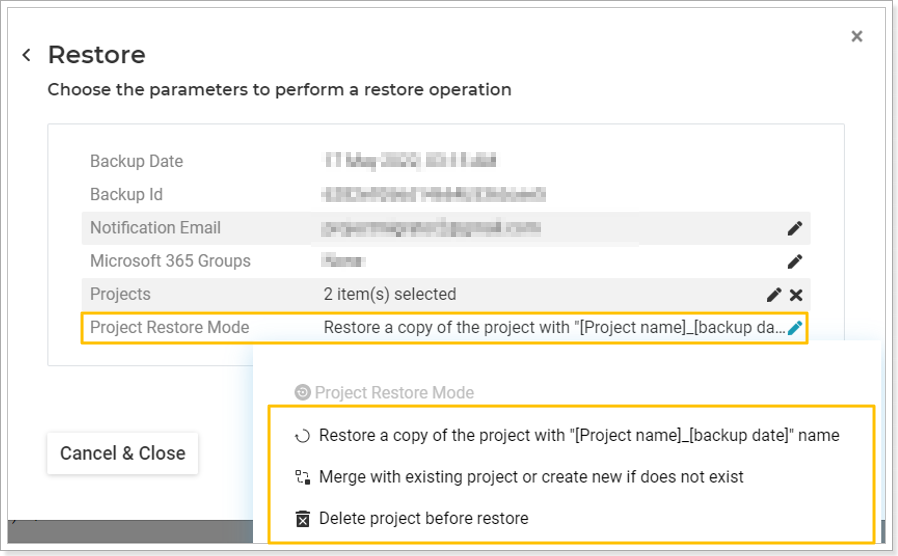
Select the restore mode:
With the 'Restore a copy..' project mode selected a copy of the project will be created with the name 'Project name and backup date'.
With the ‘Merge with existing project or create new if does not exist’ restore mode the existing project will be found by name and ID in its group, and in case it is not found, a new project is created from the backup.
In case an existing project is found by the same ID and Name in its group, the project data is updated, merging with the data from the backup during the restore operation. See how the data will be updated:
Project Element |
Updated? |
Notes |
Project Name |
+ |
|
Project Manager |
+ |
|
Project Start date |
+ |
|
Project calendar |
+ |
|
Project Custom Fields |
+ |
Only field values are restored. |
Task Custom Fields |
+ |
New fields created before the restore will not be removed. |
Project Tasks |
+ |
Missing tasks will be created, existing tasks will be found by name and ID. |
Project Buckets |
+ |
New buckets created before the restore will not be removed. |
Hierarchy |
+ |
The hierarchy will be restored. In some cases, one more additional restore will be needed. |
|
|
|
Field Values | ||
Task Name |
+ |
|
Start and Finish dates |
+ |
|
Assignees |
+ |
Only existing assignees are set during restore. |
Labels |
+ |
Missing Labels are added to the dropdown and set to the tasks, renamed Labels are updated as in the backup. New Labels added after the backup are removed during the restore |
Checklist |
+ |
Missing checklist items are restored, and item progress is set as in the backup. Renamed items are updated as in the backup. New Checklist items added after the backup are removed during the restore. If a subtask was created out of a Checklist item after the backup, it would remain, and the same item would be created in the Checklist. |
Duration |
+ |
|
% Complete |
+ |
|
Effort |
+ |
|
Effort Completed |
− |
|
Effort Remaining |
+ |
|
Attachments |
+ |
The file’s URL address and Text to display are restored. |
Notes |
+ |
|
If the ‘Delete project before restore’ restore mode is selected, the existing project found by name and ID will be deleted and a new project created from the backup.
When the data is selected, click the Restore Now button.
Operation Details page allows to open the full backup summary at once and select the required data for restore. Use filters on the page to quickly find the required backup operation.

Click on the completed backup operation to open its summary.
Clicking on the pencil-like buttons next to each element select the required projects/groups/resources for restore. Click the Restore Now button.

The restore operation will be launched at once and will appear on the Operation Details page where you can check its status and progress.
