Changes implemented by Microsoft in site creation settings for Project Online give us opportunity to create Project Sites in different Site Collections. With such an update we now have a possibility to spread the Project Sites around if we met the limits, or for other various reasons.
Note the following limitations:
- The option of creating a Subsite in different Site Collection is available for PWAs in Project Server Permission Mode only.
- If a different Site Collection is chosen, the ‘Sync User Permissions’ and ‘Sync SharePoint Tasks List’ options will be disabled.
- The possibility to create Subsite in different site collection would be available for the new projects only.
FluentPro FluentBooks allows to migrate the existing Project Sites to other Site Collections. To do this, the following steps need to be taken:
Verify the source Site Collection Permission Mode
The limitation for using a feature of creating Subsites in different Site Collections is that the source Site Collection should be in Project Server Permission Mode. If the SharePoint Permission Mode is used, the option will not be available.
The simplest way to check which Permission Mode is used is to open PWA (Server) Settings in your PWA. If you can see the Security section in the list of available settings – your PWA is in Project Server Permission Mode. If not – then SharePoint Mode is on.
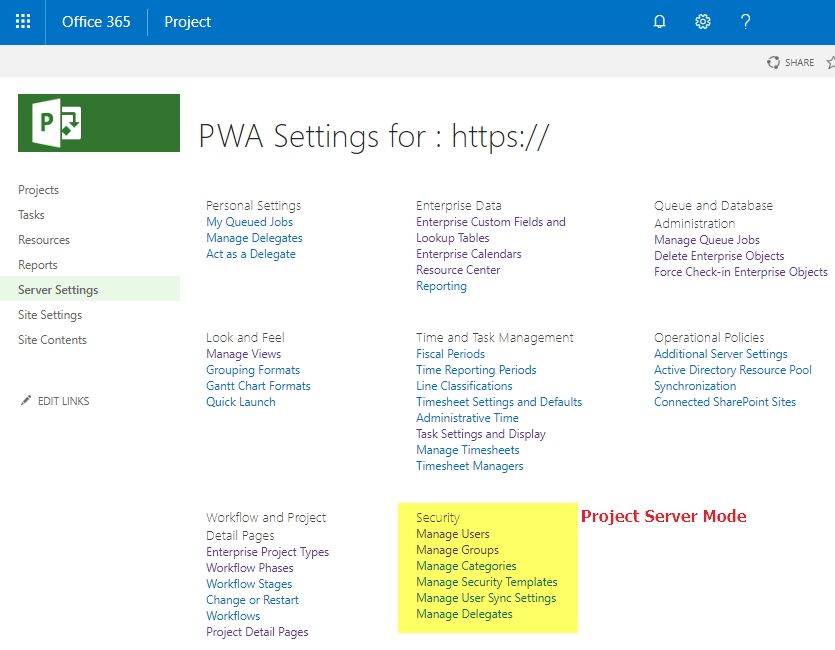
To change between permission modes:
- Sign in to Office 365 with your admin account and go to the SharePoint admin center.
- Hover over the URL for the Project Web App site collection that you want to change, and then select the check box that appears to the left of the URL.
- Select Project Web App > Settings on the ribbon.
- Choose the Project Permission Mode and select OK.
Please note: Switching between SharePoint Permission Mode and Project Permission Mode deletes all security-related settings. If you switch from SharePoint Permission Mode to Project Permission Mode, you have to manually configure your security permissions structure in Project Online.
Verify settings in source and target Site Collections
It is needed to check that both environments are ready for the Projects Site transfer:
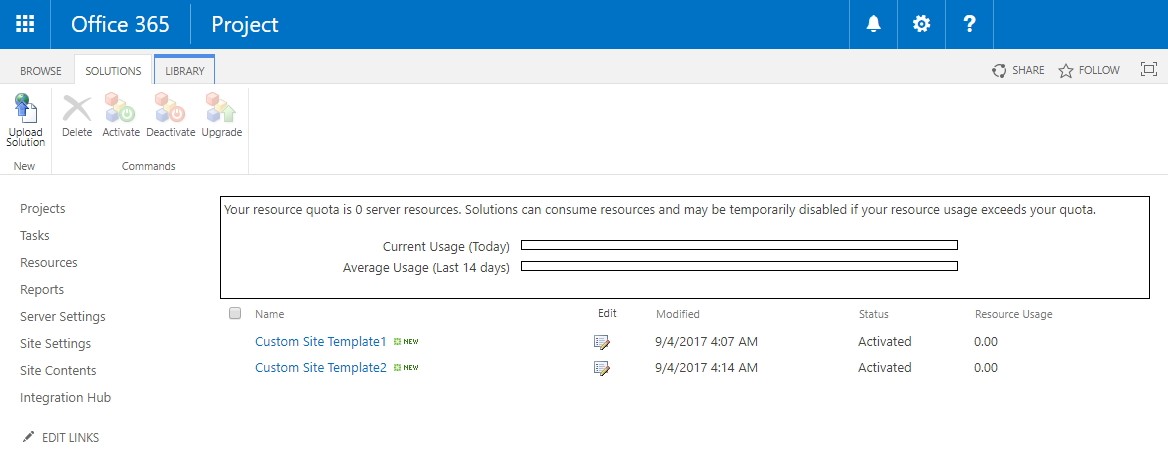
1. If custom Site Templates are used for Project Sites creation, make sure they exist in the target Site Collection - Site Settings » Solutions.
Note » If the needed Site Template is missing, it is also possible to transfer it using FluentBooks! For that perform the steps from the following two articles choosing ‘Solutions’ in the list of available content:
- To import Solutions from your source Site Collection:
Download(Import) SharePoint Sites
- To upload Solutions to the target Site Collection:
Upload(Export) SharePoint Sites
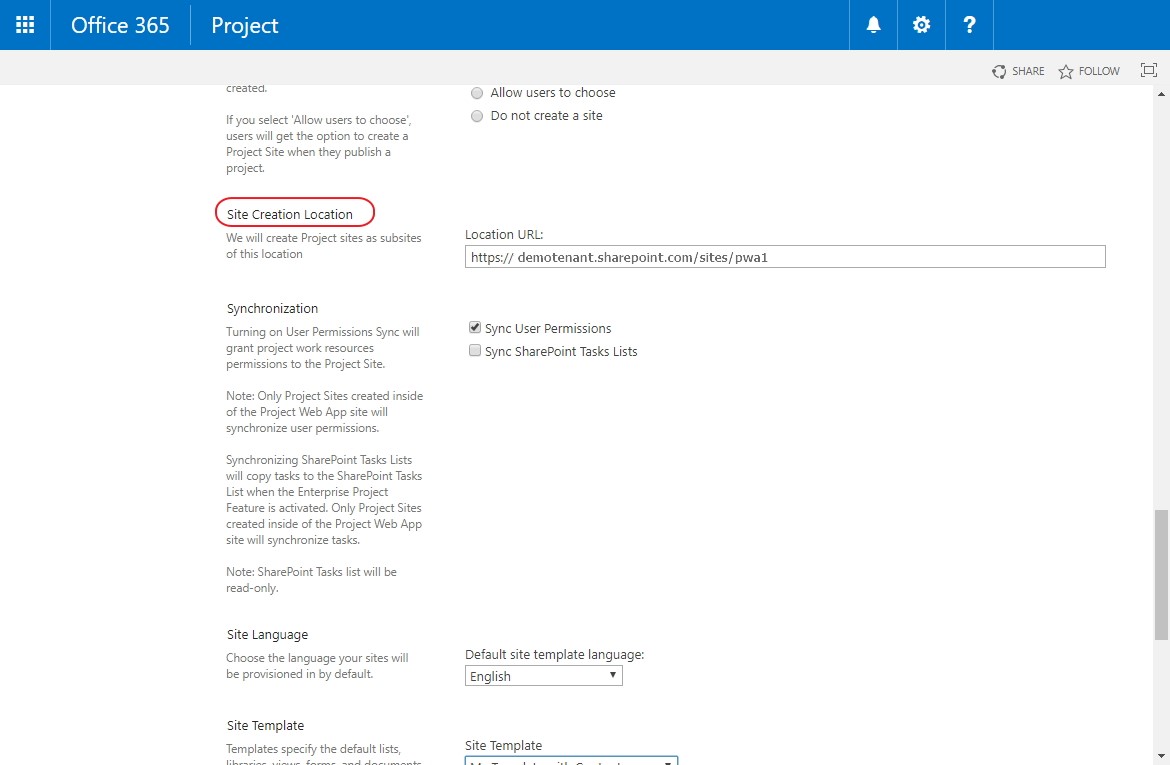
2. Update the Site Creation Location in the EPT of the projects, whose Project Sites you will be transferring.
Transfer Sites using FluentBooks
1. Download the needed Project Sites into FluentBooks workspace using the ‘Download (Import) SharePoint Sites’ wizard. The detailed procedure of this process is described here: Download (Import) SharePoint Sites
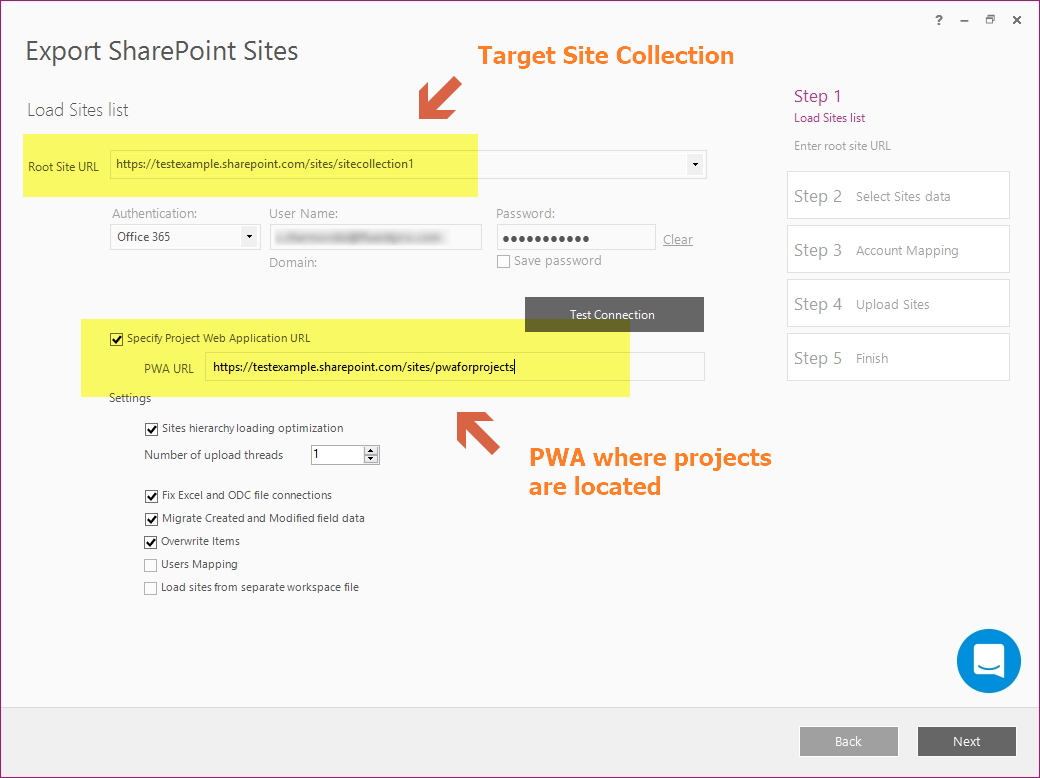
2. Run the “Upload(Export) SharePoint Sites” wizard.
- In the Root Site URL field provide the URL of the Site Collection, where Project Sites need to be created.
- Check the Specify Project Web Application URL checkbox and provide the URL of the PWA, where Projects are located.
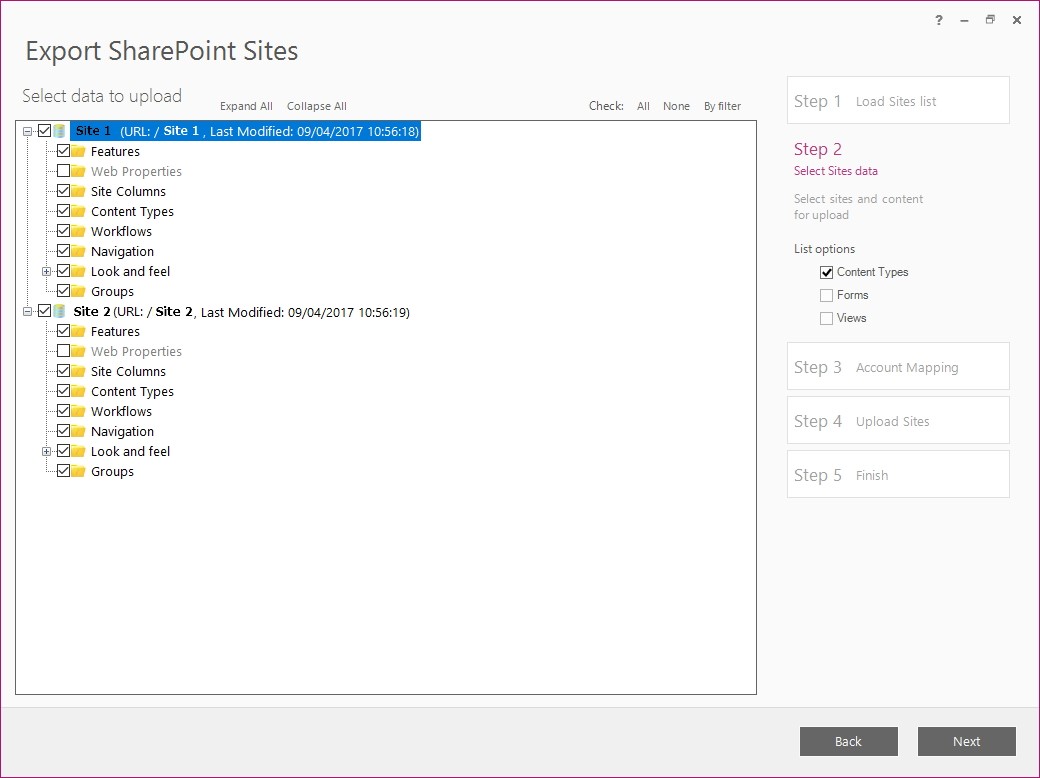
3. Select the Project Sites to be exported checking the check-boxes next to the elements.
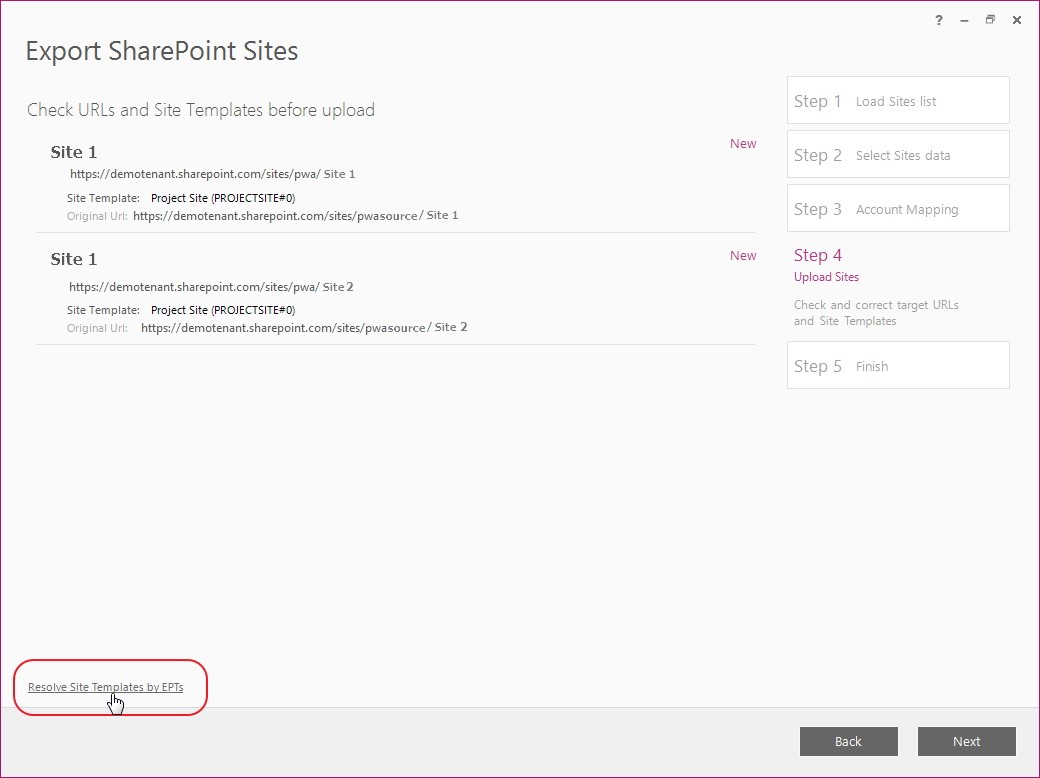
4. In the next screen click the ‘Resolve Site Templates by EPTs” button at the bottom.
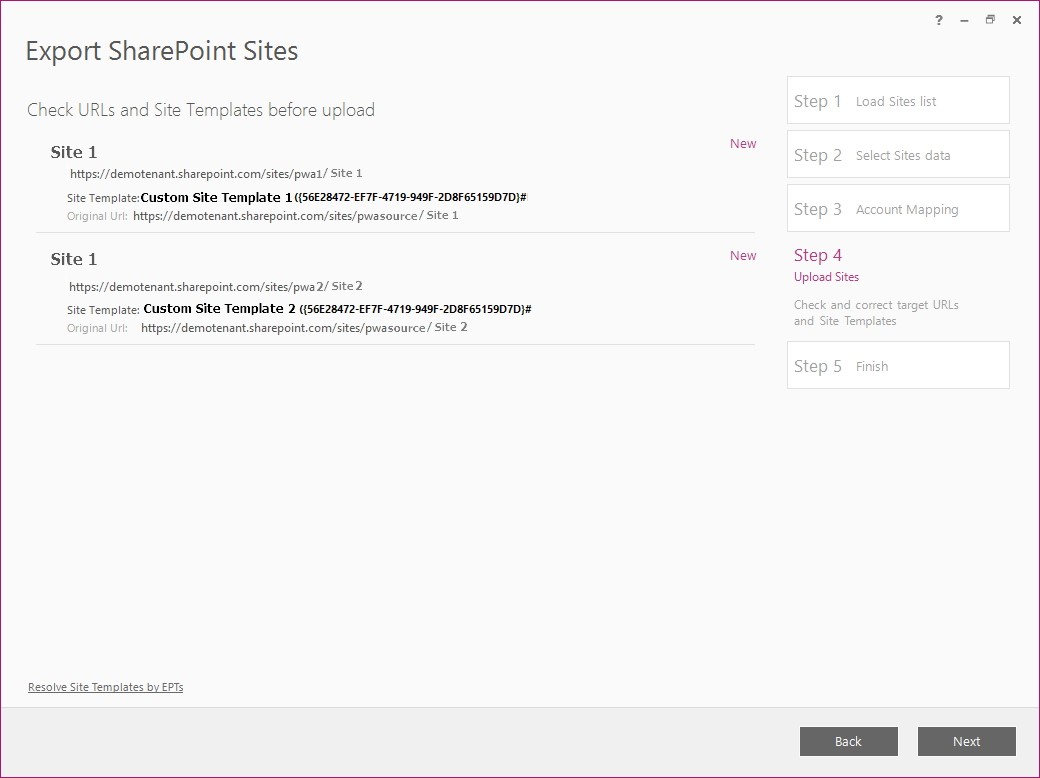
You will see, that FluentBooks resolved correct Site Templates from the EPTs. Also, the URLs will change to reflect Site Collections set in EPT settings.
5. Allow the tool some time to upload the Project Sites.
Verify, that sites were migrated to correct Site Collections
Navigate to the PWA where the projects are located » PWA Settings » Connected SharePoint Sites. In the ‘Site Address’ column you will see, that the Site Address of the Project Site changed to your new Site Collection!
