Please note: It is highly recommended to test your integration scenarios on the TEST Projects and TEST Planner plans before you configure integrations for your real existing projects and plans. If anything goes wrong, it will be easy to correct on the test projects, not on your real data. Also, you can then take into account any issues found while configuring integrations for your real projects and plans.
1. In Planner open any existing Plan or create a new one and copy its ID from URL.
Please note: To find out the Plan Id, open your plan in Planner and look at the browser URL. The URL should look like this:
https://tasks.office.com/[yourtenant].onmicrosoft.com/en-US/Home/Planner/#/planschedule?groupId=03595ee2-d38d-4604-ab5d-d0071d92ef55&planId=afiiVzPwpkGSBWuxeiIa4GUADkoj
The character combination after planId= represents the ID of the plan currently opened in the browser.
Copy the part after planId=.
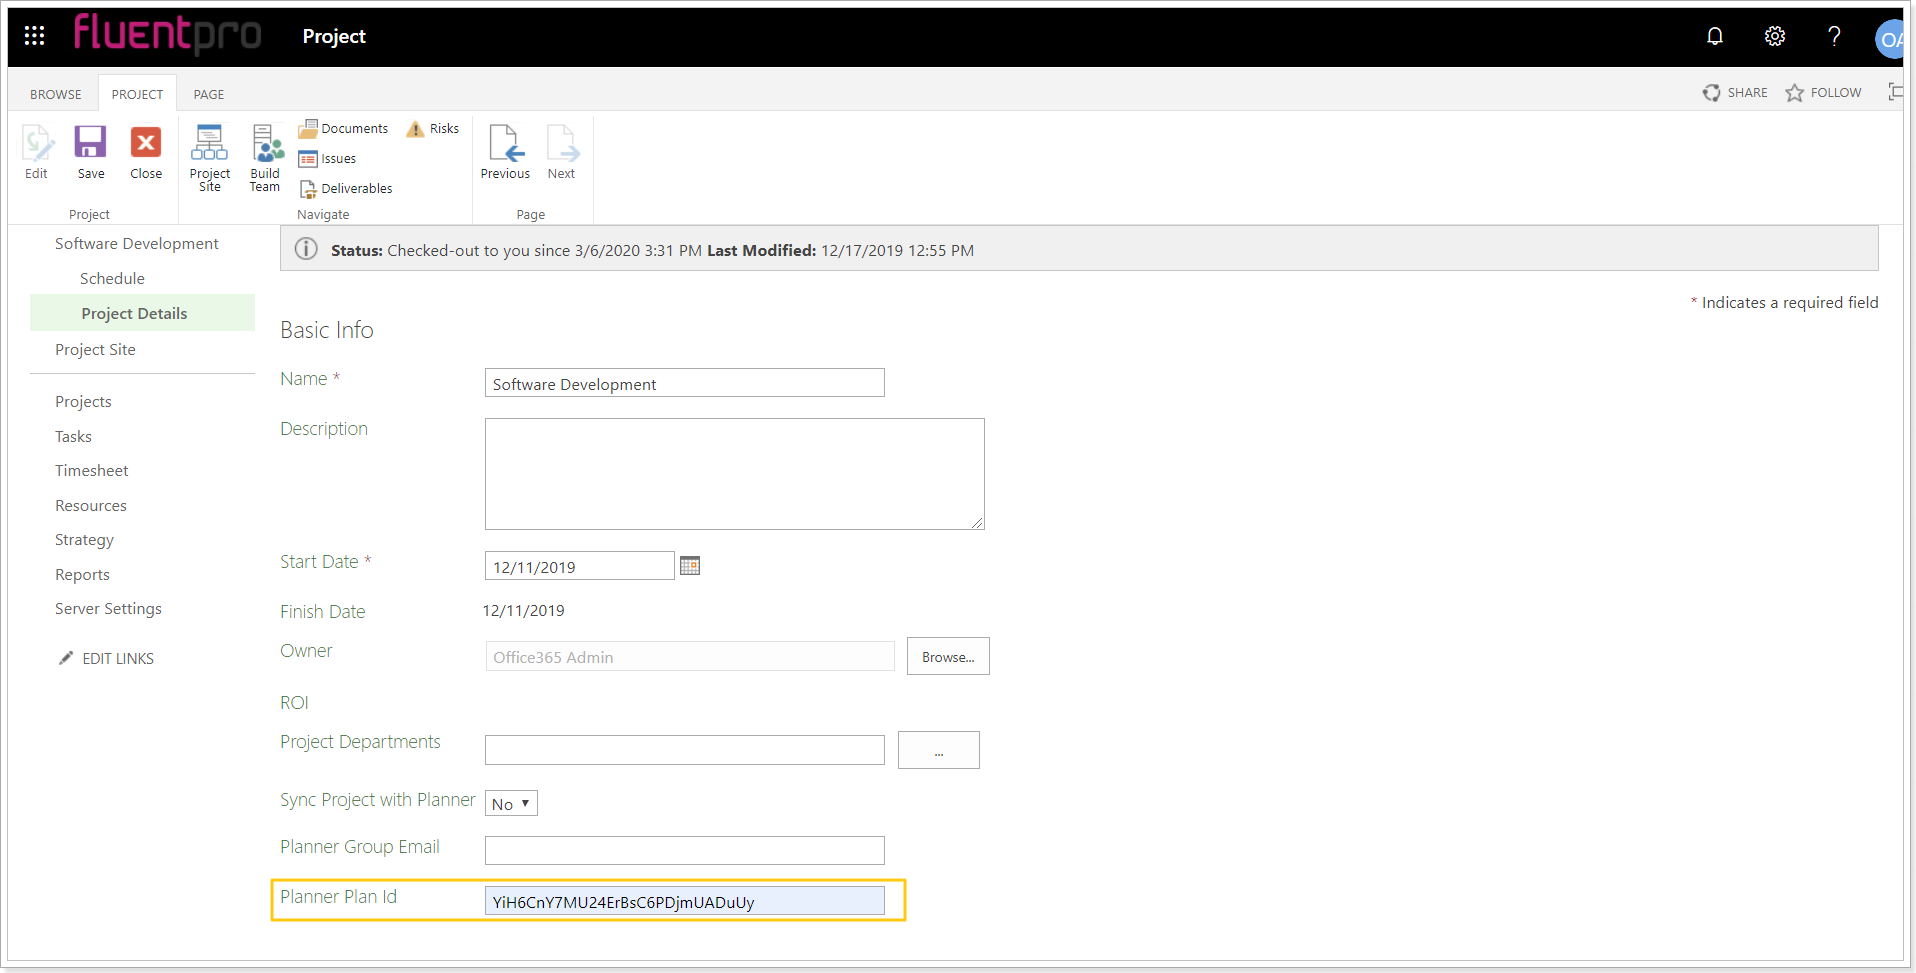
2. In Project Online create a project or open an existing one and fill in the 'Planner Plan Id' project level custom field with the PlanID which has been copied previously.

3. Run integration link (on first sync Plan which has been mapped to appropriate project in Project Online is taken from Planner instance and is stored in the cache for the following migrations).

4. Run it again and on the second sync all tasks (existing and newly created) from the mapped Plan will be migrated to Project Online.

Please note: Each new mapping between plan and project requires one additional sync before creating and migrating new tasks from Planner to Project Online.
Congratulations! You have successfully configured and tested the integration scenario.
Now the integration will be performed automatically by schedule if the corresponding setting was selected during the configuration of the integration scenario.
If you have selected to run the integration scenario on-demand, you can launch the integration when needed and all the necessary data will be automatically transferred from Planner plans to Project Online projects as it was configured.
Please review the information about the Important details for Planner > Project Online data synchronization.
