
In this article, we will review the Credentials Manager in G.A. Suite.
G.A. Suite has two pages where you can manage credentials for your PWAs:
- Credentials page - this page is available for each PWA and allows managing the accounts for each PWA separately.
- Credentials Manager page - this page includes a list of all user accounts added to G.A. Suite (while adding a new environment, specific credentials, adding new accounts before launching operations, etc.) and a list of all PWAs and Scheduling profiles where the accounts are used.
In this article, we will review the Credentials Manager page. For more information about the Credentials page, please refer to this article.
G.A. Suite supports multi-credentials option. In case of any issues with an account (permissions or access lost; password expired) during G.A. Suite operation processing, another one will be used to successfully complete the operation. Also, using the Multiple credentials option makes G.A. Suite performance faster.
Credentials Manager page
You can easily refresh, update and/or edit the credentials on the Credentials Manager page.
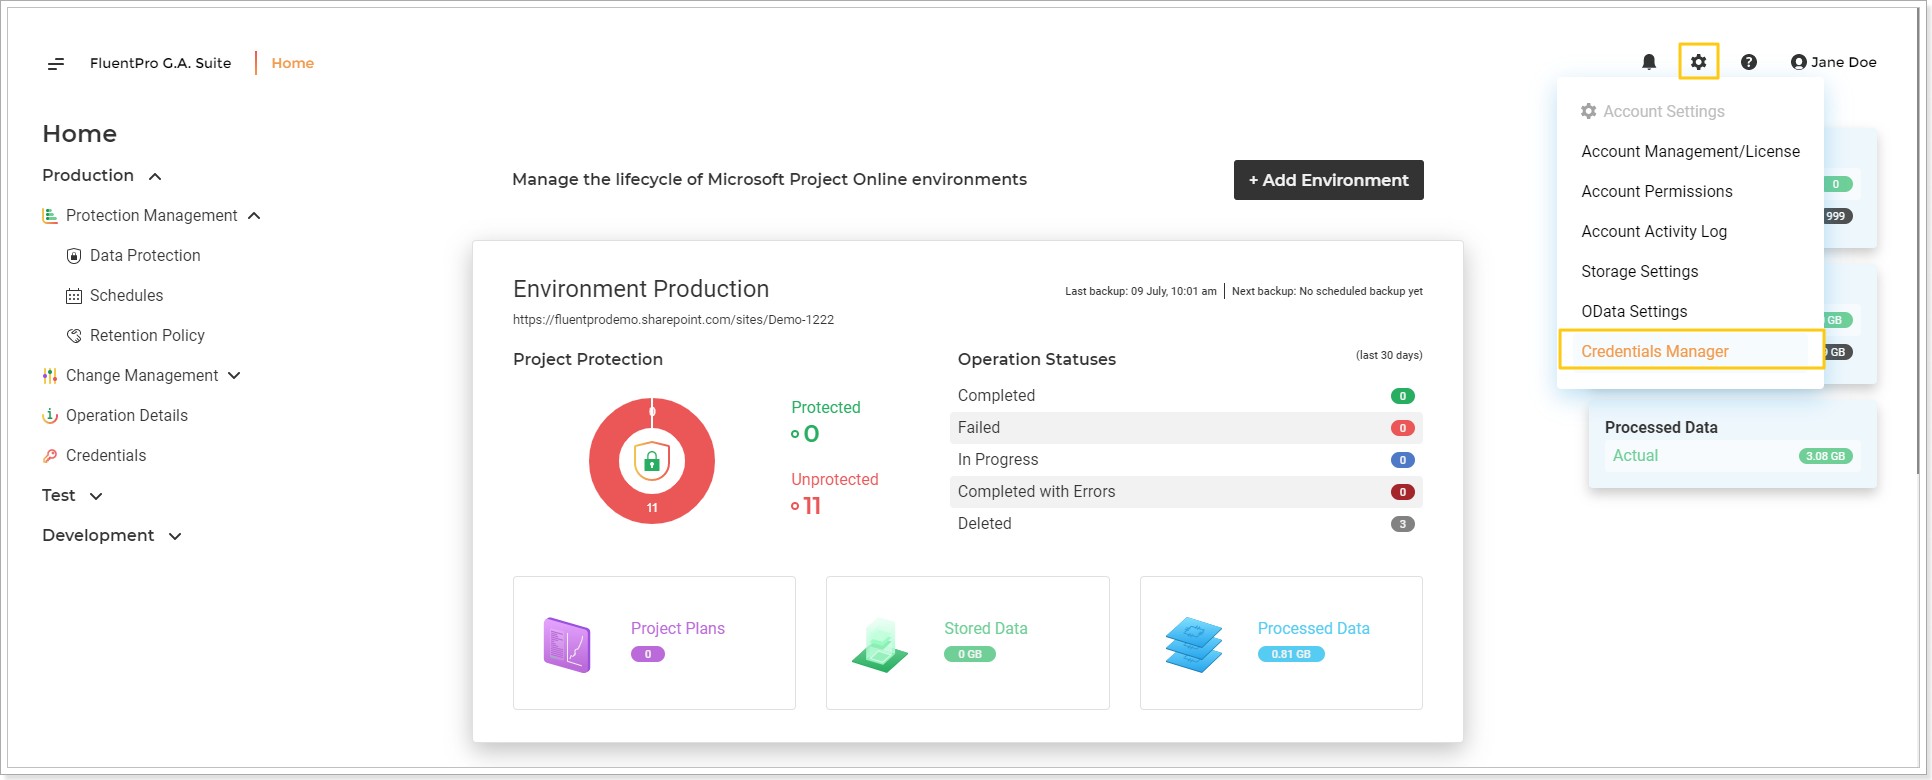
To access the Credentials Manager page, click the Gear button on the Home page and select Credentials Manager from the drop-down menu.
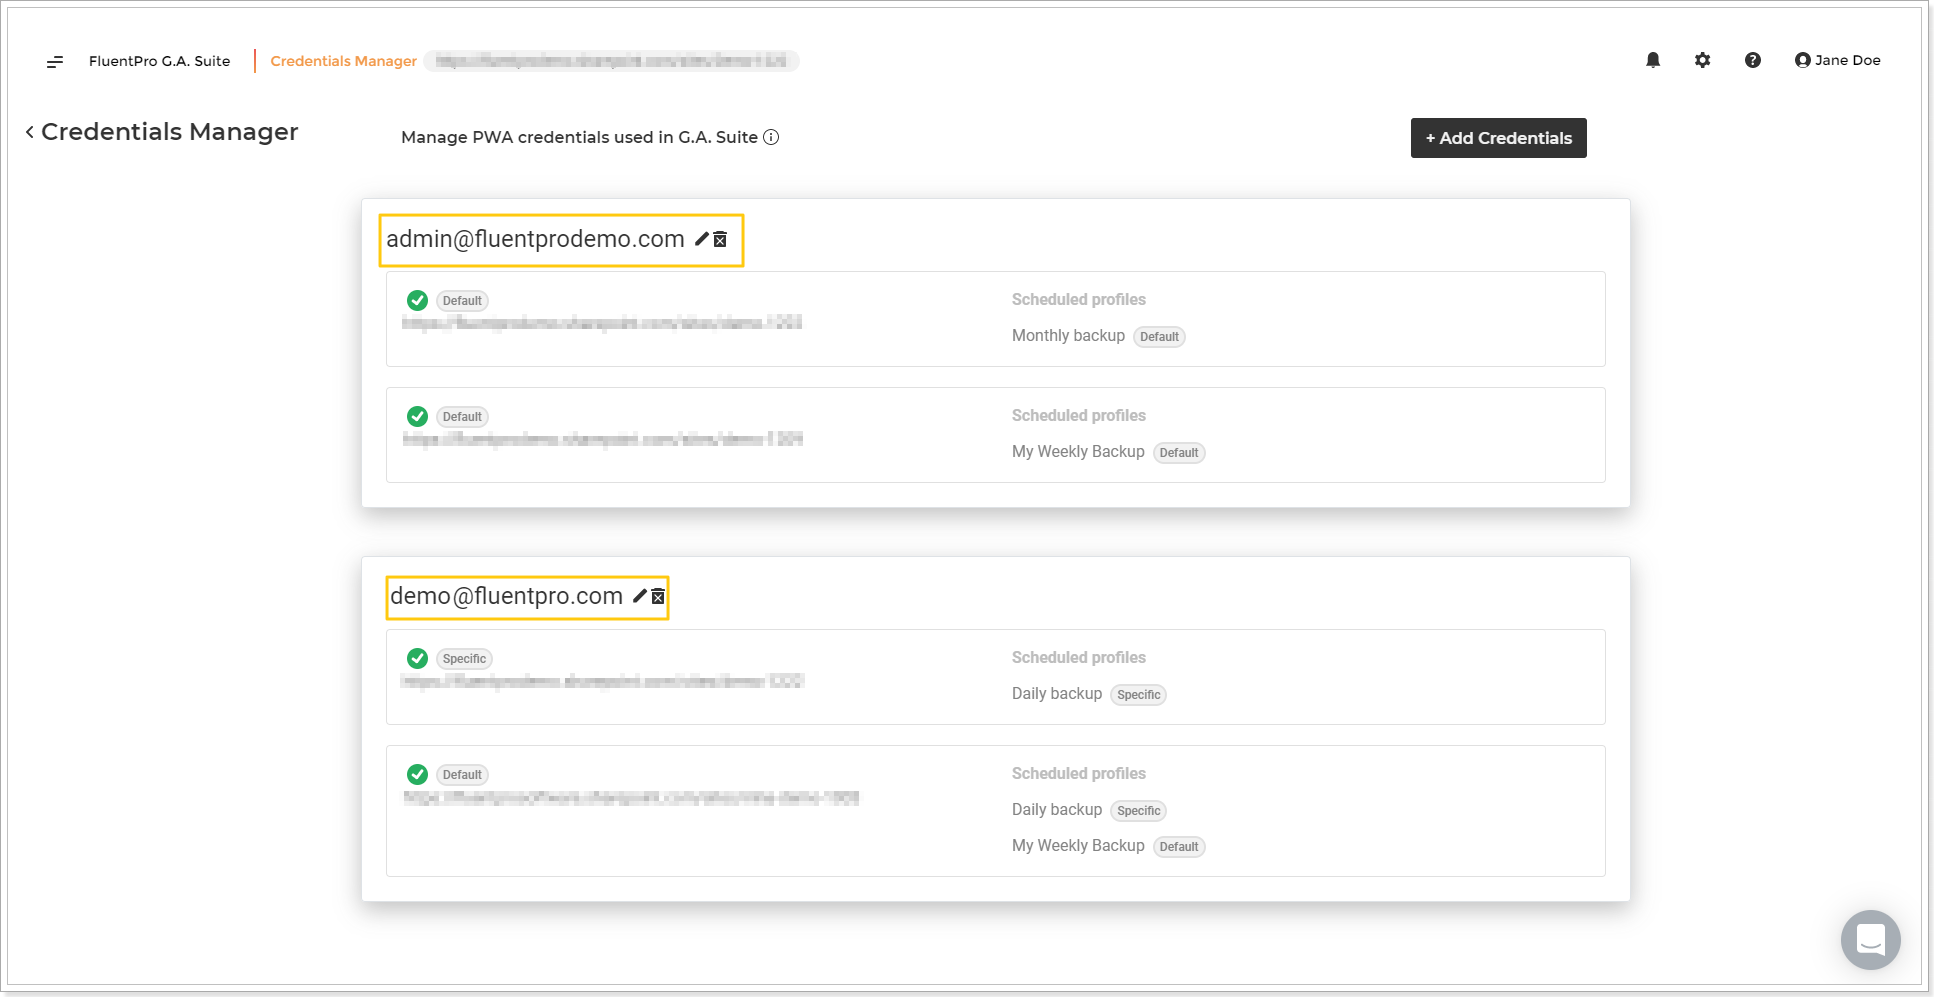
On the opened page, you will find a list of accounts used for connection to your environments. The list of environment URLs will be displayed beneath each account with information if the account is used as a default connection or is specific for an environment.
The account provided while adding environments to G.A. Suite is always set as Default. The accounts provided in the Specific Credentials section are set as Specific.
Please note: We strongly suggest setting credentials created specifically for Backup for Project Online to avoid these accounts being used simultaneously on the PWA while the backup is running.
Please note: The specified user account should have a Project Web App license and should be assigned to the PWA Administrators security group and Site Collection Administrators group on the PWA.
Please note: Several accounts can be used as the default for one PWA. Also, one account can be used as the default for different PWAs.
Also, there is a list of the Scheduling profiles where this account is used as Default or Specific (provided in the specific credentials section). By clicking on the scheduling profile name, you can open it for editing.
You can refresh, edit the account, set it as default (or remove the account from the defaults) for the required PWAs on the Credentials Manager page. For this purpose, perform the following:
1. Click on the pencil-like button next to the required account to open it for editing.
2. In the Edit Credentials window, edit the account and/or select the PWAs for which you would like to use this account as default by checking their checkboxes.
3. Click the Validate and Save button.

The account will be validated, and the changes will be saved and applied immediately.
Add Credentials
You can add credentials to G.A. Suite directly from the Credentials Manager page. For this purpose, perform the following:
1. Open the Credentials Manager page. Click the Add Credentials button.

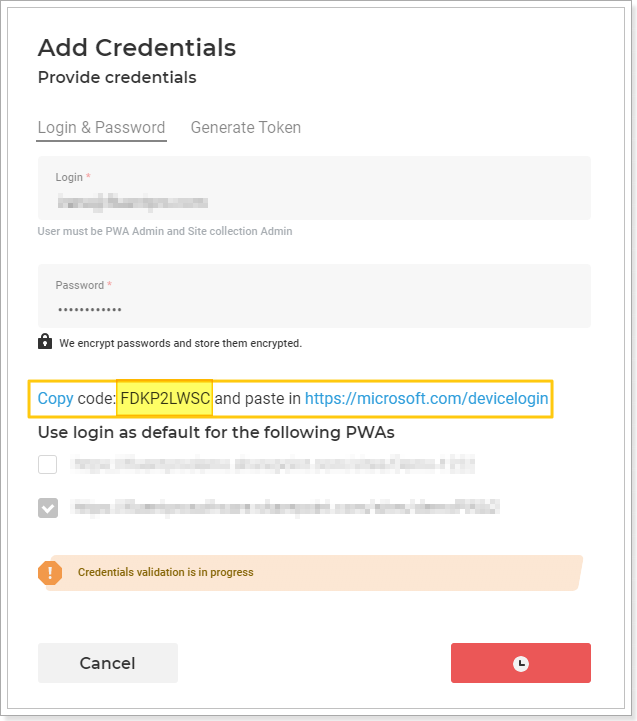
2. Type in your login and password.
3. Select the PWAs where this account will be used as default.
4. Click the Validate and Save button.

The credentials will be validated and saved.
Multi-factor authentication is also supported. If the Code appears after you click Validate and Save, copy this Code and follow the link next to it. Please refer to this Multi-factor authentication article for more details.
Generate Token
Please note: It is possible to Generate Token that will be used instead of your password to log in to the PWA while performing G.A. Suite operations. A token can be generated either while adding a new account to G.A. Suite or while editing the existing account.
If you cannot log in to the PWA via G.A. Suite UI, this may be caused by your organization's security and conditional access policies blocking unknown clients or unknown IP addresses, etc. You can now generate an access token on your local machine and just paste it to the G.A. Suite 'Token' field.
To generate a token, perform the following:
1. Click the pencil-like button next to the required account to open it for editing.
2. Select the Generate Token option.
3. Download the .exe file or .ps1 file to generate the token (using one of these files).
Please note: If the .ps1 file is used to generate the token, it is needed to install the Azure AD module:
Install-Module AzureAD -RequiredVersion 2.0.2.140
(https://learn.microsoft.com/en-us/powershell/azure/active-directory/install-adv2?view=azureadps-2.0).
If you have the AllSigned policy in PowerShell, the following warning will appear when the token generator script is launched.

Follow the steps in the downloaded file to generate a token, copy it, and paste to the G.A. Suite, Edit Credentials window.
4. Click the Validate and Save button. The token will be used to connect to your PWA while performing G.A. Suite operations.

Please note: You can use only one authentication method for each account: login, password, or token. If you have already added an account using the login and password method and then need to add a PWA using the same account with a token, it is required to open the Credentials Manager page first and edit an account, selecting the Generate Token option instead of login and password.