This article describes how to use the G.A. Suite Copying module to copy the configuration from one PWA to another.
1. On the G.A. Suite Home Page, click on the environment you want to use as a source of PWA Configuration copy. Click Change Management and select the Copy option.
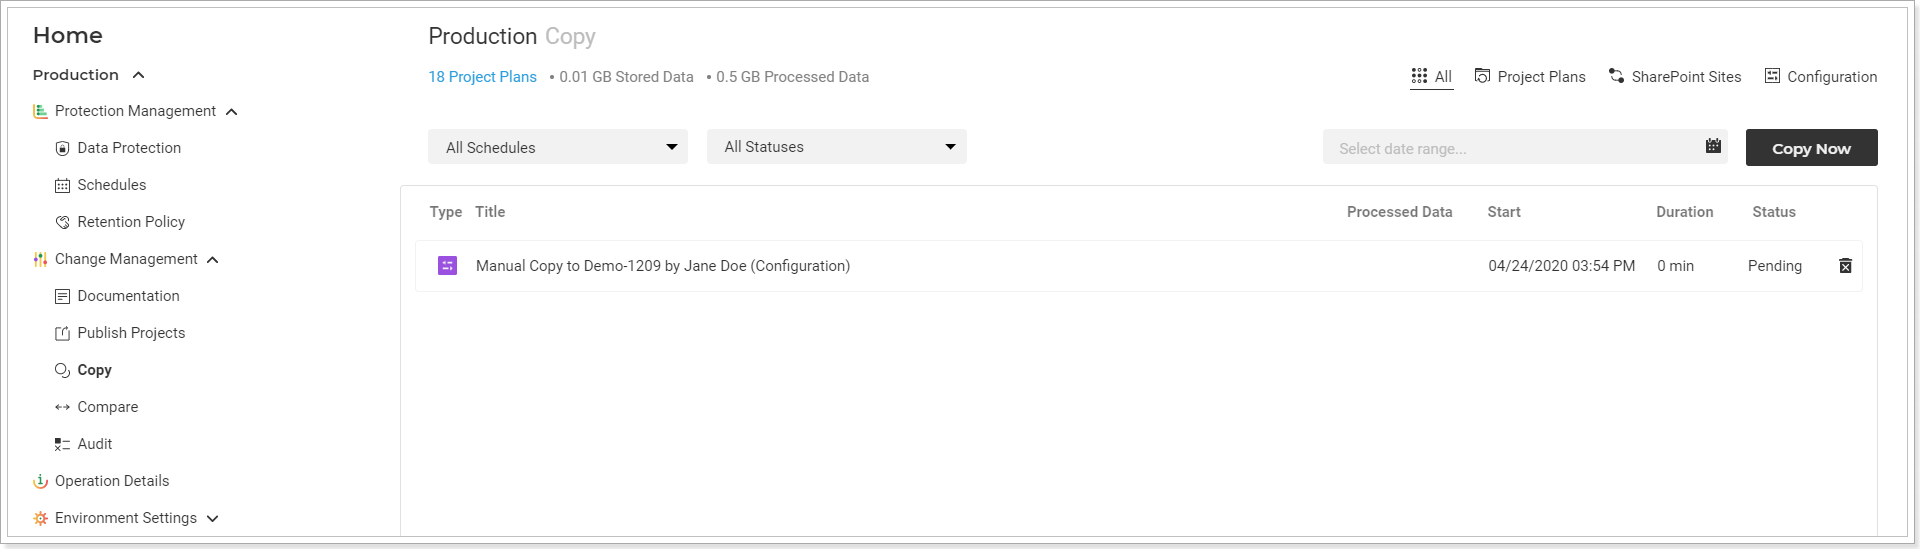
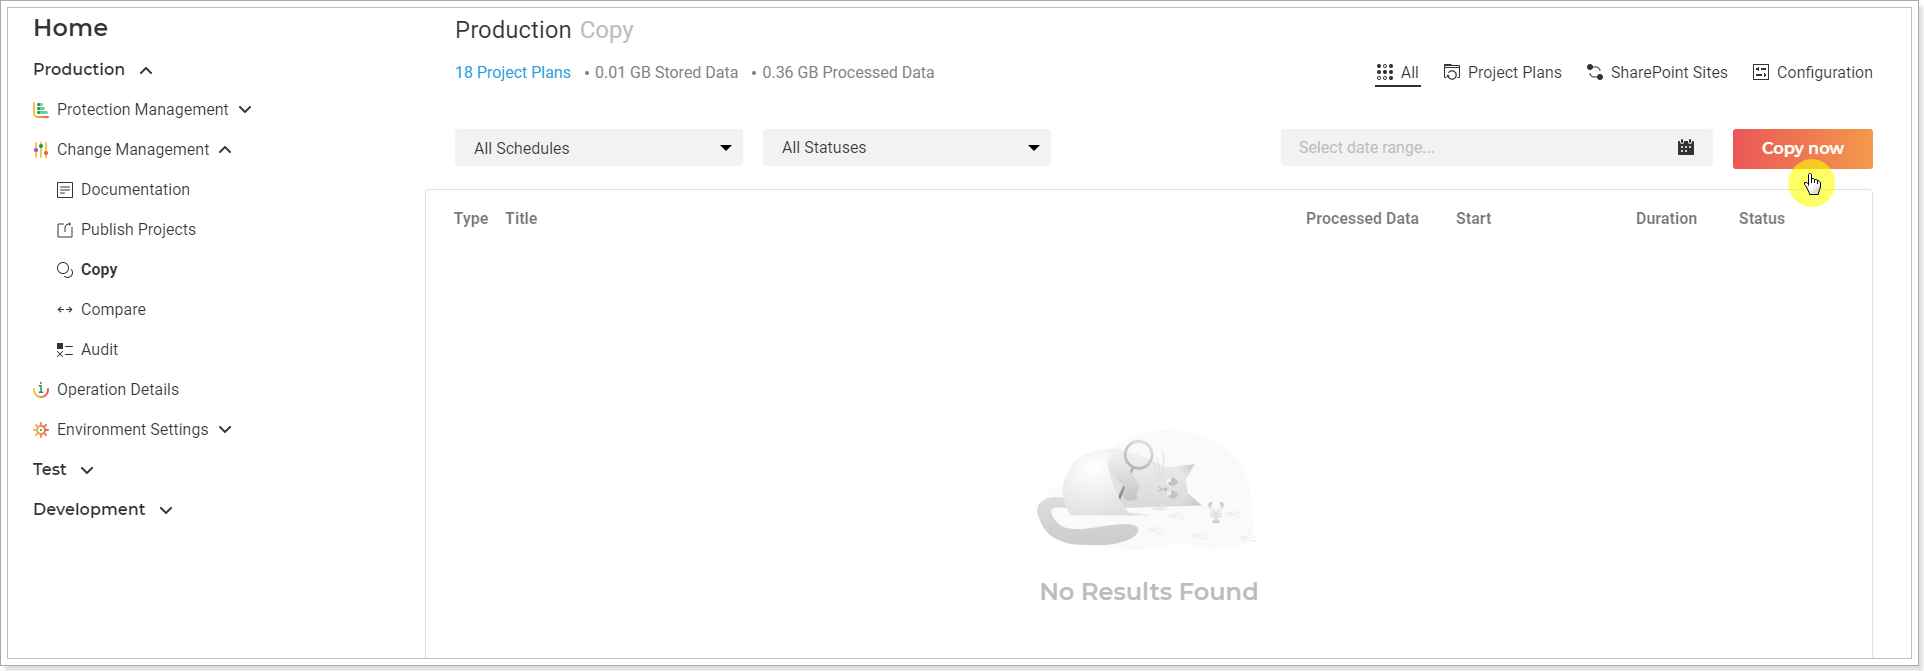
2. The Copy page will be opened. This page includes the list of all copying operations launched for the selected environment if any. You can use views and filters to sort the copying operation on the page and find the required operation if needed.
To launch the copying process, click on the Copy now option.
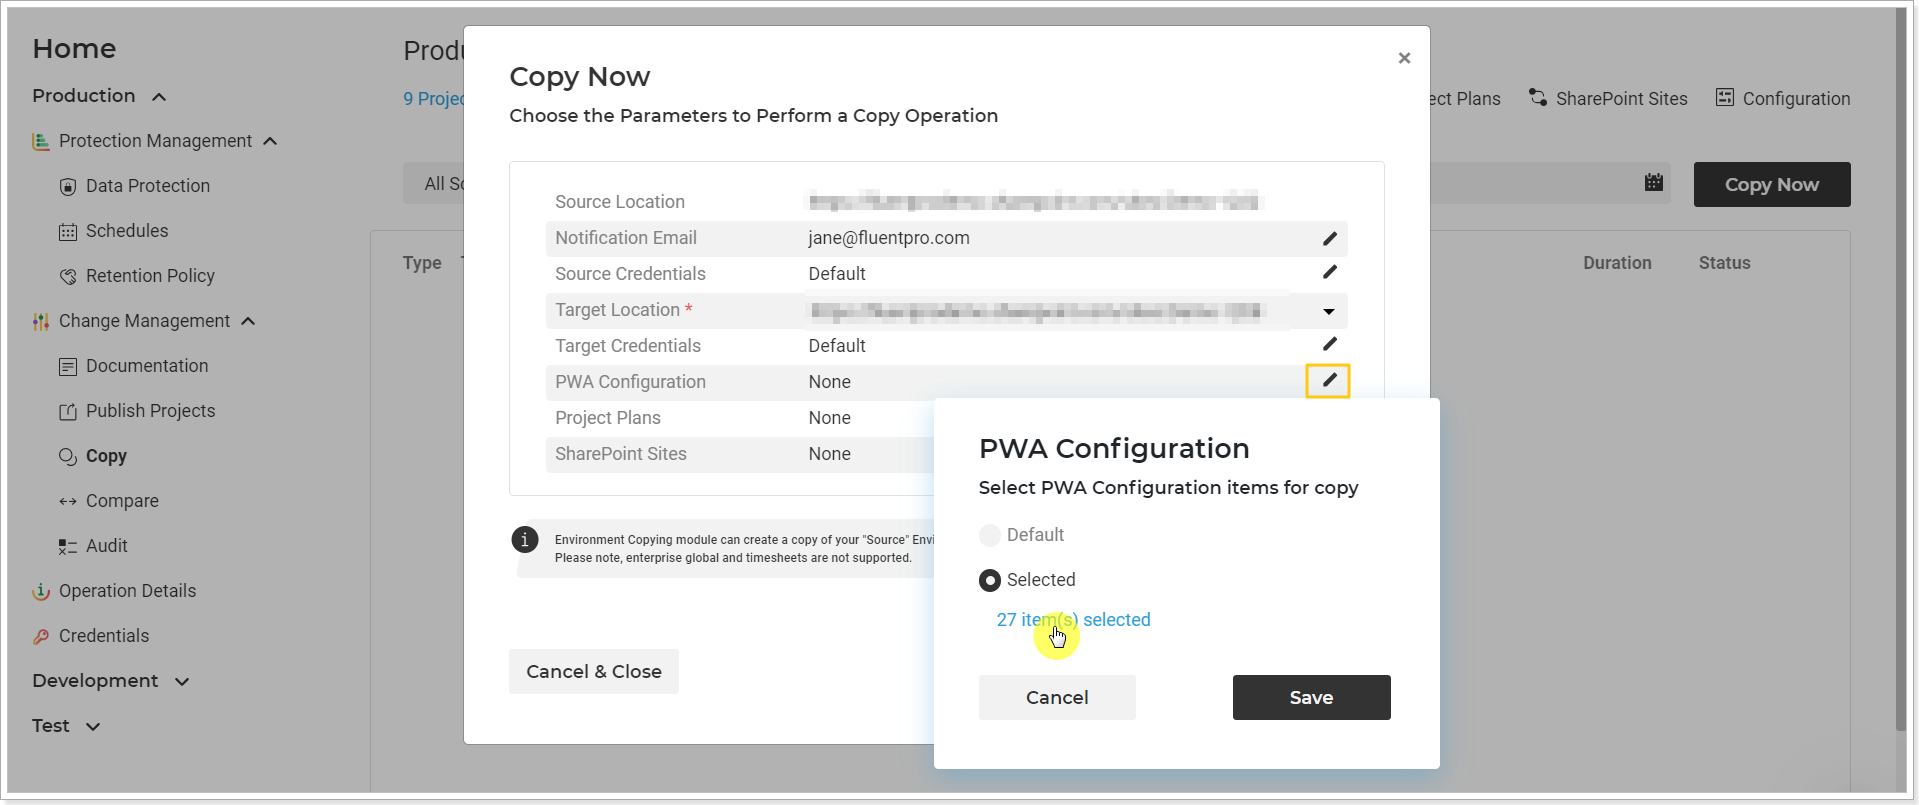
Copy Now window will be opened. Review and edit the required information here by clicking on the pencil-like button next to each section.
- Source location - check that the source PWA URL is correct.
- Notification Email - specify the email, where the notification will be sent on completion.
-
Source credentials - Provide specific credentials, if needed, and validate them. Multi-factor Authentication for Office 365 users is also available. For more details, refer to this article.
Please note: By default, G.A. Suite uses the credentials provided when adding PWA to G.A. Suite. These credentials are stored and may be found on the Credentials Manager or Credentials page. If you would like G.A. Suite to use a different set of credentials, use this option.
You can add multiple credentials to perform the operation and add more accounts to the accounts list.
In case of any issues with an account (permissions or access lost; password expired) during G.A. Suite operation processing, another one will be used to complete the operation. Also, using the Multiple credentials option makes G.A. Suite performance faster. -
Target location - the PWA configuration will be copied to the selected PWA.
Please note: The required PWA should be added to your G.A. Suite tenant and licensed. - Target credentials - provide target-specific credentials if you need to use different credentials from the ones provided in the Environment Settings.
- PWA Configuration - click on the pencil-like button to select the configuration you need to upload to the target PWA now.
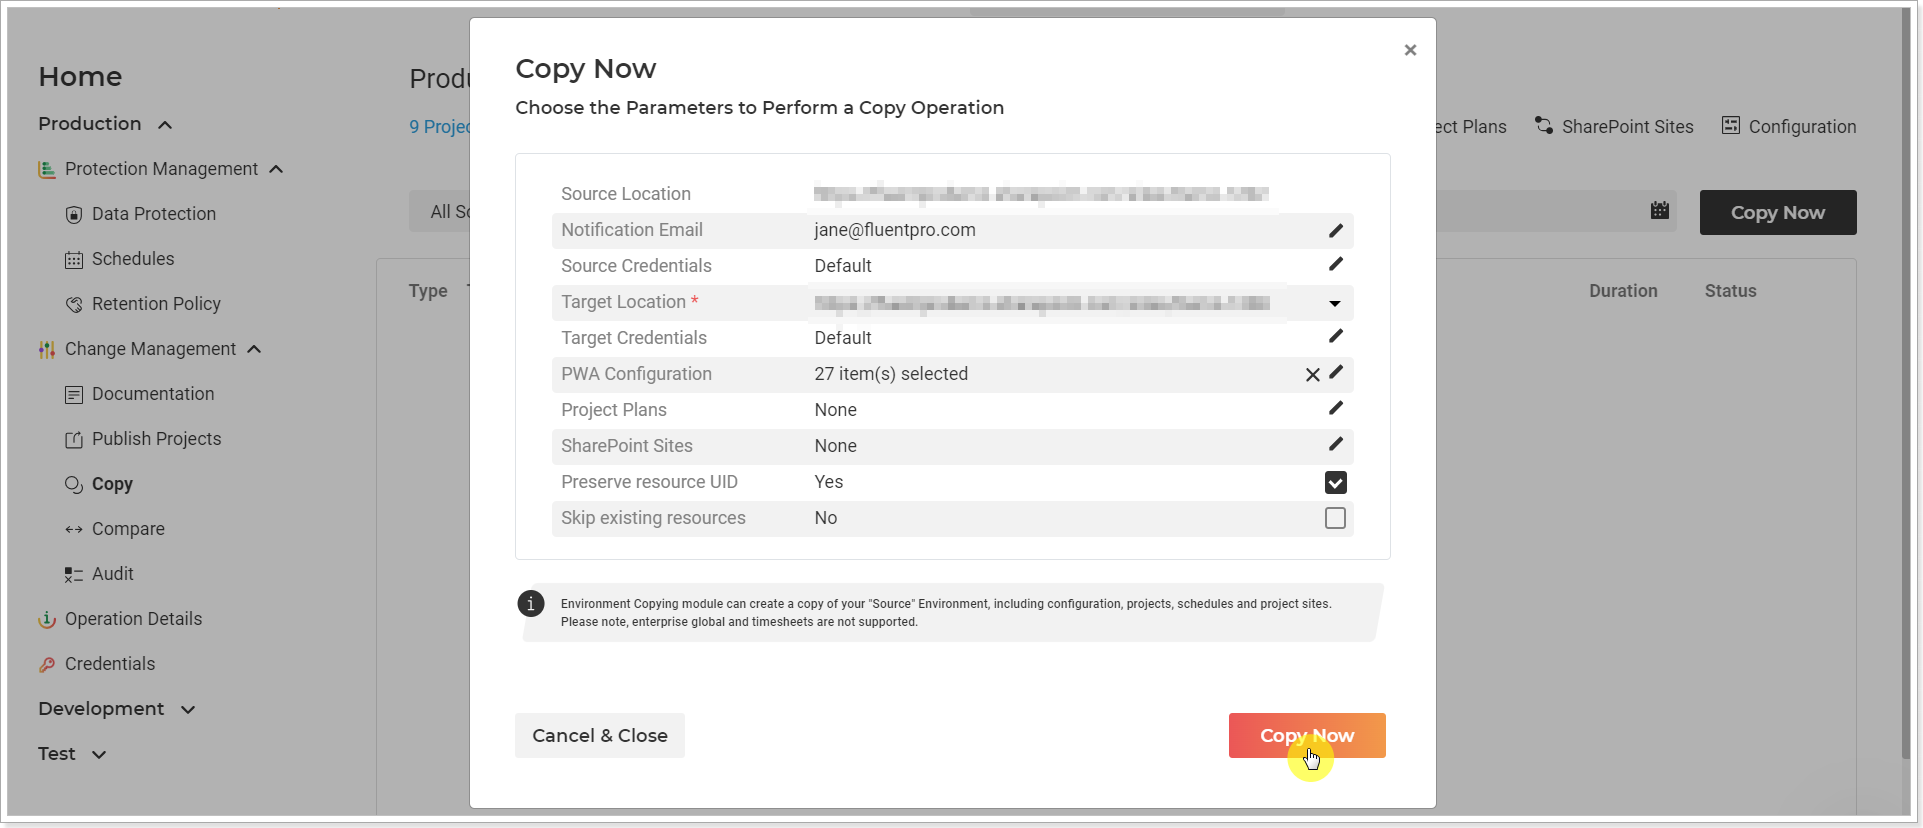
- Preserve Resource UID - With this option turned OFF, Resource UIDs will not be preserved, Resources will be created with new UIDs (this option becomes visible as soon as resources are selected).
- Skip existing resources - With this option turned ON, resources that already exist both on the source and on the target PWAs will be skipped. G.A. Suite will copy over only those resources that exist on the source PWA but do not exist on the target (this option becomes visible as soon as resources are selected).
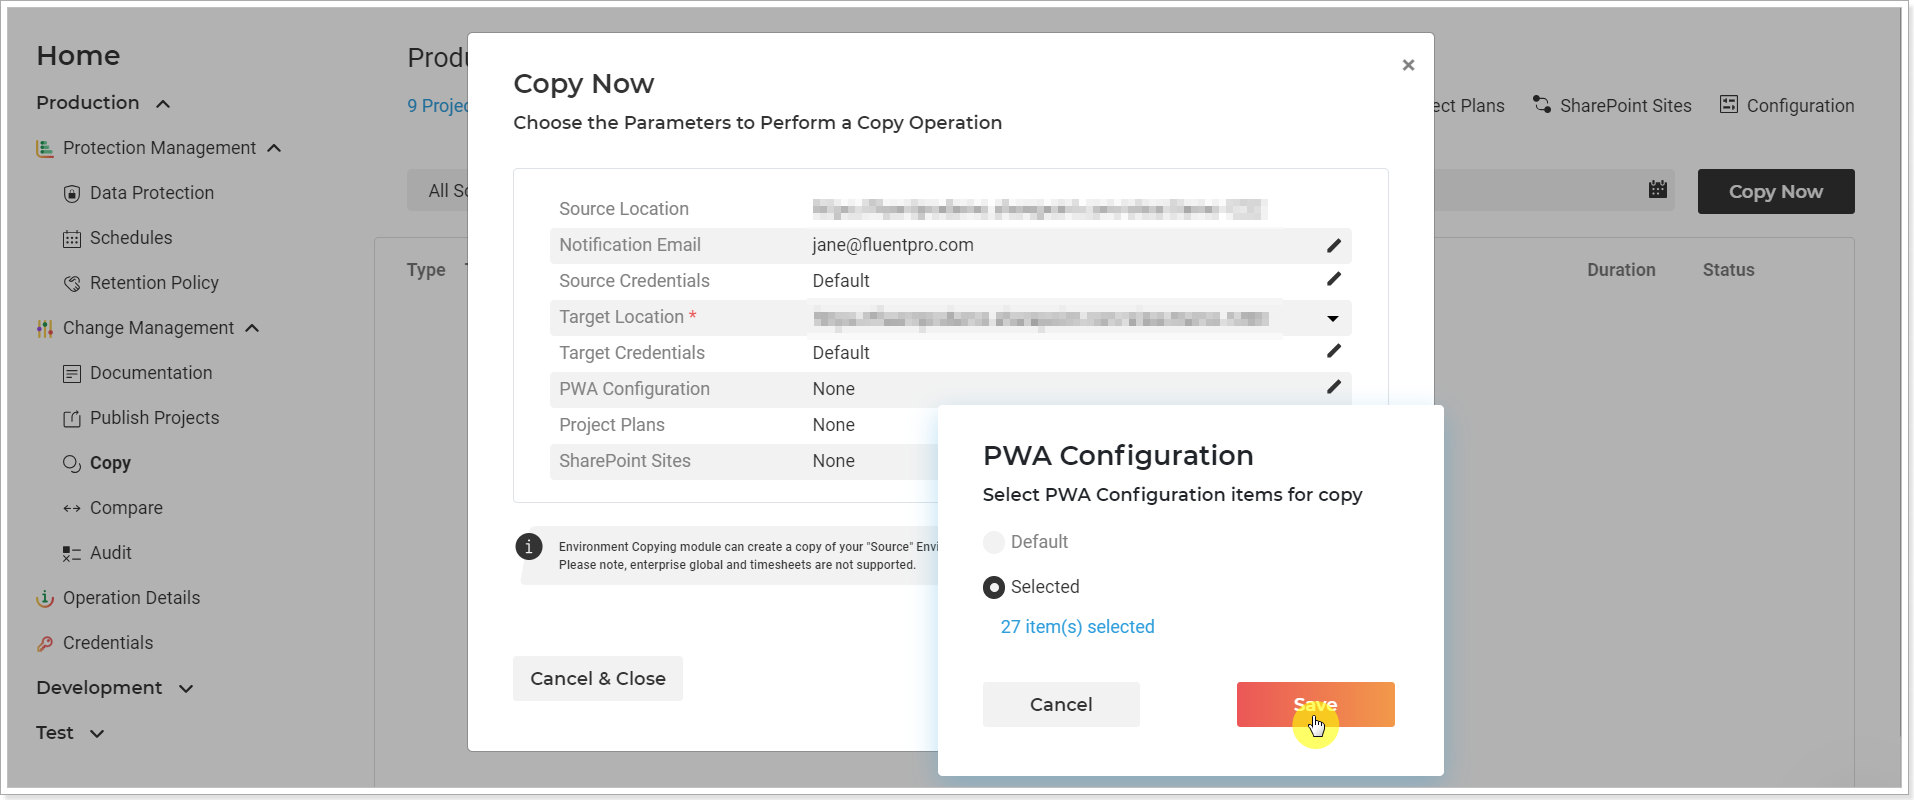
If you need to select the default set of configuration for copying, select the Default option and click the Save button.
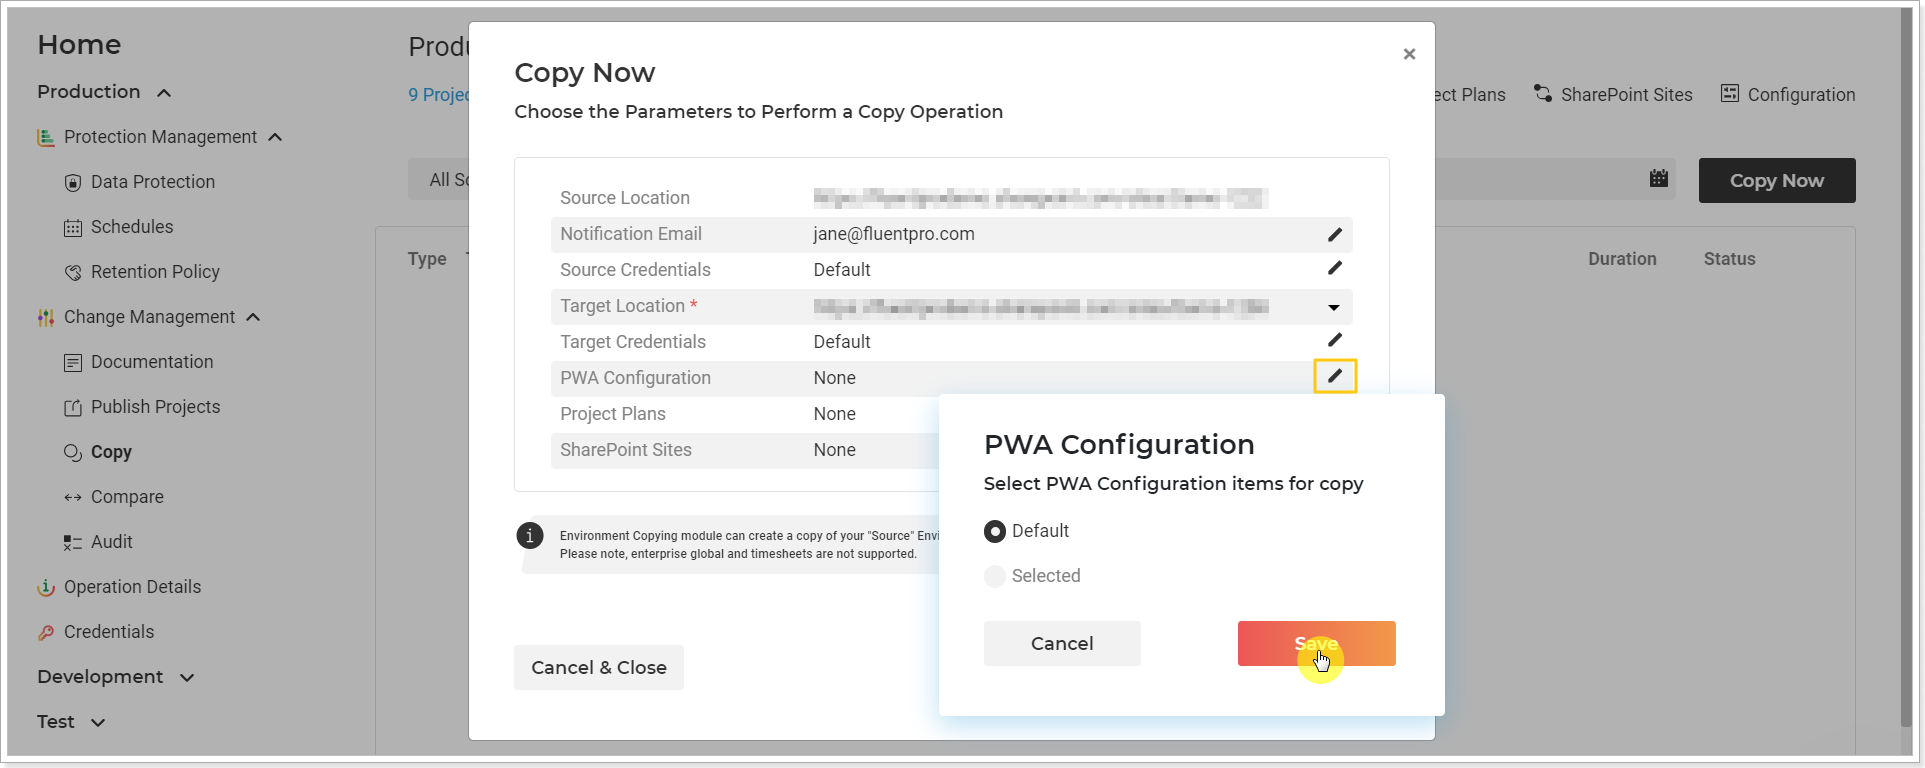
If you need to select the specific elements for copying, click the Selected option and click on the number link below.
3. In the Selected Entities window check the check-boxes of the required items. Click OK to confirm the selection.
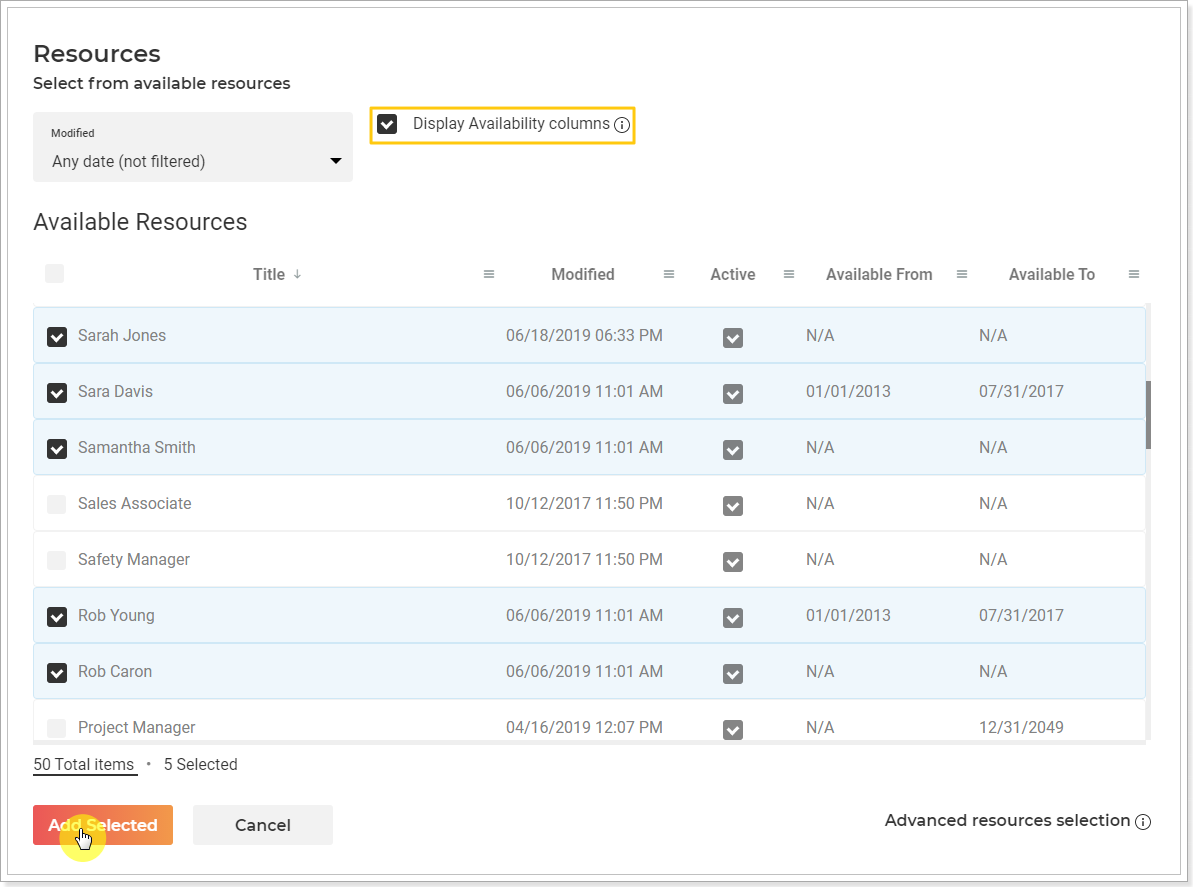
Please note: G.A. Suite allows selecting what resources exactly you would like to migrate to the target PWA. To select the required Resources, click on the 'All' button next to Resources.

Allow a few minutes for the Resources to be loaded to the Resources window.
4. As the Resources list is loaded, select the Resources you would like to include in this operation. The 'Modified' drop-down Resources list can be filtered by modified date.
You can use additional columns (Availability, Status, Modified) to make the resource selection faster and easier. Modified and Status columns are available by default, if you need to include Availability, check the 'Display Availability columns' checkbox first. Allow some time for the information to load.
Click 'Add Selected' to confirm the selection.
5. Click OK to confirm the selection of PWA Configuration elements and click Save to save the selection and proceed.
- Project Plans and SharePoint sites - if you would also like to have the Project Plans and SharePoint Content copied, please select the content here as well by clicking on the pencil-like button.
6. Click the Copy Now button to launch the copying process.
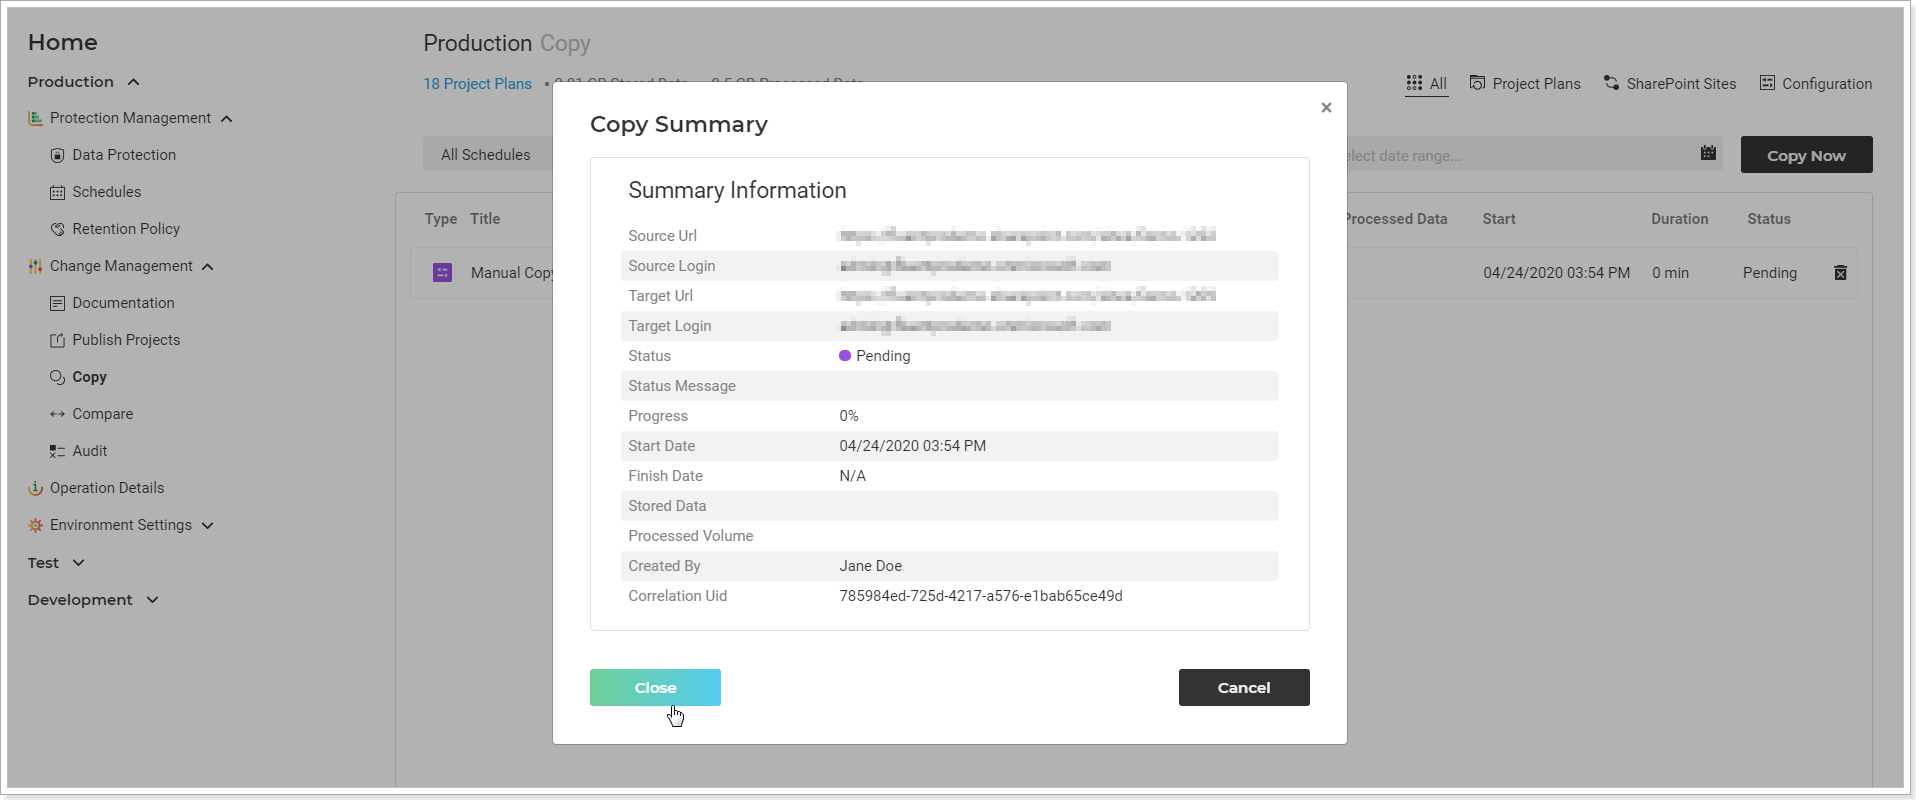
Copy Summary window will be opened where you can review the information for the launched operation. You can Cancel and Pause the operation if required.
7. Click Close to return to the Copy page.
The operation will appear on the Copy page at once and you can track progress here.